Driftwood Dune Textured Throw Pillow Free Knitting Pattern
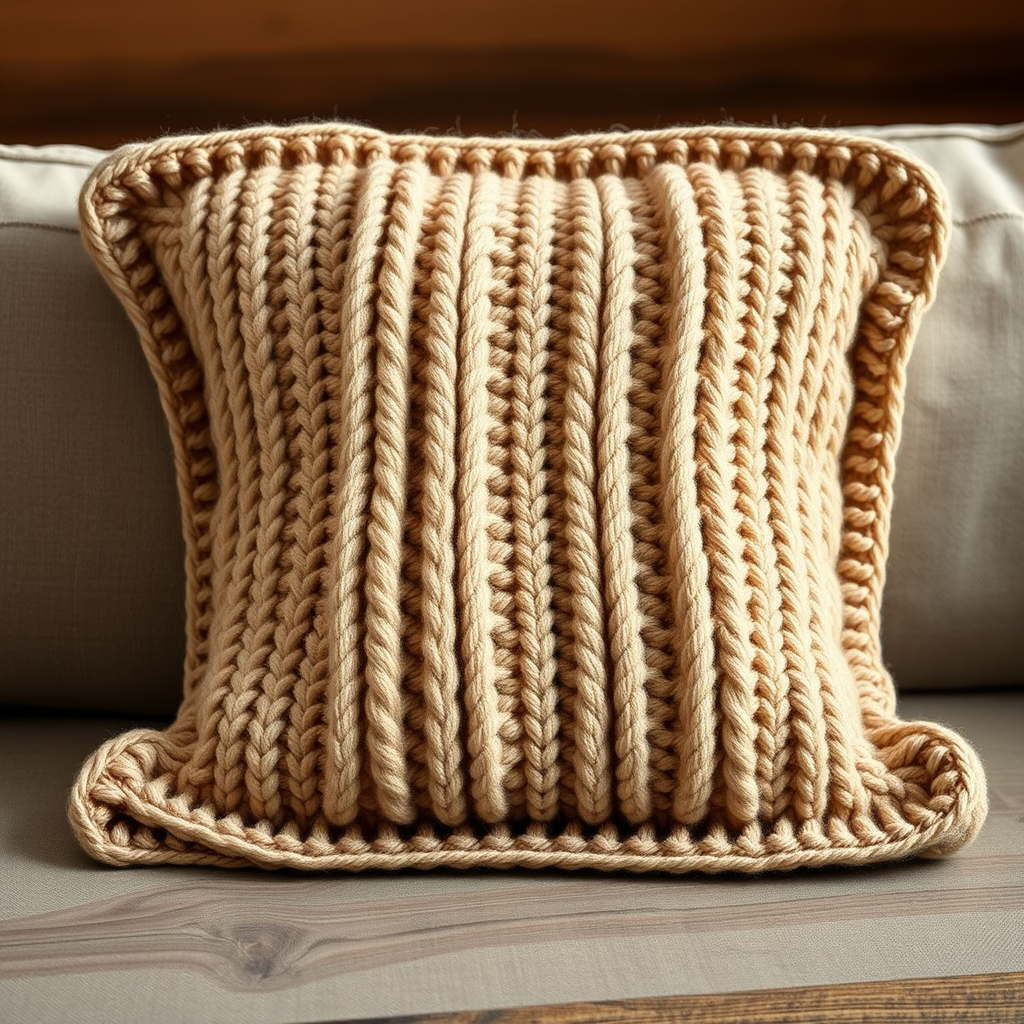
Bring Coastal Calm Indoors: The Driftwood Dune Textured Throw Pillow
Imagine sinking into your sofa after a long day, resting against a pillow that feels as soothing as a walk on the beach. The Driftwood Dune Textured Throw Pillow captures that exact serenity. This chunky, tactile knit combines elegant cables with the classic nubby texture of seed stitch, creating a sculptural surface that adds depth and warmth to any modern or coastal living space. The warm oatmeal color and super bulky yarn make this project not only beautiful but also incredibly quick to knit. Best of all, this is a free knitting pattern designed to be approachable for confident beginners ready to tackle their first cable. Let's dive in and create a stunning handmade accent piece that will be the talk of your home.
Materials Needed: Your Knitting Toolkit
Before you cast on, gather these simple supplies. The beauty of this pattern lies in its minimal requirements—just a few tools and three skeins of luscious, chunky yarn.
- Yarn: Super bulky weight yarn (approx. 200 yds per 100g) in a warm oatmeal or sand color. You will need 3 skeins. Look for a plied yarn to ensure crisp cable definition.
- Knitting Needles: US 13 (9 mm) straight or circular needles (for flat knitting).
- Cable Needle: A small, U-shaped or straight cable needle to hold stitches.
- Tapestry Needle: For seaming the panels and weaving in ends.
- Pillow Form: One 18-inch square pillow insert.
- Stitch Markers (optional): To help track the cable pattern repeats.
Gauge: 8 stitches and 10 rows = 4 inches in stockinette stitch. Always knit a swatch to ensure your pillow is the correct size.
Step-by-Step Instructions: Knitting Your Driftwood Dune Pillow
This pattern is worked flat in two identical panels, then seamed together. Each panel measures approximately 18 inches square. We'll break this down into three phases: the ribbed base, the textured cable body, and the finishing ribbing.
Panel (Make 2)
Phase 1: Ribbed Foundation
This creates a sturdy, neat border for the bottom of your pillow.
Cast on 36 stitches.
Row 1 (Right Side): K2, *P2, K2; repeat from * to end of row.
Row 2 (Wrong Side): P2, *K2, P2; repeat from * to end of row.
Repeat Rows 1 and 2 until the piece measures 4 inches from the cast-on edge. Ensure you end having just completed a Wrong Side row.
Phase 2: Cable & Seed Stitch Pattern
This is where the magic happens! The pattern uses a 8-row repeat. The seed stitch sections (alternating knits and purls) create a beautiful, bumpy texture that contrasts perfectly with the smooth, braided cables.
Row 1 (RS): K2, P2, K2, P2, C4F (Slip 2 stitches to cable needle, hold to FRONT, knit next 2 stitches, then knit the 2 stitches from the cable needle), P2, K2, P2, K2, P2, C4F, P2, K2, P2, K2.
Note: You are creating two cables, each over 4 stitches, separated by purl stitches.
Row 2 (WS): P2, K2, P2, K2, P4, K2, P2, K2, P2, K2, P4, K2, P2, K2, P2.
This row establishes the purl background for the cables.
Row 3 (RS): K2, P2, K2, P2, K4, P2, K2, P2, K2, P2, K4, P2, K2, P2, K2.
Simply knit the 4 cable stitches to let them rest and twist.
Row 4 (WS): P2, K2, P2, K2, P4, K2, P2, K2, P2, K2, P4, K2, P2, K2, P2.
Row 5 (RS): K2, P2, K2, P2, K4, P2, K2, P2, K2, P2, K4, P2, K2, P2, K2.
Row 6 (WS): P2, K2, P2, K2, P4, K2, P2, K2, P2, K2, P4, K2, P2, K2, P2.
Row 7 (RS): K2, P2, K2, P2, C4B (Slip 2 stitches to cable needle, hold to BACK, knit next 2 stitches, then knit the 2 stitches from the cable needle), P2, K2, P2, K2, P2, C4B, P2, K2, P2, K2.
This row twists the cables in the opposite direction, creating the classic braided effect.
Row 8 (WS): P2, K2, P2, K2, P4, K2, P2, K2, P2, K2, P4, K2, P2, K2, P2.
Repeat Rows 1 through 8 until the piece measures 14 inches from the cast-on edge. Ensure you end having just completed a Wrong Side row (Row 2, 4, 6, or 8).
Phase 3: Finishing Ribbing & Bind Off
This top border mirrors the bottom, giving your pillow a polished, symmetrical look.
Row 1 (RS): K2, *P2, K2; repeat from * to end.
Row 2 (WS): P2, *K2, P2; repeat from * to end.
Repeat these two rows until the entire panel measures 18 inches from the cast-on edge. Bind off all stitches loosely in pattern (knit the knits and purl the purls as you bind off) to maintain the stretch of the ribbing.
Assembly: Seaming Your Pillow
Now for the final step—bringing your two beautiful panels together.
- Blocking (Optional but Recommended): Lightly steam or wet block your panels to even out the stitches and relax the cables. Let them dry completely flat.
- Seaming: Place the two panels with Right Sides Together. Using your tapestry needle and a length of yarn, sew three sides together using a mattress stitch for an invisible seam, or a simple whip stitch for a more rustic look. Be sure to match the ribbing and cable rows carefully.
- Insert Pillow Form: Turn the pillow cover right side out. Gently insert your 18-inch square pillow form, pushing it into the corners.
- Close the Opening: Sew the fourth side closed using the same seaming technique. Weave in all loose ends securely with your tapestry needle.
And there you have it—a stunning, handcrafted Driftwood Dune Textured Throw Pillow! Place it on your sofa, armchair, or bed, and enjoy the cozy, coastal texture you created with your own hands. This pattern is perfect for gifting, and once you master the C4F and C4B cables, you'll be ready to tackle even more intricate cable projects. Happy knitting!


