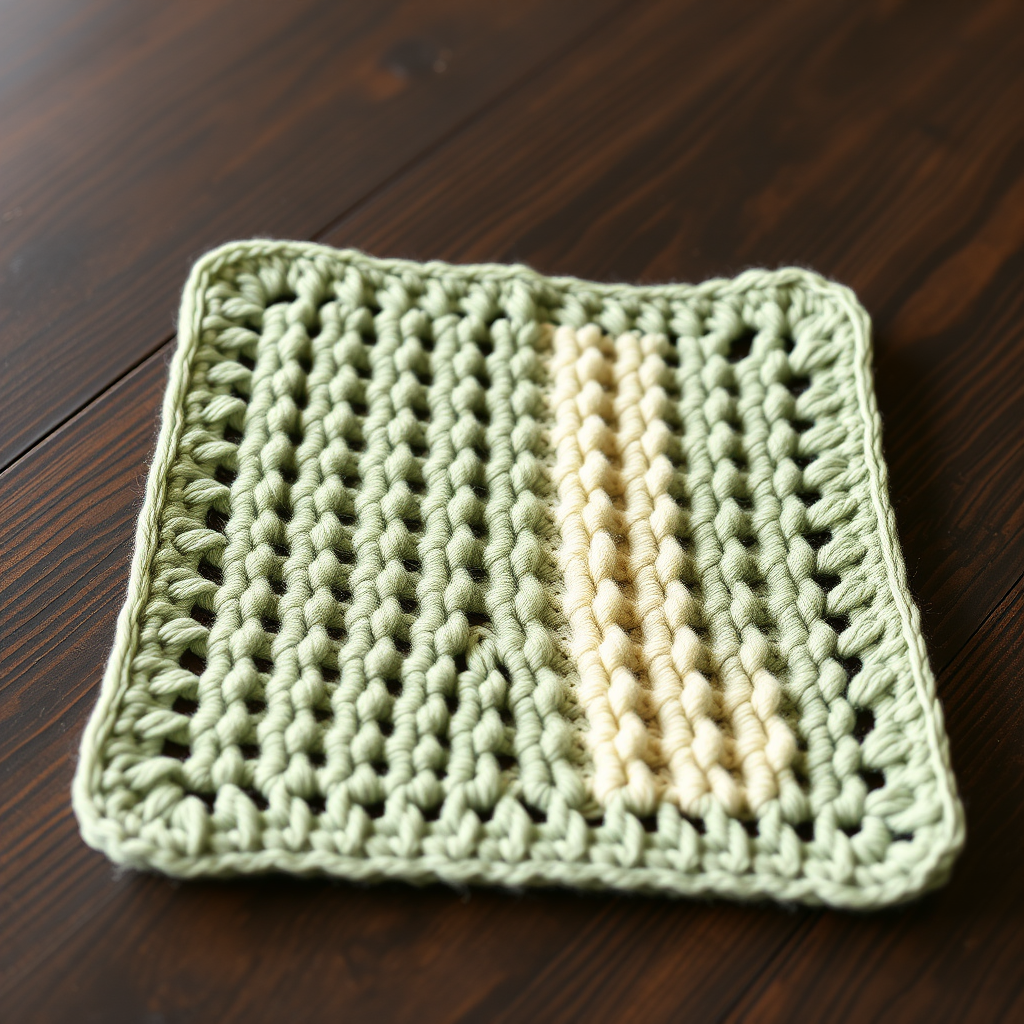
Ember & Ash Thermal Scrubby Set Free Pattern – Textured Crochet Dishcloths with Honeycomb Ridges

Ember & Ash Thermal Scrubby Set: A Beginner-Friendly Crochet Kitchen Pattern
Transform your kitchen sink into a spa-like sanctuary with these thick, textured crochet scrubbies that feature a stunning honeycomb thermal stitch. This free pattern creates a dual-sided scrubby with a soft cotton face for gentle wiping and a bumpy, textured side that tackles stuck-on grime without scratching your cookware. The warm "Ember" (burnt orange) and cool "Ash" (warm gray) color combination adds a rustic, handmade charm to any kitchen. Best of all, this pattern is perfect for beginners—it uses only single crochet and a simple repeating stitch that creates a beautifully thick, squishy fabric.
Whether you're looking for a quick weekend project, a thoughtful handmade gift, or a sustainable alternative to plastic sponges, this thermal scrubby set delivers both form and function. Let's dive into everything you need to create your own set at home.
Materials Needed
Before you begin, gather the following supplies. All items are readily available at craft stores or online.
- Yarn: Lily Sugar'n Cream 100% Cotton Worsted Weight (4) in 2 colors: 'Ember' (burnt orange) and 'Ash' (warm gray) – approximately 50 yards of each color. (Any 100% cotton worsted weight yarn will work; cotton is essential for absorbency and durability.)
- Crochet Hook: Size G/6 (4.25 mm) crochet hook. (Adjust hook size if needed to achieve gauge.)
- Other Tools: Yarn needle for weaving in ends, scissors, and a steam iron or spray bottle for blocking (optional but recommended).
Gauge: 4 sc x 4 rows = 1 inch in thermal stitch (after light steaming, not stretching). Gauge is important for achieving the correct finished size, but since this is a dishcloth, slight variations are acceptable.
Step-by-Step Instructions
Follow these detailed instructions carefully, and you'll have a beautiful, functional scrubby in no time. The pattern is worked in rows, then finished with a simple border.
Finished Size & Abbreviations
Finished Size: Approximately 6 inches square. (You can adjust the size by adding or subtracting multiples of 2 to your starting chain.)
Abbreviations:
- ch = chain
- sc = single crochet
- sl st = slip stitch
- st(s) = stitch(es)
- RS = right side
- WS = wrong side
Special Stitch – Thermal Stitch (Worked in Rows)
This pattern uses a special "thermal stitch" that creates a double-thick, honeycomb-like texture. It's easier than it looks! Here's how it works:
Row 1 (RS): sc in 2nd ch from hook and in each ch across. Turn.
Row 2 (WS): ch 1, sc in first st, *working in the BACK LOOP ONLY of the next st, insert hook into the FRONT LOOP of the SAME st one row below (the loop that is directly behind the current st), yarn over and pull up a loop, yarn over and pull through both loops on hook (this creates a double-thick sc). Repeat from * across, ending with sc in last st. Turn.
Row 3 (RS): ch 1, sc in first st, *working in the BACK LOOP ONLY of the next st, insert hook into the FRONT LOOP of the SAME st one row below, yarn over and pull up a loop, yarn over and pull through both loops. Repeat from * across, ending with sc in last st. Turn.
Note: For all subsequent rows, you will repeat Row 3. The key is to always insert your hook into the back loop of the current stitch AND the front loop of the stitch directly below it. This creates the thick, ridged fabric.
Pattern Instructions
Now that you understand the thermal stitch, let's put it all together. We'll work in three color sections: Ember, Ash, then Ember again.
With Color A (Ember)
Step 1: Ch 24.
Step 2 (Row 1, RS): sc in 2nd ch from hook and in each ch across (23 sc). Turn.
Step 3 (Row 2, WS): Work thermal stitch across (23 sts). Turn.
Step 4 (Rows 3–10): Repeat Row 3 of thermal stitch for 7 more rows (so you complete a total of 10 rows with Color A). At the end of Row 10, fasten off Color A and weave in the ends securely.
With Color B (Ash)
Step 5: Attach Color B to the first st of the last row (RS facing). To attach, make a slip knot and place it on your hook, then insert your hook into the first stitch, yarn over, and pull through both the stitch and the loop on your hook (this counts as your first sc).
Step 6 (Rows 11–18): Work thermal stitch across (23 sts) for 8 rows total. At the end of Row 18, fasten off Color B and weave in ends.
With Color A (Ember) Again
Step 7: Attach Color A to the first st of the last row (RS facing), using the same method as Step 5.
Step 8 (Rows 19–26): Work thermal stitch across (23 sts) for 8 rows total. At the end of Row 26, do NOT fasten off – you will now create the border.
Border (Worked in the Round)
Step 9: Ch 1, then sc evenly around all four edges of the square. Here's how to distribute your stitches:
- Corners: Work 3 sc in each corner stitch to create a smooth, rounded turn.
- Side edges (left and right): Work 1 sc in each row-end. You should have approximately 26 sc per side (one for each row of the 26 total rows).
- Top and bottom edges: Work 1 sc in each stitch across (23 sc each).
Step 10: When you reach the starting point, join with a sl st to the first sc of the border. Fasten off and weave in all remaining ends.
Finishing & Care Instructions
Step 11: Lightly steam block the scrubby. To do this, hold a steam iron about 1-2 inches above the fabric and steam it gently, or use a spray bottle to mist it with water and lay it flat to dry. Do NOT stretch the fabric—the thermal stitch is meant to be dense and squishy. Blocking simply evens out the stitches and gives the scrubby a professional finish.
Step 12: To use, hold the scrubby with the bumpy side facing the dish. The ridges provide gentle abrasion to lift stuck-on food, while the 100% cotton absorbs water and soap beautifully. After use, rinse thoroughly and hang to dry. These scrubbies are machine washable (cold, gentle cycle) and can be tumble dried low, though air drying extends their life.
Tips for Perfect Results
- Keep tension consistent: The thermal stitch is forgiving, but consistent tension will give you an even, professional-looking honeycomb texture.
- Count your stitches: Always end each row with 23 stitches. If you find yourself with 22 or 24, you've likely missed a back-loop/front-loop combination.
- Use cotton only: Acrylic yarn won't absorb water and can melt under high heat. Stick with 100% cotton for the best performance.
- Make it your own: Once you're comfortable with the pattern, experiment with different color combinations or add a hanging loop by chaining 10 and slip stitching it into a corner before fastening off.
This Ember & Ash Thermal Scrubby Set is a rewarding project that combines beauty with practicality. In just a few hours, you'll have a durable, eco-friendly alternative to disposable sponges—and you'll never look at your kitchen sink the same way again. Happy crocheting!