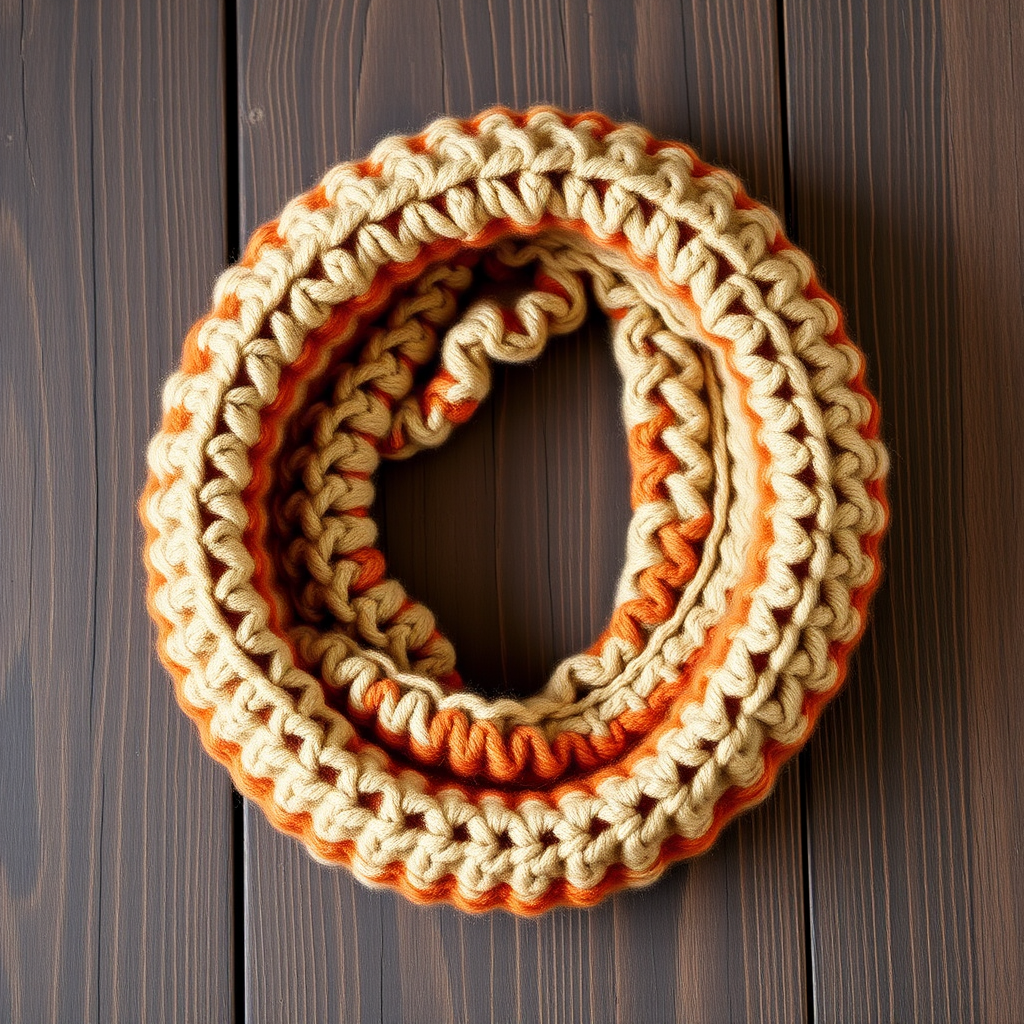
Emberwood Ridge Crochet Cowl Free Pattern – Chunky Textured Neck Warmer

Wrap Yourself in Rustic Warmth: The Emberwood Ridge Crochet Cowl
There are certain projects that feel like a warm hug the moment you begin stitching them. The Emberwood Ridge Crochet Cowl is exactly that—a chunky, textured neck warmer that combines the rustic charm of a cabin retreat with modern, sculptural design. This free pattern creates a dense, woven basketweave texture that looks far more complex than it actually is, making it the perfect weekend project for both confident beginners and seasoned crocheters looking for a quick, satisfying make.
Using super bulky yarn and a large hook, this cowl works up in just a few hours. The mesmerizing Woven Post Stitch creates diagonal ridges that stack beautifully, evoking the feeling of a cozy fireside on a chilly autumn evening. Whether you choose a heathered rust orange like the sample or a deep forest green, this cowl is destined to become a staple in your cold-weather wardrobe.
Materials Needed
Before you begin, gather the following supplies. The beauty of this pattern lies in its simplicity—you only need a few items to create something truly stunning.
Yarn
- Super Bulky Weight Yarn (Size 6): Approximately 180–200 yards. The sample shown uses a heathered rust orange for the main body and a deep forest green for the trim, but feel free to experiment with your favorite color combinations.
Hook & Notions
- 10 mm (N/P-15) Crochet Hook – This larger hook is essential for achieving the lofty, plush drape of the finished cowl.
- Yarn Needle – For weaving in ends and finishing.
- Scissors
- Stitch Markers (optional) – Helpful for keeping track of your rounds, especially when working the post stitches.
Gauge
8 stitches and 6 rows in half double crochet = 4 inches (10 cm). While gauge is not critical for this project, it will affect the final size. If you crochet loosely, your cowl may be larger; if tightly, it may be smaller. The pattern is forgiving, so don't stress—just enjoy the process!
Step-by-Step Instructions
This pattern is worked in the round as a seamless tube. The clever Woven Post Stitch (WPS) is the star of the show, creating that gorgeous woven texture. Let's break it down step by step.
Finished Dimensions
Approximately 28 inches (71 cm) around and 10 inches (25 cm) tall, comfortably fitting over the head and sitting snugly around the neck.
Stitches & Abbreviations
- ch = chain
- hdc = half double crochet
- fpdc = front post double crochet
- bpdc = back post double crochet
- sl st = slip stitch
- st(s) = stitch(es)
Special Stitch: Woven Post Stitch (WPS)
This is the magic behind the texture. To work a WPS:
Yarn over, insert your hook from front to back around the post (the vertical part) of the stitch two rows below, skipping the stitch directly behind it. Yarn over and pull up a loop (you'll have 3 loops on your hook). Yarn over and pull through all 3 loops, just like a regular half double crochet. This creates a long, diagonal strand that weaves over the fabric.
Pattern Instructions
Foundation
Ch 44 loosely. Join with a sl st to the first ch to form a ring, being careful not to twist your chain. This is crucial—a twisted foundation will ruin the drape of your cowl.
Round 1
Ch 2 (counts as hdc here and throughout). Work 1 hdc in each ch around. Join with a sl st to the top of the beginning ch-2. (44 hdc)
Round 2
Ch 2. Work 1 hdc in each st around. Join with a sl st. (44 hdc)
Round 3: The First Woven Row
Ch 2. *Work 1 WPS around the post of the next st two rows below (skipping the st directly behind it). Work 1 hdc in the next st.* Repeat from * to * around. Join with a sl st. (22 WPS, 22 hdc)
Pro Tip: When you work the WPS, you'll be reaching down two rows. The stitch you skip on the current row will be "hidden" behind the long strand, creating that beautiful woven effect.
Round 4: The Offset Woven Row
Ch 2. *Work 1 hdc in the next st (the one behind the WPS from the previous round). Work 1 WPS around the post of the next st two rows below.* Repeat from * to * around. Join with a sl st. (22 WPS, 22 hdc)
Notice how the WPS in this round are offset from the ones in Round 3. This staggering is what creates the diagonal, basketweave pattern.
Rounds 5–16: Building the Texture
Repeat Rounds 3 and 4 alternately. The WPS will stack diagonally, creating a dense, woven basket-like texture. Continue until you've completed Round 16. Your cowl should measure approximately 9 inches tall at this point.
Helpful Hint: To keep your place, place a stitch marker at the beginning of each round. The alternating pattern is easy to follow once you see the rhythm—you're simply working a WPS into the post two rows below the next available stitch.
Round 17: The Smooth Edge
Ch 2. Work 1 hdc in each st around. Join with a sl st. (44 hdc)
This round creates a clean, smooth band at the top of the cowl, preparing it for the decorative trim.
Round 18: The Crab Stitch Trim
Ch 1. Work 1 reverse single crochet (crab stitch) in each st around. Join with a sl st to the first st. Fasten off and weave in ends.
How to Crab Stitch: Instead of working left to right, you'll work right to left (or left to right if you're left-handed). Insert your hook into the next stitch to the right, yarn over, pull up a loop, yarn over, and pull through both loops on your hook. This creates a twisted, rope-like edge that's both decorative and functional, preventing the cowl from curling.
Finishing Touches
Weave in all loose ends with your yarn needle. If desired, block lightly to even out the stitches and enhance the drape. The cowl is designed to be worn doubled over or pulled up high for extra warmth—the dense texture will keep you cozy even on the coldest days.
And there you have it—your very own Emberwood Ridge Cowl! This project is perfect for gifting, and once you master the Woven Post Stitch, you'll find yourself reaching for this pattern again and again. The rustic texture pairs beautifully with everything from denim jackets to wool coats, adding a touch of handcrafted warmth to any outfit.
Happy crocheting, and may your stitches always be cozy!