Harvest Moon Basketweave Bag Free Pattern – Chunky Knit Tote with Woven Texture
Harvest Moon Basketweave Bag Free Pattern – Chunky Knit Tote with Woven Texture
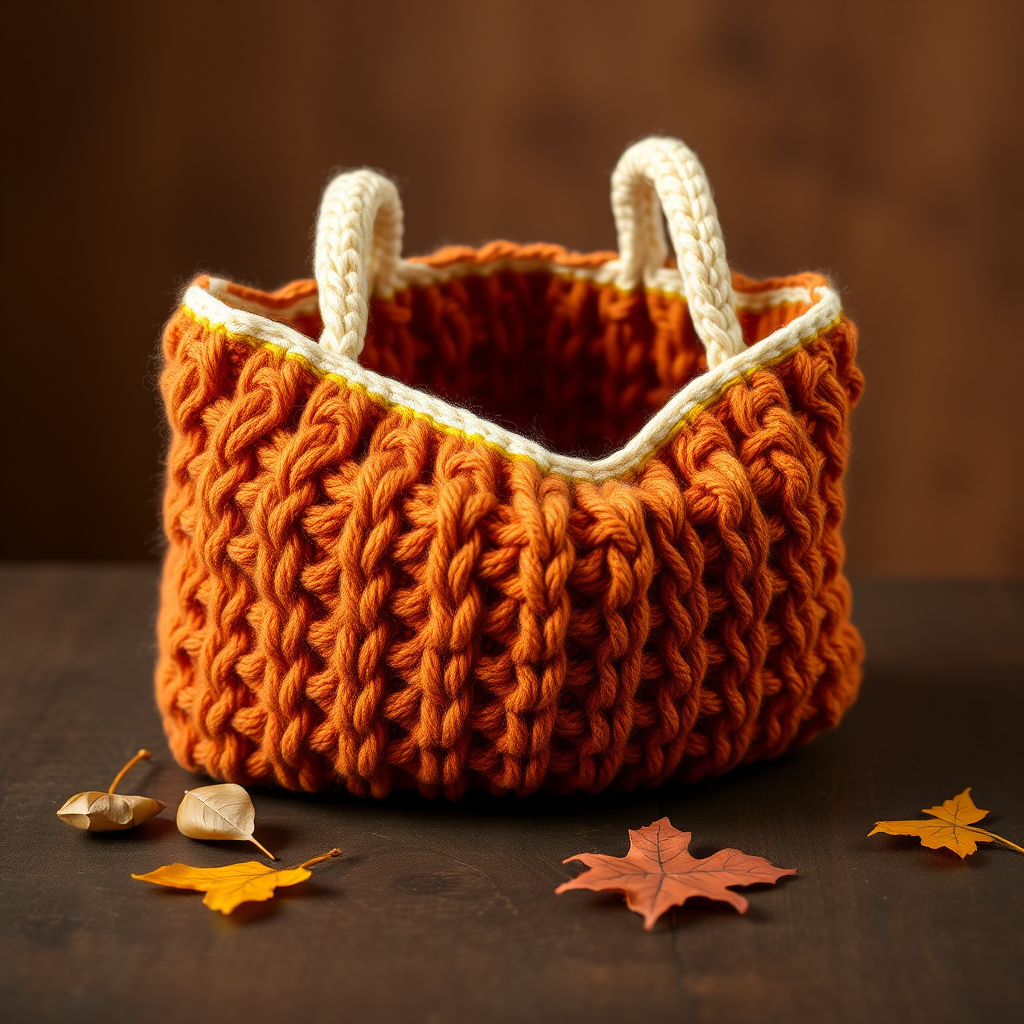
Carry a piece of autumn with you wherever you go. This stunning Harvest Moon Basketweave Bag combines the warmth of terracotta with the crisp contrast of cream, creating a richly textured tote that's as functional as it is beautiful. The chunky yarn works up quickly, making this an ideal weekend project for knitters ready to move beyond scarves and blankets. The deep woven pattern gives the bag structure and visual depth, while the soft, sturdy handles make it a reliable everyday companion. Whether you're heading to the farmer's market or settling in for a cozy coffee shop afternoon, this bag adds a handcrafted touch to any outfit.
Best of all, this free pattern is beginner-friendly. If you can knit and purl, you can create this gorgeous basketweave tote. The repetitive pattern is meditative once you get into the rhythm, and the chunky yarn means you'll see progress with every row. Let's dive into this delightful autumn project!
Materials Needed
Before you begin, gather the following supplies. All items are readily available at your local craft store or online.
Yarn
- Super bulky weight yarn – approximately 250g in terracotta (main color for bag body)
- 150g in cream (for handles)
- 50g in mustard (for accent embroidery)
Tip: Look for a soft, plied super bulky yarn (like wool or a wool-acrylic blend) that holds its shape well. The gauge is forgiving, so don't stress about exact fiber content—just make sure it's comfortable to work with and durable enough for a bag.
Needles & Notions
- US 13 (9mm) knitting needles – straight or circular (if using circular, work back and forth as if straight)
- Tapestry needle (for seaming and weaving in ends)
- Scissors
- Stitch markers (optional, but helpful for keeping track of pattern repeats)
Gauge
10 stitches x 14 rows = 4 inches in basketweave pattern (knit on US 13 needles).
Always knit a swatch first to ensure your tension matches. If your gauge is off, adjust your needle size accordingly—larger needles for looser tension, smaller needles for tighter tension.
Step-by-Step Instructions
This pattern is worked flat in one piece, then folded and seamed. The basketweave texture is created by alternating blocks of knit and purl stitches. Follow along carefully, and you'll have a beautiful tote in no time.
Bag Body (Worked Flat in One Piece, Then Seamed)
Foundation: Cast on 40 stitches with terracotta yarn. Leave a tail of about 6 inches for weaving in later.
Rows 1–4 (Garter Border): Knit all stitches. This creates a sturdy, non-curling edge for the bottom of your bag.
Row 5 (Set Up Pattern): K4 (this is your garter edge stitch), then work the basketweave pattern across the next 32 stitches: *K4, P4* repeat from * to * 4 times (that's 8 stitches per repeat x 4 = 32 stitches), end with K4. You'll have 4 knit stitches at the end for the other garter edge.
Rows 6–12: K4, then *P4, K4* repeat across the 32 stitches, end with K4. This creates the first woven block—the purl bumps sit on top of the knit blocks from Row 5, forming the classic basketweave check.
Rows 13–19: K4, then *K4, P4* repeat across the 32 stitches, end with K4. This is the second woven block, offset from the first. The knit blocks now sit on top of the purl bumps, creating the alternating checkerboard effect.
Rows 20–26: Repeat Rows 6–12.
Rows 27–33: Repeat Rows 13–19.
Rows 34–40: Repeat Rows 6–12.
Rows 41–47: Repeat Rows 13–19.
Rows 48–54: Repeat Rows 6–12.
Rows 55–58: Knit all stitches for the top garter border. This mirrors the bottom border and gives a clean finish.
Bind off loosely (use a larger needle or a loose bind-off method to prevent the top from pulling in). Cut yarn, leaving a long tail for seaming.
Your finished rectangle should measure approximately 16 inches wide x 20 inches tall. This will become both the front and back of the bag.
Seaming the Bag
- Fold the rectangle in half with right sides together. The garter borders should be at the bottom (fold) and top (opening).
- Using your tapestry needle and the long tail from binding off, sew the side seams using a mattress stitch or whip stitch. Work from the bottom fold up to the top edge, leaving the top open.
- Turn the bag right side out. The basketweave texture should now be facing outward, with the garter borders at the bottom and top.
Pro tip: For extra durability, you can reinforce the side seams by sewing them twice or adding a fabric lining later. But for a casual, rustic tote, the single seam is plenty strong.
Handles (Make 2)
Row 1: With cream yarn, cast on 8 stitches. Leave a tail of about 6 inches.
Rows 2–30: Knit every row (garter stitch) until the handle measures approximately 12 inches from the cast-on edge. Garter stitch creates a thick, sturdy fabric that won't stretch out of shape.
Bind off loosely. Cut yarn, leaving a long tail for sewing. Repeat to make a second handle.
Attaching the Handles
- Fold each handle in half to form a loop. The folded end will be the top of your handle, and the two raw ends will be sewn to the bag.
- Position the handles on the inside top edge of the bag. Space them about 4 inches apart on each side (so the handles are roughly centered over the bag's width).
- Using the long tails from binding off, sew the handle ends securely to the inside of the bag. Use a whip stitch and go through both layers of the handle and the bag fabric for maximum strength. Sew a square or X pattern for extra reinforcement.
- Repeat for the second handle on the opposite side.
Tip: Make sure both handles are attached at the same height and spacing for a balanced look. You can try the bag on your shoulder before sewing the second handle to adjust placement.
Accent Detail
Add a pop of color with a simple embroidery accent along the top garter border.
- Thread your tapestry needle with mustard yarn.
- Work a running stitch or cross-stitch along the top garter border, just below the bind-off edge. Keep your stitches even and about 1/4 inch apart.
- You can do a single line, a double line, or create small diamond shapes—get creative! The mustard adds a warm, autumnal contrast to the terracotta.
- Weave in the ends of the embroidery yarn on the inside of the bag.
Finishing
- Weave in all ends using your tapestry needle. Make sure to secure them well so they don't unravel with use.
- Block the bag lightly to even out the basketweave texture. Wet block or steam block according to your yarn's care instructions. This will help the pattern lay flat and look polished.
- Once dry, your Harvest Moon Basketweave Bag is ready to use! Fill it with your essentials and enjoy the compliments.
Final Thoughts
This basketweave tote is more than just a bag—it's a celebration of texture, color, and the cozy spirit of autumn. The chunky yarn makes it a fast, satisfying knit, and the result is a sturdy, stylish accessory you'll reach for all season long. Whether you keep it for yourself or gift it to a fellow craft lover, this pattern is sure to become a favorite.
Happy knitting, and may your harvest be bountiful!


