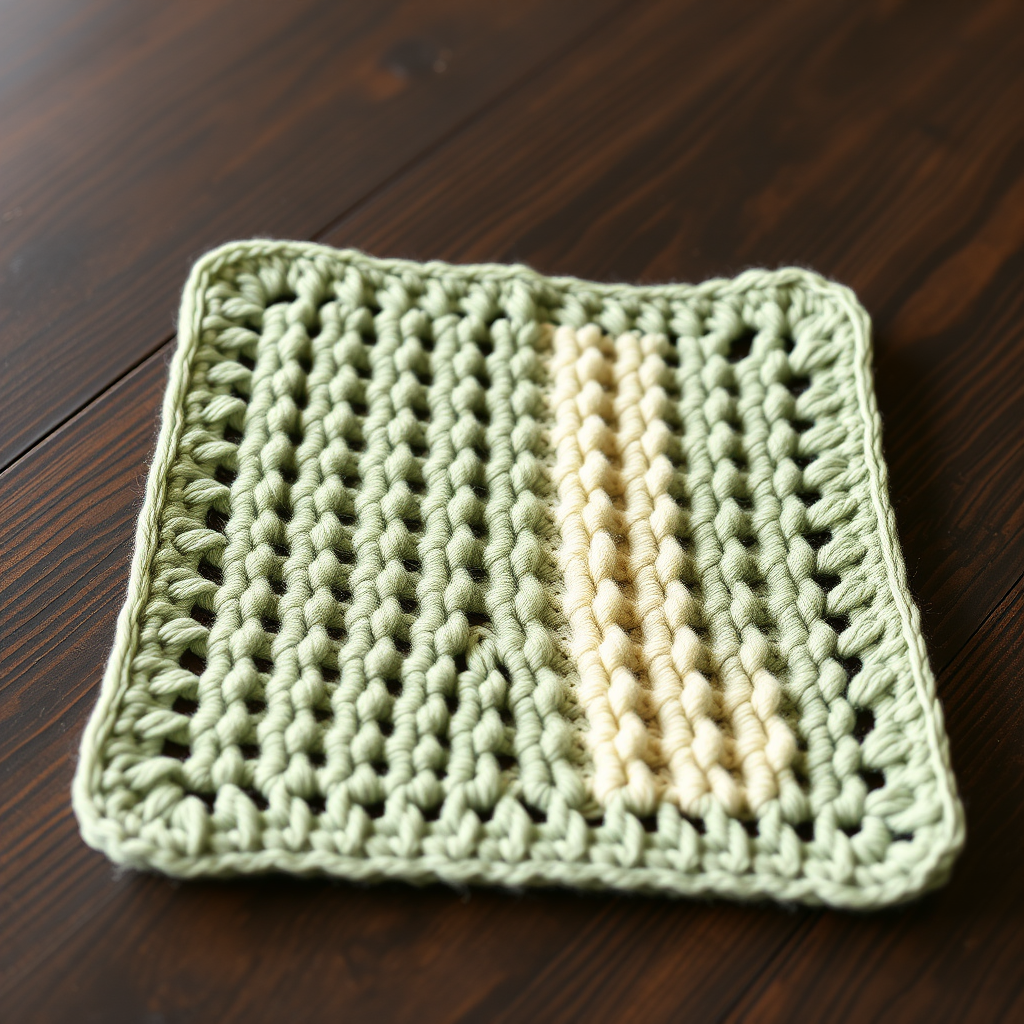
Rustic Stonewash Chunky Dish Scrubby Free Pattern

Rustic Stonewash Chunky Dish Scrubby: A Free Crochet Pattern for a Cozy, Farmhouse Kitchen
Are you tired of flimsy, plastic dish scrubbers that fall apart after a week? It's time to upgrade your kitchen sink with something that's both beautiful and functional. This Rustic Stonewash Chunky Dish Scrubby is the perfect blend of form and function. It combines the super absorbency of cotton with the gentle abrasiveness of a nubby, textured stitch, making it a powerhouse against tough, baked-on messes—without scratching your delicate cookware.
Beyond its cleaning prowess, this scrubby is a piece of handmade art. The thick, chunky yarn and the unique ridged texture give it a cozy, farmhouse aesthetic that will instantly warm up your kitchen. It's a quick, satisfying project that makes a fantastic gift for housewarmings, hostesses, or anyone who appreciates handmade charm. Let's dive into this free pattern and create something beautiful and useful for your home!
Why You'll Love This Pattern
This isn't just another flat crochet circle. The magic of this pattern lies in its construction. By working in continuous rounds and alternating between front-loop-only and back-loop-only single crochet stitches, you create a dense, ridged fabric that is perfect for scrubbing. The result is a thick, sturdy scrubby that feels substantial in your hand and stands up to daily use. Plus, it's a beginner-friendly project that only uses basic stitches, so you can relax and enjoy the rhythm of the crochet.
Materials Needed
Before you begin, gather your supplies. This project is wonderfully simple, requiring just a few essentials:
- Yarn: Lion Brand Re-Up (or any bulky weight cotton blend) in two colors:
- 'Stonewash' (light blue) - approximately 50 yards
- 'Oat' (cream) - approximately 50 yards
- Crochet Hook: US Size J/10 (6.0 mm) crochet hook
- Other: Yarn needle for weaving in ends and creating the hanging loop, scissors
Gauge: 4 sc x 4 rows = 2 inches (in pattern stitch). Gauge is not critical for this project, but maintaining a consistent tension will ensure a nice, flat circle.
Step-by-Step Instructions: Creating Your Chunky Scrubby
This scrubby is worked in continuous rounds, which means you will not join at the end of each round. Instead, you'll work in a spiral, creating a seamless, dense fabric. Use a stitch marker to keep track of the beginning of each round.
Special Stitch Note: The texture is created by working into only one loop of the stitch. When the pattern says "front loop only" (FLO), you insert your hook under the front loop (the one closest to you). When it says "back loop only" (BLO), you insert your hook under the back loop (the one furthest from you).
Starting the Circle (Rounds 1-5)
Round 1: With Stonewash, make a magic ring. Work 6 single crochet (sc) into the ring. Pull the tail tight to close the circle. (6 stitches)
Round 2: Work 2 sc in each stitch around. (12 stitches)
Round 3: *Sc in the next stitch, 2 sc in the next stitch*; repeat from * to * around. (18 stitches)
Round 4: *Sc in the next 2 stitches, 2 sc in the next stitch*; repeat from * to * around. (24 stitches)
Round 5: *Sc in the next 3 stitches, 2 sc in the next stitch*; repeat from * to * around. (30 stitches)
Building the Body (Rounds 6-15)
Continue the same increasing pattern. As the circle grows, you'll start to see the beautiful ridged texture forming.
Round 6: *Sc in the next 4 stitches, 2 sc in the next stitch*; repeat around. (36 stitches)
Round 7: *Sc in the next 5 stitches, 2 sc in the next stitch*; repeat around. (42 stitches)
Round 8: *Sc in the next 6 stitches, 2 sc in the next stitch*; repeat around. (48 stitches)
Round 9: *Sc in the next 7 stitches, 2 sc in the next stitch*; repeat around. (54 stitches)
Round 10: *Sc in the next 8 stitches, 2 sc in the next stitch*; repeat around. (60 stitches)
Round 11: *Sc in the next 9 stitches, 2 sc in the next stitch*; repeat around. (66 stitches)
Round 12: *Sc in the next 10 stitches, 2 sc in the next stitch*; repeat around. (72 stitches)
Round 13: *Sc in the next 11 stitches, 2 sc in the next stitch*; repeat around. (78 stitches)
Round 14: *Sc in the next 12 stitches, 2 sc in the next stitch*; repeat around. (84 stitches)
Round 15: *Sc in the next 13 stitches, 2 sc in the next stitch*; repeat around. (90 stitches)
Finishing the Main Body (Rounds 16-30)
Keep going! You're more than halfway there. The scrubby is becoming a substantial, chunky circle.
Round 16: *Sc in the next 14 stitches, 2 sc in the next stitch*; repeat around. (96 stitches)
Round 17: *Sc in the next 15 stitches, 2 sc in the next stitch*; repeat around. (102 stitches)
Round 18: *Sc in the next 16 stitches, 2 sc in the next stitch*; repeat around. (108 stitches)
Round 19: *Sc in the next 17 stitches, 2 sc in the next stitch*; repeat around. (114 stitches)
Round 20: *Sc in the next 18 stitches, 2 sc in the next stitch*; repeat around. (120 stitches)
Round 21: *Sc in the next 19 stitches, 2 sc in the next stitch*; repeat around. (126 stitches)
Round 22: *Sc in the next 20 stitches, 2 sc in the next stitch*; repeat around. (132 stitches)
Round 23: *Sc in the next 21 stitches, 2 sc in the next stitch*; repeat around. (138 stitches)
Round 24: *Sc in the next 22 stitches, 2 sc in the next stitch*; repeat around. (144 stitches)
Round 25: *Sc in the next 23 stitches, 2 sc in the next stitch*; repeat around. (150 stitches)
Round 26: *Sc in the next 24 stitches, 2 sc in the next stitch*; repeat around. (156 stitches)
Round 27: *Sc in the next 25 stitches, 2 sc in the next stitch*; repeat around. (162 stitches)
Round 28: *Sc in the next 26 stitches, 2 sc in the next stitch*; repeat around. (168 stitches)
Round 29: *Sc in the next 27 stitches, 2 sc in the next stitch*; repeat around. (174 stitches)
Round 30: *Sc in the next 28 stitches, 2 sc in the next stitch*; repeat around. (180 stitches)
Adding the Contrasting Edge
Now it's time to add that beautiful, crisp cream border that gives the scrubby its polished, farmhouse look.
Edging: Switch to your Oat (cream) yarn. Work 1 sc in each stitch around, but this time, insert your hook through both loops of each stitch. This will create a clean, flat edge that contrasts beautifully with the textured body. When you reach the end of the round, join with a slip stitch to the first sc of this round. Fasten off and weave in all your ends securely.
Creating the Hanging Loop
This final touch makes your scrubby easy to store and quick to dry.
Finishing: Cut a 6-inch piece of Oat yarn. Fold it in half. Using your yarn needle, pull the folded loop through the edge of the scrubby, right at the border. Then, pull the two yarn tails through the loop and pull tight to create a secure knot. Trim the tails to your desired length. And that's it—you're done!
Tips for the Perfect Scrubby
- Keep it flat: If your circle starts to ruffle, your tension might be too loose. If it starts to cup like a bowl, your tension is too tight. Try to keep your stitches consistent.
- Use a stitch marker: Since you're working in a continuous spiral, it's easy to lose your place. A stitch marker in the first stitch of each round is a lifesaver.
- Cotton is key: Cotton yarn is essential for this project because it's absorbent, durable, and gets softer with each wash. Avoid acrylic, which can melt or not absorb water well.
This Rustic Stonewash Chunky Dish Scrubby is more than just a cleaning tool; it's a small piece of handmade joy for your daily routine. It's a quick, satisfying project that uses minimal yarn, making it perfect for using up scraps. I hope you enjoy making this as much as I enjoyed designing it. Happy crocheting!