Sprinkle Donut Hot Pad Free Pattern – Playful Crochet Trivet with Frosting Texture
Sprinkle Donut Hot Pad Free Pattern – Playful Crochet Trivet with Frosting Texture
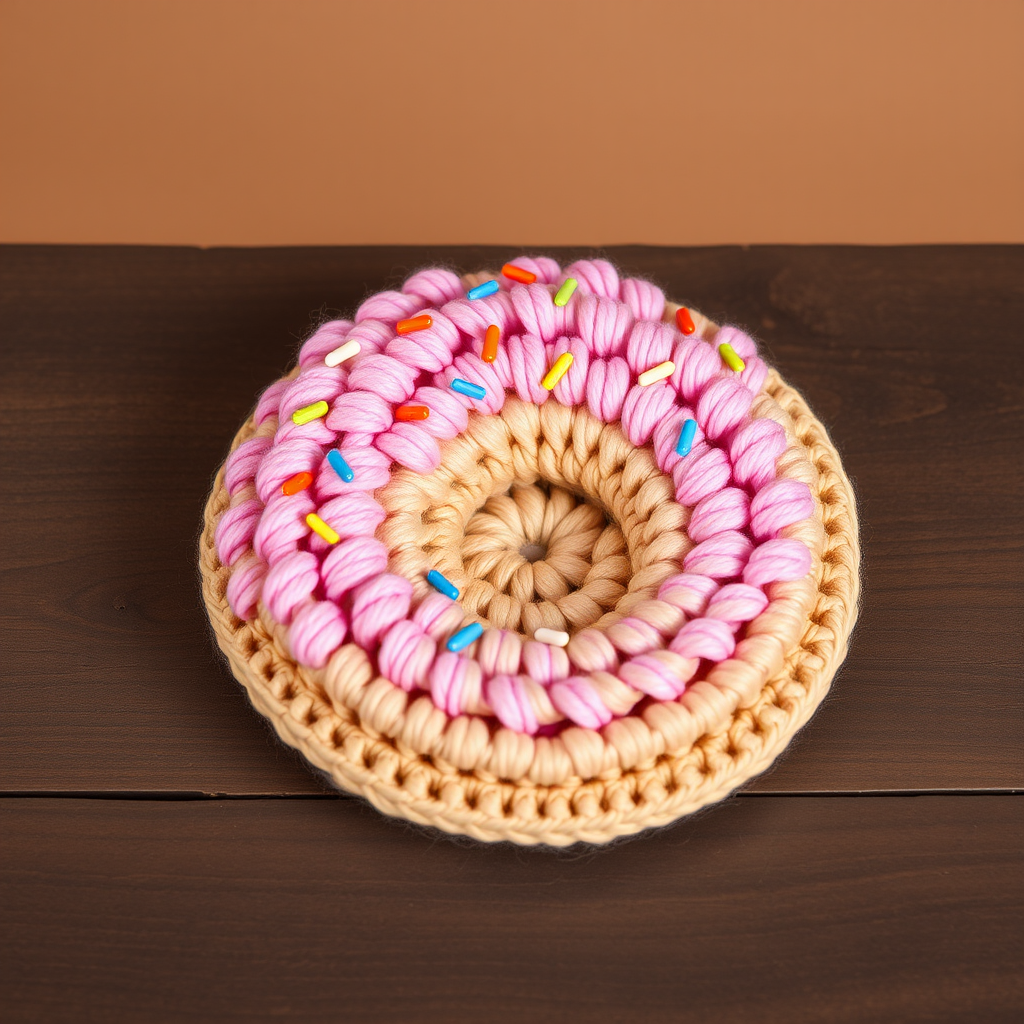
Bring a dash of bakery charm to your kitchen with this crochet hot pad shaped like a sprinkle donut, complete with a puffy frosting ridge and colorful bead-like stitches. It's a functional, cheerful project that protects your counters while adding a pop of color to your cooking space. Whether you're an experienced crocheter or a curious beginner, this pattern is designed to be approachable, rewarding, and utterly adorable. Let's get started!
Materials Needed
Before you begin, gather the following supplies. All items are readily available at craft stores or online.
- Yarn: Worsted weight cotton yarn (e.g., Lily Sugar'n Cream) in tan (for the donut base), pink (for frosting), and assorted bright colors (yellow, blue, green, orange, purple) for sprinkles.
- Hook: 5.0 mm (H-8) crochet hook.
- Yarn needle: For weaving in ends and embroidering sprinkles.
- Scissors: For cutting yarn.
- Polyester fiberfill: Optional, for a puffy, padded feel (recommended for heat protection).
- Stitch marker: Helpful for keeping track of rounds.
Gauge: 4" x 4" = 16 sc x 18 rows (not critical, but aim for a dense fabric to ensure heat protection).
Step-by-Step Instructions
Follow these detailed instructions carefully. The pattern is broken down into manageable sections: the donut base, frosting ridge, sprinkles, and assembly. Take your time, and don't hesitate to refer back to the abbreviations and special stitch notes.
Abbreviations
- ch = chain
- sc = single crochet
- hdc = half double crochet
- dc = double crochet
- sl st = slip stitch
- rnd = round
- st(s) = stitch(es)
- inc = increase (2 sc in same st)
- dec = decrease (sc2tog)
Special Stitch: Puff Stitch (puff)
The puff stitch creates the fluffy frosting texture. Here's how to do it:
- Yarn over, insert hook into indicated stitch.
- Yarn over and pull up a loop (3 loops on hook).
- Yarn over, insert hook into same stitch, yarn over and pull up a loop (5 loops on hook).
- Yarn over, insert hook into same stitch, yarn over and pull up a loop (7 loops on hook).
- Yarn over and pull through all 7 loops on hook.
- Chain 1 to close the puff stitch.
Donut Base (Make 2 Pieces – Front and Back)
You'll crochet two identical circles. One will become the top (with frosting), and the other will be the bottom.
Rnd 1: With tan yarn, make a magic ring. Work 8 sc into ring. Pull tight. Sl st to first sc. (8 sts)
Rnd 2: Ch 1, inc in each st around. Sl st to first sc. (16 sts)
Rnd 3: Ch 1, *sc in next st, inc in next st* repeat around. Sl st to first sc. (24 sts)
Rnd 4: Ch 1, *sc in next 2 sts, inc in next st* repeat around. Sl st to first sc. (32 sts)
Rnd 5: Ch 1, *sc in next 3 sts, inc in next st* repeat around. Sl st to first sc. (40 sts)
Rnd 6: Ch 1, *sc in next 4 sts, inc in next st* repeat around. Sl st to first sc. (48 sts)
Rnd 7: Ch 1, *sc in next 5 sts, inc in next st* repeat around. Sl st to first sc. (56 sts)
Rnd 8: Ch 1, *sc in next 6 sts, inc in next st* repeat around. Sl st to first sc. (64 sts)
Rnd 9: Ch 1, *sc in next 7 sts, inc in next st* repeat around. Sl st to first sc. (72 sts)
Rnd 10: Ch 1, *sc in next 8 sts, inc in next st* repeat around. Sl st to first sc. (80 sts)
Rnd 11: Ch 1, sc in each st around. Sl st to first sc. (80 sts)
Rnd 12: Ch 1, *sc in next 9 sts, inc in next st* repeat around. Sl st to first sc. (88 sts)
Rnd 13: Ch 1, sc in each st around. Sl st to first sc. (88 sts)
Rnd 14: Ch 1, *sc in next 10 sts, inc in next st* repeat around. Sl st to first sc. (96 sts)
Rnd 15: Ch 1, sc in each st around. Sl st to first sc. (96 sts)
Fasten off and weave in ends. Repeat the entire process to create a second identical piece.
Frosting Ridge (Worked on One Piece)
This step adds the puffy pink frosting to the top of your donut. Work in continuous rounds (do not join with a sl st at the end of each round).
Attach pink yarn to any stitch on the edge of one donut piece.
Rnd 1: Ch 1, *puff in next st, sc in next st* repeat around. (48 puffs, 48 sc)
Rnd 2: *puff in next st, sc in next st* repeat around. (48 puffs, 48 sc)
Fasten off, leaving a long tail (about 18 inches) for sewing the pieces together.
Sprinkles (Worked Directly onto Frosting)
Now for the fun part – adding colorful sprinkles! Using bright colors (yellow, blue, green, orange, purple), embroider small straight stitches onto the pink frosting.
- Thread a yarn needle with a bright color.
- Insert the needle from the back of the frosting to the front.
- Make a small straight stitch (about 1/4 inch long) by inserting the needle back through the frosting a short distance away.
- Repeat to create 20-30 sprinkles scattered randomly across the pink frosting area.
- Vary the colors and angles for a realistic sprinkle look.
Assembly
Now it's time to bring your donut together.
- Place the two donut pieces together with wrong sides facing (the frosting piece facing up).
- Using the long tail from the frosting, whip stitch the edges together. Insert your needle through both layers, going over the edge, and pull tight. Continue around the entire circle.
- Leave a 3-inch opening when you're about three-quarters of the way around.
- Stuff lightly with polyester fiberfill to give a puffy, padded feel. This is optional but recommended for better heat protection.
- Continue whip stitching closed. Weave in all ends securely.
Hanging Loop (Optional)
If you'd like to hang your hot pad, add a simple loop.
- At the top edge of the donut, attach yarn with a slip stitch.
- Chain 12 stitches.
- Slip stitch to the same spot to form a loop.
- Fasten off and weave in ends.
Finishing
Block lightly if needed to flatten. Your sprinkle donut hot pad is ready to use or gift!
This project is perfect for using up scrap yarn and makes a wonderful handmade gift for housewarmings, birthdays, or just because. The combination of functional heat protection and playful design is sure to bring a smile to anyone's face. Happy crocheting!