The Claw-some Crab Coaster Free Pattern – A Textured Crochet Mug Rug
The Claw-some Crab Coaster Free Pattern – A Textured Crochet Mug Rug
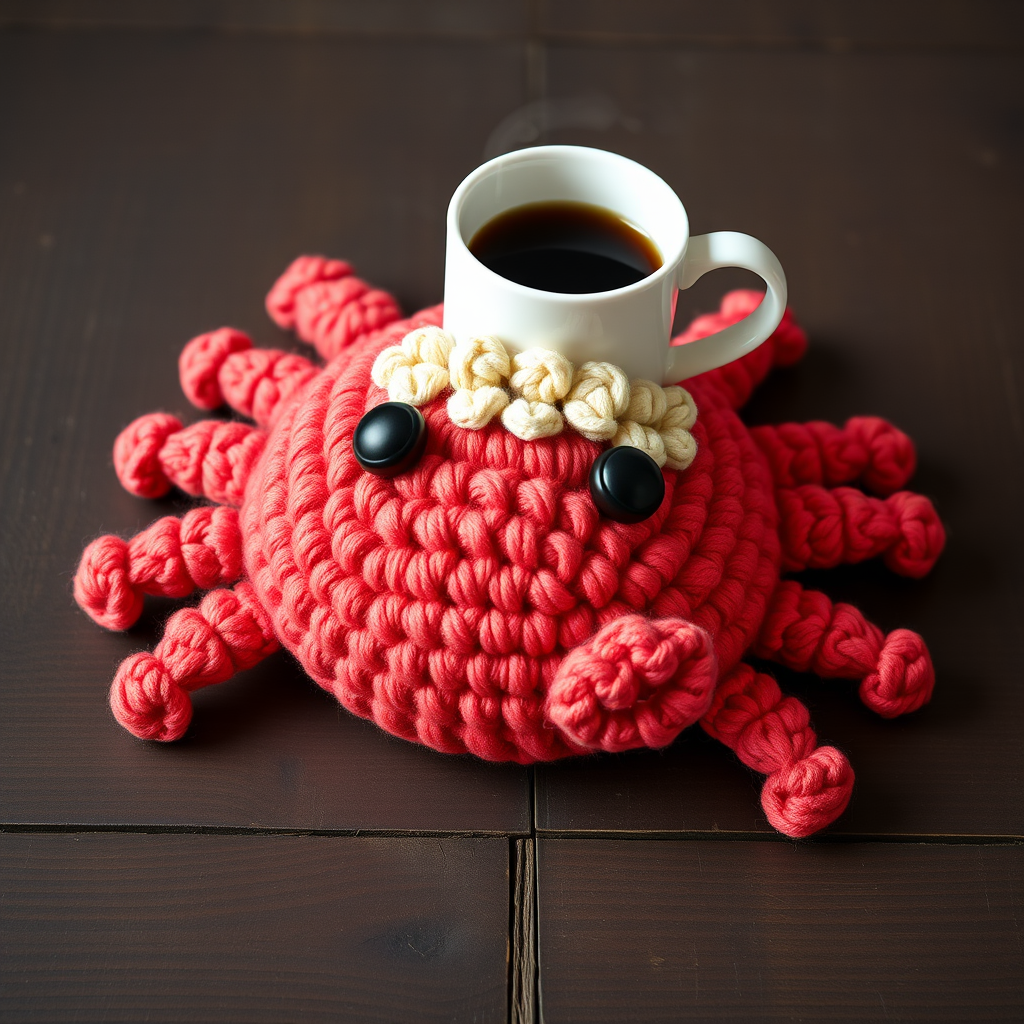
Bring a splash of the seashore to your coffee table with this charming crochet crab mug rug, featuring a delightfully bumpy shell and wiggly legs. It's a quick, whimsical project that adds a playful coastal vibe to any mug. Whether you're looking for a handmade gift for a beach lover or a fun weekend project for yourself, this little crustacean is sure to steal the show. The textured shell, created with simple embroidery, gives it a tactile, high-end finish that belies its beginner-friendly construction.
Materials Needed
Before you dive into this ocean-inspired project, gather the following supplies. All materials are readily available at most craft stores, and the project is perfect for using up scrap yarn from your stash.
- Yarn: Worsted weight cotton yarn in three colors:
- Coral red (main body, claws, and legs) – approximately 50-60 yards
- Cream (shell texture bumps) – small amount for embroidery
- Black (eyes) – small amount
- Hook: 4.0 mm (G) crochet hook
- Other Tools: Yarn needle for sewing parts together, stitch marker, scissors, and fiberfill stuffing
- Gauge: 4 sc x 4 rows = 1 inch (2.5 cm) in single crochet (gauge is not critical for this project, but matching it ensures the correct size)
Step-by-Step Instructions
This pattern is worked in continuous spirals unless otherwise noted. Use a stitch marker to keep track of rounds – this is crucial for amigurumi-style projects to avoid losing your place.
Body (Make 1)
Start with coral red yarn. This forms the main dome of the crab's back.
- R1: Create a magic ring, then work 6 single crochet (sc) into the ring. Pull tight to close. (6 stitches)
- R2: Work 2 sc in each stitch around. (12 stitches)
- R3: *Sc in next stitch, 2 sc in next stitch*; repeat from * to * around. (18 stitches)
- R4: *Sc in next 2 stitches, 2 sc in next stitch*; repeat from * to * around. (24 stitches)
- R5: *Sc in next 3 stitches, 2 sc in next stitch*; repeat from * to * around. (30 stitches)
- R6-8: Sc in each stitch around for 3 rounds. (30 stitches) – This creates the straight sides of the dome.
- R9: *Sc in next 3 stitches, sc2tog (single crochet decrease)*; repeat from * to * around. (24 stitches)
- R10: *Sc in next 2 stitches, sc2tog*; repeat from * to * around. (18 stitches)
- R11: *Sc in next stitch, sc2tog*; repeat from * to * around. (12 stitches)
- Stuff firmly with fiberfill. The body should be plump but not stretched.
- R12: Sc2tog around. (6 stitches)
- Fasten off, leaving a long tail (about 12 inches). Thread the tail through a yarn needle, weave it through the front loops of the remaining 6 stitches, pull tight to close the hole, and secure with a knot. Weave in the end.
Shell Texture (Optional but Recommended)
This step transforms your simple dome into a realistic crab shell. Using the cream yarn and a yarn needle, create small "bumps" on the top of the body.
- Thread the cream yarn onto a yarn needle.
- Insert the needle from the inside of the body (or the bottom) to the top surface at a random spot.
- Make a French knot: Wrap the yarn around the needle 2-3 times, then insert the needle back down close to where it came up, pulling gently to form a small knot on the surface.
- Alternatively, make small surface crochet stitches or simple straight stitches in a random pattern.
- Repeat across the top of the body, spacing the bumps unevenly to mimic a crab's natural shell texture. Aim for 10-15 bumps.
- Weave in the ends securely on the inside of the body.
Eyes (Make 2)
Using black yarn, these simple circles give your crab its friendly, goofy expression.
- R1: Magic ring, 6 sc in ring. (6 stitches)
- R2: 2 sc in each stitch around. (12 stitches)
- Fasten off, leaving a long tail (about 8 inches) for sewing.
- Lightly stuff the eyes with a tiny amount of fiberfill (optional, but gives them a slight dome shape).
- Sew the eyes onto the front of the body, slightly above the center. Position them close together for a cute look, or further apart for a goofier expression.
Claws (Make 2)
These slightly larger pieces are the crab's signature pincers, positioned at the front.
- Using coral red yarn.
- R1: Magic ring, 6 sc in ring. (6 stitches)
- R2: *Sc in next stitch, 2 sc in next stitch*; repeat from * to * around. (9 stitches)
- R3-4: Sc in each stitch around for 2 rounds. (9 stitches)
- R5: *Sc in next stitch, sc2tog*; repeat from * to * around. (6 stitches)
- Fasten off, leaving a long tail (about 10 inches).
- Stuff lightly with fiberfill before closing. Sew the claws to the sides of the body, slightly forward (toward the eyes). Position them so they angle slightly upward.
Legs (Make 6)
These stubby little legs are quick to make and give the crab its characteristic waddle.
- Using coral red yarn.
- R1: Magic ring, 5 sc in ring. (5 stitches)
- R2-3: Sc in each stitch around for 2 rounds. (5 stitches)
- Fasten off, leaving a long tail (about 8 inches).
- Do not stuff the legs – they should remain flat and flexible.
- Sew 3 legs on each side of the body, evenly spaced along the lower edge. Position them so they stick out slightly to the sides.
Assembly
Now it's time to bring your crab together. Take your time with this step – secure attachments make for a longer-lasting project.
- Before sewing, lay out all pieces to visualize the final placement.
- Sew the eyes onto the front of the body first, as they determine the "face" direction.
- Attach the claws to the front sides, just below and to the outside of the eyes.
- Attach the legs along the sides, spacing them evenly. The middle leg should be at the widest point of the body.
- For each piece, use the long tail and a yarn needle to sew securely, passing through the body and the piece multiple times. Tie off knots firmly.
- Weave in all remaining ends with the yarn needle, hiding them inside the body.
Finishing
The final touches ensure your mug rug sits flat and functions perfectly.
- Block the mug rug lightly: Mist the bottom of the crab with water and place it on a flat surface. Gently press down to flatten the bottom. Allow it to dry completely. This helps the crab sit evenly on your table.
- Place a steaming mug of coffee or tea on the crab's back. The flat bottom and sturdy construction will protect your table from heat and condensation.
- Enjoy your new coastal companion! It also makes a fantastic handmade gift for housewarmings, beach-themed parties, or any ocean lover in your life.
This pattern is perfect for beginners looking to try amigurumi-style crochet, as it uses only basic stitches (single crochet, increases, and decreases) with simple assembly. The result is a charming, functional piece of coastal decor that's sure to spark conversation. Happy crocheting!



