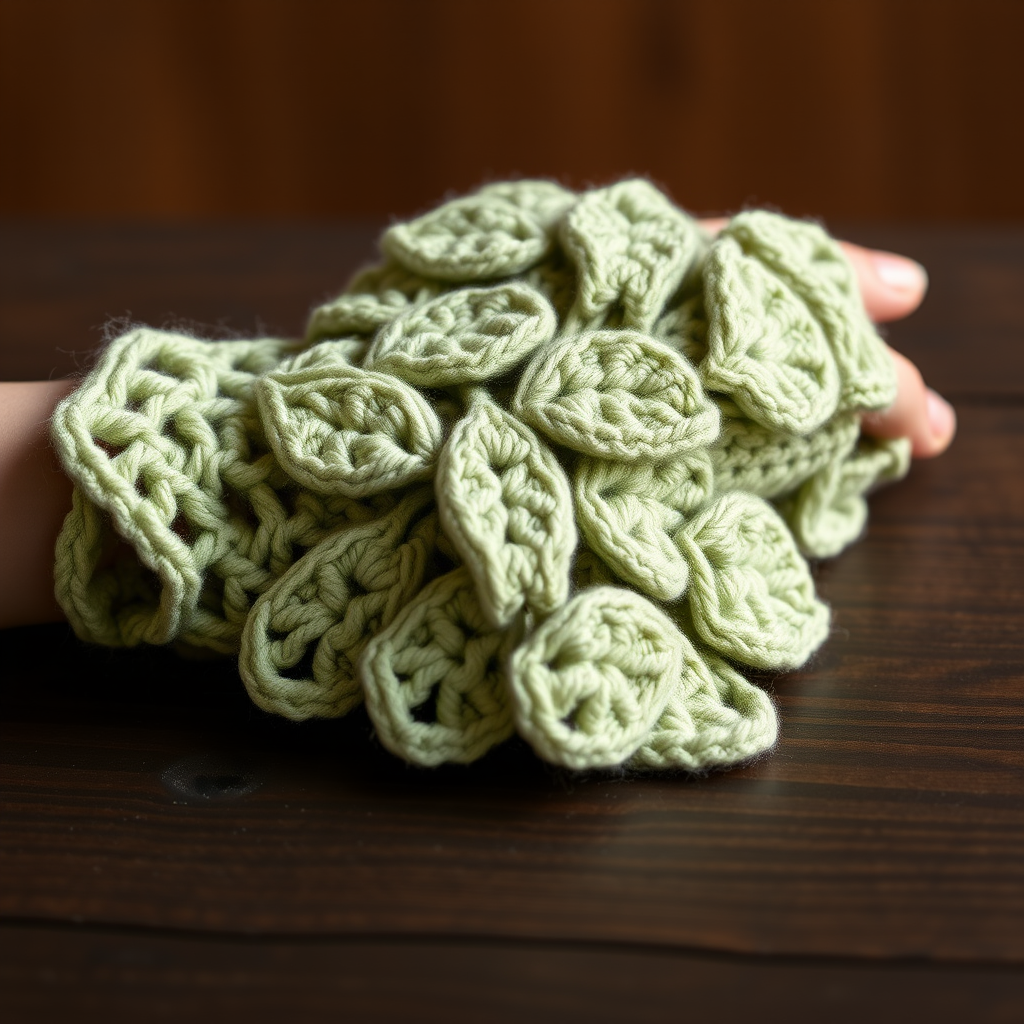
The Dewdrop & Dandelion Headband: A Free Crochet Pattern for a Textured, Floral Crown

Weave a Whimsical Crown of Spring Blooms
Bring a touch of garden-fresh charm to your wardrobe with the Dewdrop & Dandelion Headband. This free crochet pattern combines a soft, textured band with dimensional, floral motifs to create a crown-like accessory that’s both whimsical and wearable. Perfect for spring outings, garden parties, or adding a handmade touch to everyday style, this headband features an adjustable fit and a lush, overlapping flower arrangement. Whether you’re a beginner looking to practice new stitches or an experienced crocheter seeking a quick, satisfying project, this pattern is designed to be clear, detailed, and easy to follow.
Materials Needed
Before you begin, gather the following supplies. Using the exact materials will ensure your headband matches the gauge and texture shown in the pattern.
- Yarn: Worsted weight cotton or cotton-blend yarn in two colors:
- Main Color (MC): Soft sage green – approximately 100 yards
- Contrast Color (CC): Creamy white or pale blush – approximately 50 yards
- Hook: US Size G/6 (4.0 mm) crochet hook
- Other: Yarn needle for weaving ends and sewing, scissors, stitch markers (optional)
- Gauge: 16 single crochet stitches x 18 rows = 4 inches (10 cm) in single crochet. Note: Gauge is important for the headband to fit properly. If your gauge is different, adjust the number of rows in the headband base accordingly.
Step-by-Step Instructions
Part 1: Headband Base (using Main Color – soft sage green)
The headband base is worked in rows of single crochet, then sewn into a ring. This creates a sturdy, textured band that will hold the flowers securely.
- Chain 8. Leave a 6-inch tail for sewing later.
- Row 1: Single crochet (sc) in the 2nd chain from the hook and in each chain across. You will have 7 single crochet stitches.
- Row 2: Chain 1 (ch 1), turn your work. Single crochet in each stitch across. (7 sc)
- Rows 3-60: Repeat Row 2 until your piece measures approximately 20-22 inches (or the desired head circumference). Tip: To check fit, wrap the piece around your head where you want the headband to sit. It should be snug but not tight. Adjust the number of rows as needed.
- Finishing the base: Fasten off, leaving a long tail (at least 12 inches). Thread the tail through a yarn needle. Fold the piece so the short ends meet, and sew them together using a whip stitch or mattress stitch to form a ring. Weave in the end securely, but do not cut the tail yet if you plan to use it for attaching flowers.
Part 2: Flower Motif (make 5-7 using Contrast Color – creamy white or pale blush)
Each flower has six rounded petals worked in the round. The magic ring technique creates a tight, closed center.
- Make a magic ring. If you are unfamiliar with this technique, you can also chain 4 and slip stitch to form a ring, but the magic ring is preferred for a closed center.
- Round 1: Chain 1 (does not count as a stitch). Work 6 single crochet into the ring. Pull the tail to close the ring tightly. Slip stitch (sl st) to the first single crochet to join. (6 sc)
- Round 2 (making petals):
- First petal: Chain 3 (counts as first double crochet). Work 2 double crochet (dc) in the same stitch (the stitch where you just slip stitched). Chain 2. Slip stitch in the same stitch. This completes the first petal.
- Remaining petals: *Slip stitch in the next stitch. Chain 3, work 2 double crochet in that same stitch, chain 2, slip stitch in the same stitch.* Repeat from * around until you have 6 petals total. You will end with a slip stitch in the last stitch.
- Finishing the flower: Fasten off, leaving a 6-inch tail. Gently shape the petals with your fingers to make them rounded and dimensional.
Part 3: Assembly
Arrange and sew the flowers onto the headband base to create a lush, garden-inspired crown effect.
- Arrange the flowers: Place the headband ring flat on a table. Position the flowers along the top edge of the band, spacing them evenly. For a full crown look, overlap the petals slightly. You can use 5 flowers for a subtle look or 7 for a denser arrangement. Play with the placement until you are happy.
- Sew the flowers: Using the 6-inch tail from each flower, thread a yarn needle. Sew each flower securely to the headband by stitching through the back of the petals (the part that touches the band) and into the headband fabric. Make sure to catch the yarn of the headband so the flower is firmly attached. Repeat for all flowers.
- Weave in ends: Use the yarn needle to weave in all remaining tails on the inside of the headband (the side that will touch your hair). Trim any excess yarn.
Optional Embellishment
For an extra touch of detail, add a small French knot or a bead in the center of each flower using a contrasting color (such as pale yellow or gold). This mimics the look of dandelion or dewdrop centers and adds a subtle sparkle.
Your Dewdrop & Dandelion Headband is now complete! Wear it as a whimsical crown for spring, or gift it to a loved one who adores handmade floral accessories. The soft cotton yarn and adjustable fit make it comfortable for all-day wear. Happy crocheting!