The Drifting Dune Cocoon Cardigan Free Pattern – A Textured Knit Kimono with Ribbed Wrap Belt
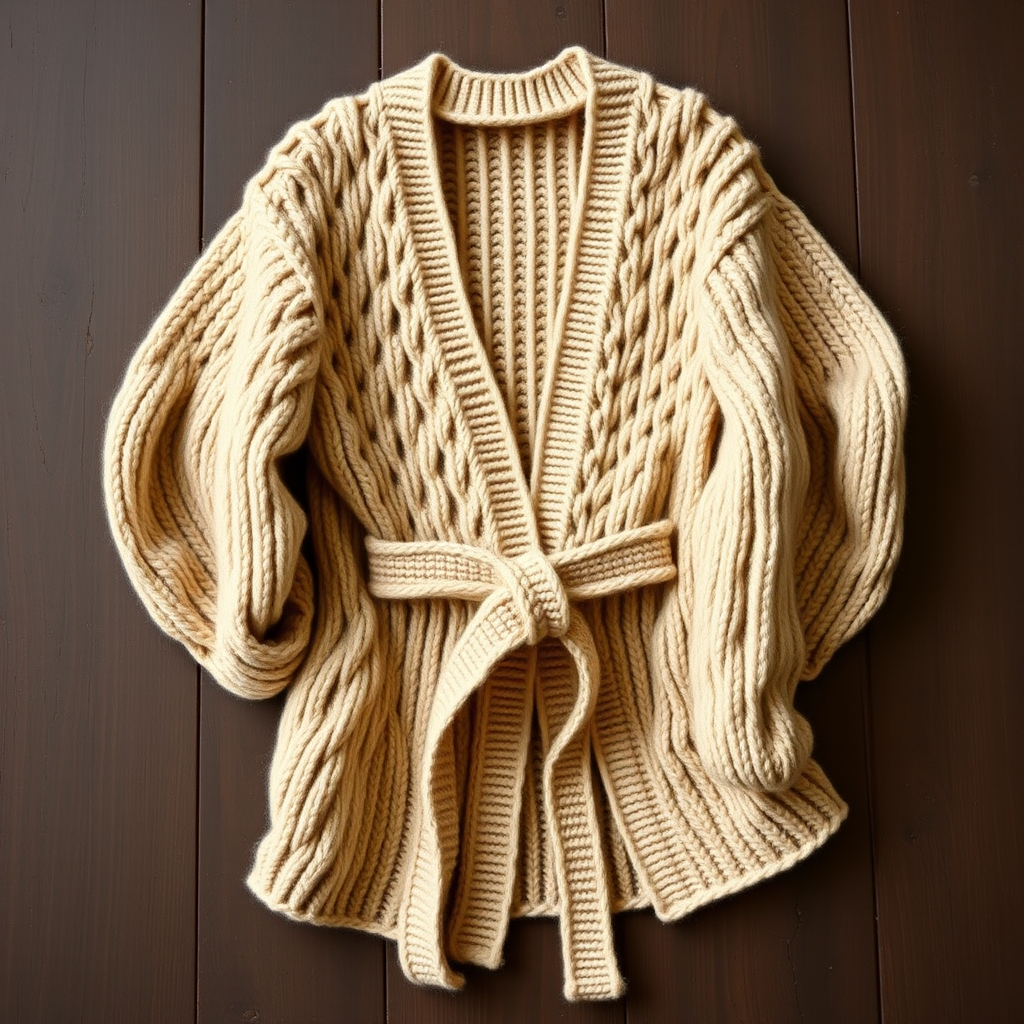
The Drifting Dune Cocoon Cardigan: A Free Knitting Pattern for a Textured Kimono Wrap
Wrap yourself in the soft embrace of the Drifting Dune Cocoon Cardigan, a modern kimono-style knit that drapes like a warm cloud. With its rich honeycomb cables and a cozy ribbed belt, this pattern turns simple lounging into a luxurious ritual. Whether you're curling up with a book or stepping out on a cool evening, this cardigan is the perfect blend of comfort and style. Best of all, it's a free pattern designed with beginners in mind—so grab your needles and let's get started!
Why You'll Love This Pattern
This cardigan is worked in one piece from the top down, which means minimal seaming and maximum flow. The honeycomb cable pattern adds a beautiful, dimensional texture that resembles interwoven sand dunes, while the relaxed cocoon silhouette drapes elegantly over any body type. The separate ribbed belt lets you customize the fit—wear it tied at the waist for a tailored look or leave it open for a breezy, bohemian vibe.
Materials Needed
Before you begin, gather the following supplies:
- Yarn: Worsted weight yarn in a warm oat or sand color (approx. 1200-1400 yards for sizes S/M, 1500-1700 yards for L/XL)
- Needles: US 8 (5.0 mm) circular needles (32-inch or longer) for the body, US 8 (5.0 mm) straight needles for the belt
- Notions: Stitch markers, tapestry needle for weaving in ends
- Gauge: 18 stitches and 24 rows = 4 inches in stockinette stitch (blocked)
Sizes and Abbreviations
Sizes: S/M (bust up to 38 inches) and L/XL (bust up to 46 inches). The cardigan is designed to be oversized and drapey, so don't worry about a perfect fit—the cocoon shape is meant to be loose and flowing.
Abbreviations:
- CO: cast on
- K: knit
- P: purl
- K2tog: knit two together
- P2tog: purl two together
- C4B: cable 4 back (slip 2 stitches to cable needle, hold in back, knit next 2 stitches, then knit the 2 from cable needle)
- C4F: cable 4 front (slip 2 stitches to cable needle, hold in front, knit next 2 stitches, then knit the 2 from cable needle)
- PM: place marker
- SM: slip marker
- BO: bind off
Pattern Notes
- The cardigan is worked in one piece from the top down, starting with the back panel, then picking up stitches for the shoulders and front panels.
- The honeycomb cable pattern is worked on the back and front panels for a rich, textured look.
- The belt is worked separately and can be worn tied at the waist or left open.
Step-by-Step Instructions
Back Panel
CO 90 (110) stitches.
Row 1 (RS): K all.
Row 2 (WS): P all.
Repeat rows 1-2 for 4 more rows (total 6 rows of garter stitch edge).
Begin honeycomb cable pattern:
Row 1 (RS): K4 (edge), *C4B, C4F*, repeat from * to * until last 4 stitches, K4.
Row 2 (WS): P all.
Row 3 (RS): K all.
Row 4 (WS): P all.
Row 5 (RS): K4, *C4F, C4B*, repeat from * to * until last 4 stitches, K4.
Row 6 (WS): P all.
Repeat rows 1-6 for the cable pattern until the piece measures 20 (22) inches from the cast-on edge, ending with a WS row.
Shoulder Shaping
Next RS row: K22 (27), BO 46 (56) stitches for the back neck, K22 (27) to end. You now have two separate shoulder sections. Work each side separately.
Right Shoulder:
Continue in pattern (keeping the cable pattern as established, but only over the remaining 22 (27) stitches) for 4 more inches, ending with a WS row. Place these stitches on a holder.
Left Shoulder:
Rejoin yarn to the left shoulder stitches and work the same as the right shoulder for 4 inches, ending with a WS row. Place on a holder.
Front Panels
With RS facing, pick up and knit 22 (27) stitches along the right front edge (from the shoulder down to the bottom edge). Work in honeycomb cable pattern (starting with Row 1) for 20 (22) inches, ending with a WS row. BO all stitches loosely.
Repeat for the left front panel, picking up stitches from the bottom edge up to the shoulder.
Sleeves
With RS facing, pick up and knit 60 (70) stitches around the armhole opening (between the front and back panels). Work in stockinette stitch (K on RS, P on WS) for 12 (14) inches, decreasing 1 stitch at each end every 6 rows until 48 (56) stitches remain. BO all stitches loosely.
Finishing
Weave in all ends. Block the cardigan to shape, gently stretching the cables to open them up.
Belt
CO 10 stitches. Work in 2x2 rib (K2, P2) for 60 (70) inches or until desired length. BO in pattern. Weave in ends.
Assembly
Sew the shoulder seams. Attach the belt by threading it through the side seams at the waist level (optional) or simply tie it around the waist.
Tips for Success
- Blocking is key: Don't skip this step! Blocking opens up the cables and gives your cardigan that polished, professional look.
- Use stitch markers: Place markers at the beginning of each cable repeat to keep track of your pattern easily.
- Take your time with cables: If you're new to cabling, practice on a swatch first. The C4B and C4F are simple 4-stitch cables that are perfect for beginners.
Final Thoughts
The Drifting Dune Cocoon Cardigan is more than just a knitting project—it's a wearable hug. The textured cables, the soft drape, and the versatile belt make it a staple piece you'll reach for again and again. Whether you're a seasoned knitter or just starting your journey, this pattern is designed to be approachable and rewarding. So pour yourself a cup of tea, settle into your favorite chair, and let the soothing rhythm of the needles carry you away. Happy knitting!



