The Prismatic Basketweave Baby Blanket Free Pattern – Knit a Rainbow Heirloom
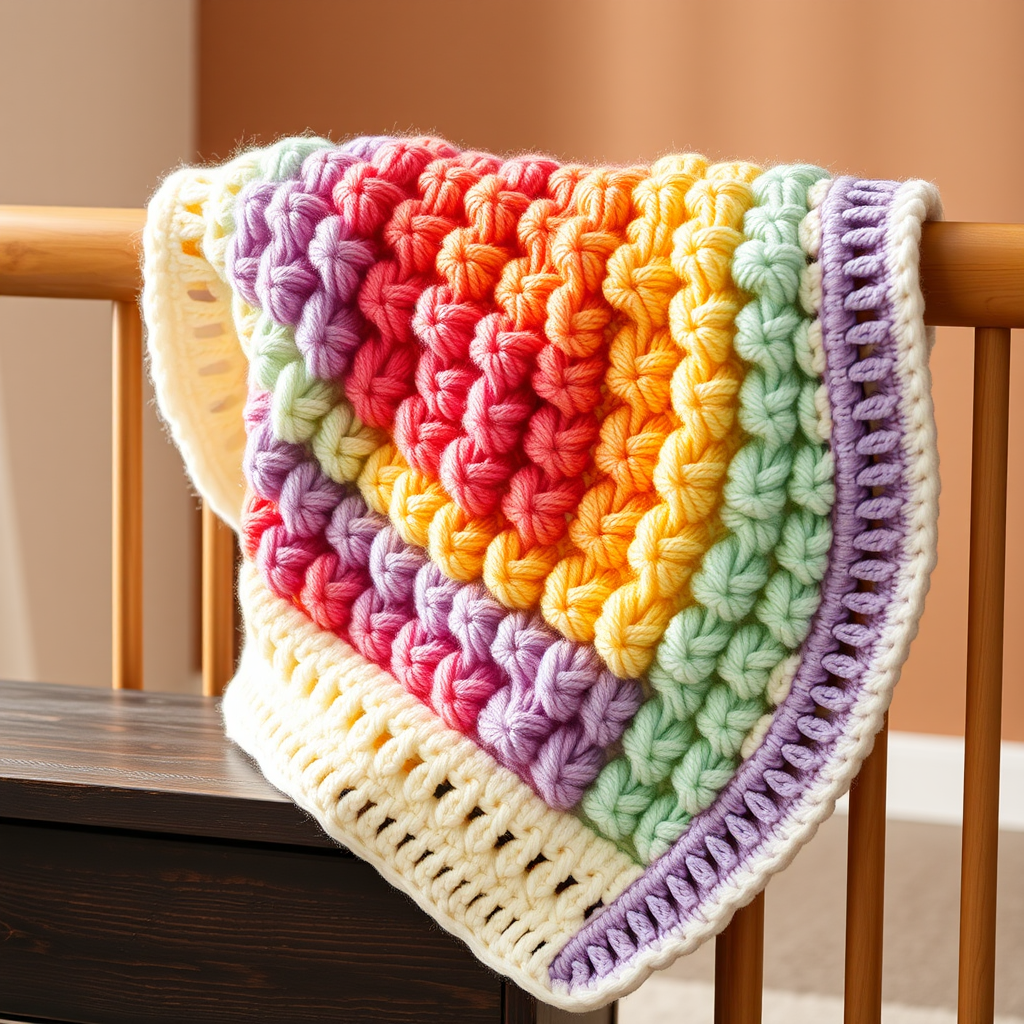
The Prismatic Basketweave Baby Blanket: A Rainbow Heirloom to Knit with Love
There's something truly magical about wrapping a new baby in a blanket made with your own two hands. The Prismatic Basketweave Baby Blanket elevates this experience into a vibrant, textured journey. This isn't just a blanket; it's a story woven in soft cotton, a kaleidoscope of color that will grow with your little one from a crib essential to a beloved cuddle buddy. The classic basketweave stitch, reimagined in a stunning rainbow gradient, creates a dimensional, plush fabric that is as beautiful to look at as it is to touch. Whether you're a seasoned knitter or a confident beginner ready for a rewarding project, this pattern is designed to be your new favorite heirloom to craft.
Materials Needed: Gathering Your Rainbow
Before you begin this colorful adventure, let's gather your supplies. The beauty of this pattern lies in its simplicity and the quality of its materials. Here’s what you'll need to create your own Prismatic masterpiece:
- Yarn: Worsted weight (#4) cotton or cotton-blend yarn in 6 colors:
- A (soft cream) – 60g
- B (buttercup yellow) – 60g
- C (coral pink) – 60g
- D (mint green) – 60g
- E (sky blue) – 60g
- F (lavender) – 60g
- Needles: US 7 (4.5 mm) circular knitting needles with a 32-inch cable, or straight needles if you prefer.
- Other: Tapestry needle for weaving in ends, scissors, and stitch markers (optional, but helpful for keeping track of sections).
Understanding Your Gauge
Gauge: 18 stitches and 26 rows = 4 inches in stockinette stitch. Gauge is crucial for a drapey, even blanket. Take a moment to knit a small swatch to ensure your tension matches. This will ensure your blanket comes out the perfect size and has the lovely, soft drape it's designed for.
Step-by-Step Instructions: Knitting Your Heirloom
This blanket is knit in one piece from the bottom up, making it a wonderfully portable project. We'll build it section by section, creating a beautiful rhythm as you go. Let's dive into the pattern.
Abbreviations
- K = knit
- P = purl
- St(s) = stitch(es)
- Rep = repeat
- RS = right side
- WS = wrong side
The Basketweave Pattern Stitch (Multiple of 12 + 2)
This is the heart of the blanket. The pattern creates a beautiful checkerboard of smooth "knit" squares and bumpy "purl" squares. Follow these rows carefully, and you'll see the magic unfold.
Row 1 (RS): K2, *P8, K4; rep from * to last 10 sts, P8, K2.
Row 2 (WS): P2, *K8, P4; rep from * to last 10 sts, K8, P2.
Row 3: K2, *P8, K4; rep from * to last 10 sts, P8, K2.
Row 4: P2, *K8, P4; rep from * to last 10 sts, K8, P2.
Row 5: K2, *P8, K4; rep from * to last 10 sts, P8, K2.
Row 6: P2, *K8, P4; rep from * to last 10 sts, K8, P2.
Row 7: K2, *P8, K4; rep from * to last 10 sts, P8, K2.
Row 8: P2, *K8, P4; rep from * to last 10 sts, K8, P2.
Row 9: K2, *K4, P8; rep from * to last 10 sts, K4, P8, K2.
Row 10: P2, *P4, K8; rep from * to last 10 sts, P4, K8, P2.
Row 11: K2, *K4, P8; rep from * to last 10 sts, K4, P8, K2.
Row 12: P2, *P4, K8; rep from * to last 10 sts, P4, K8, P2.
Row 13: K2, *K4, P8; rep from * to last 10 sts, K4, P8, K2.
Row 14: P2, *P4, K8; rep from * to last 10 sts, P4, K8, P2.
Row 15: K2, *K4, P8; rep from * to last 10 sts, K4, P8, K2.
Row 16: P2, *P4, K8; rep from * to last 10 sts, P4, K8, P2.
Color Sequence & Blanket Construction
Now that you have the stitch pattern down, let's put it all together. The blanket is built in 12 distinct sections, each 16 rows tall, following a beautiful rainbow sequence.
- Section 1: Color A (cream) – 16 rows
- Section 2: Color B (yellow) – 16 rows
- Section 3: Color C (coral) – 16 rows
- Section 4: Color D (mint) – 16 rows
- Section 5: Color E (sky blue) – 16 rows
- Section 6: Color F (lavender) – 16 rows
- Repeat the sequence once more for a total of 12 sections (192 rows).
Let's Knit! The Complete Instructions
Follow these steps from cast-on to bind-off, and you'll have a gorgeous, rainbow blanket in no time.
- Cast On: With Color A (cream), cast on 122 stitches (multiple of 12 + 2).
- Bottom Border: Knit 6 rows of garter stitch (knit every row) for a neat, sturdy bottom edge.
- Begin the Pattern: Start the basketweave pattern, working the 16-row pattern with Color A. At the end of the 16th row, switch to Color B (yellow) by tying in the new yarn at the side edge. Pro Tip: Do not cut the old yarn! Carry it up the side of the work to minimize the number of ends you'll need to weave in later.
- Continue the Rainbow: Keep working the pattern, switching colors every 16 rows according to the sequence above. Always carry the unused colors up the side edge. This creates a clean, professional finish.
- Top Border: After completing all 12 sections (192 rows), you will be at the top of the blanket. Knit 6 rows of garter stitch with the current color (which will be Color F, lavender) for the top border.
- Bind Off: Bind off all stitches loosely. This is crucial to prevent a tight, puckered edge. Weave in all ends securely with your tapestry needle.
- Finishing Touch: Optional but recommended: Block the blanket gently to even out the stitches and enhance the beautiful basketweave texture. Lay it flat to dry.
Your Finished Heirloom
Trim any loose yarn ends. Your finished Prismatic Basketweave Baby Blanket will measure approximately 30 inches wide by 36 inches long, the perfect size for a crib, stroller, or cuddle sessions on the go. The soft cotton yarn is gentle on delicate skin, and the vibrant colors are sure to stimulate and delight. This isn't just a project; it's a gift of love, time, and artistry that will be treasured for years to come. Happy knitting!



