The Serpentine Bloom Brooch Free Pattern – Crochet a Sculptural Calla Lily Pin
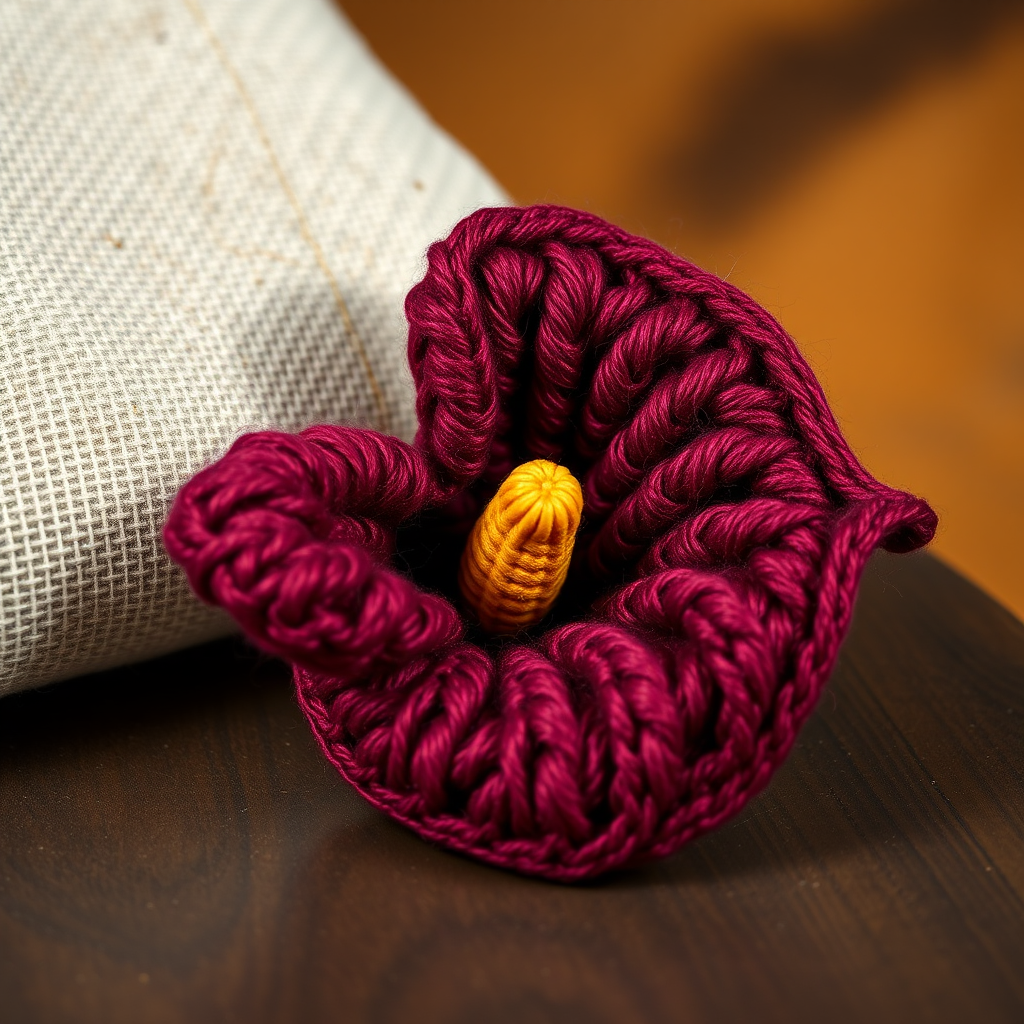
The Serpentine Bloom Brooch: A Free Crochet Pattern for a Sculptural Calla Lily Pin
Imagine wearing a piece of art that you crafted with your own hands—a brooch that captures the elegant, spiraling silhouette of a calla lily in rich, jewel-toned yarn. This free crochet pattern guides you through creating a stunning, three-dimensional flower pin that's both soft and sculptural. Whether you're looking to elevate a plain jacket, add a unique touch to a scarf, or create a heartfelt handmade gift, the Serpentine Bloom Brooch is a rewarding project that blends classic crochet techniques with a modern, wearable-art aesthetic. Let's dive in and create something beautiful together.
Materials Needed
Before you begin, gather the following supplies. This project is perfect for using up small amounts of yarn from your stash, and the total yardage is minimal—around 20 grams total.
- Yarn: Worsted weight cotton or acrylic yarn in three colors: deep burgundy (for the petal), ivory (optional, for contrast), and gold (for the spadix). Approx. 20g total.
- Crochet Hook: 3.5mm (E) crochet hook. This size helps create a tight, dense fabric that will hold the flower's shape beautifully.
- Stitch Marker: To track your rounds as you work in a spiral.
- Yarn Needle: For weaving in ends and assembling the pieces.
- Brooch Pin Back: A standard 1-inch or 1.5-inch pin back for the final assembly.
- Strong Thread or Embroidery Floss: To securely sew the pin back onto the fabric.
Gauge: Gauge is not critical for this project, but aim for a tight, dense fabric to help the flower hold its sculptural shape. Approx. 4 sc = 1 inch. If your stitches are loose, consider using a smaller hook.
Step-by-Step Instructions
This pattern is worked in continuous rounds unless otherwise stated. Use a stitch marker to track the beginning of each round. The beauty of this design is that it's built from simple single crochet increases and decreases, making it accessible to confident beginners.
Calla Lily Petal (Make 1)
This petal is worked from the bottom up, starting with a magic ring and increasing to create a wide, flat circle before shaping the trumpet.
- Round 1: Make a magic ring, ch 1, work 6 sc into ring. Pull tight to close. (6 sts)
- Round 2: 2 sc in each st around. (12 sts)
- Round 3: *Sc in next st, 2 sc in next st* repeat around. (18 sts)
- Round 4: *Sc in next 2 sts, 2 sc in next st* repeat around. (24 sts)
- Round 5: *Sc in next 3 sts, 2 sc in next st* repeat around. (30 sts)
- Round 6: *Sc in next 4 sts, 2 sc in next st* repeat around. (36 sts)
- Round 7: *Sc in next 5 sts, 2 sc in next st* repeat around. (42 sts)
- Round 8: *Sc in next 6 sts, 2 sc in next st* repeat around. (48 sts)
- Round 9: *Sc in next 7 sts, 2 sc in next st* repeat around. (54 sts)
- Round 10: *Sc in next 8 sts, 2 sc in next st* repeat around. (60 sts)
- Rounds 11-15: Sc in each st around. (60 sts) This creates the straight sides of the trumpet.
- Round 16: *Sc in next 8 sts, sc2tog* repeat around. (54 sts) Begin decreasing to shape the top.
- Round 17: *Sc in next 7 sts, sc2tog* repeat around. (48 sts)
- Round 18: *Sc in next 6 sts, sc2tog* repeat around. (42 sts)
- Round 19: *Sc in next 5 sts, sc2tog* repeat around. (36 sts)
- Round 20: *Sc in next 4 sts, sc2tog* repeat around. (30 sts)
- Round 21: *Sc in next 3 sts, sc2tog* repeat around. (24 sts)
- Round 22: *Sc in next 2 sts, sc2tog* repeat around. (18 sts)
- Round 23: *Sc in next st, sc2tog* repeat around. (12 sts)
- Round 24: Sc2tog around. (6 sts)
Fasten off, leaving a long tail (approx. 18 inches). Thread the tail through a yarn needle, weave it through the front loops of the remaining 6 stitches, and pull tight to close the top of the petal completely. Set aside.
Spadix (The Central Spike)
This is the golden, cone-shaped center of the calla lily. It's created by crocheting a small strip and rolling it into a spiral.
- Using gold yarn, ch 8.
- Work 7 sc into the second ch from hook and across. (7 sts)
- Fasten off, leaving a tail for sewing.
Shaping the Spadix: Roll the small strip tightly into a spiral, starting from one end. The rolled strip will naturally form a small cone shape. Sew the base of the spiral together with the yarn tail to secure it, ensuring the cone holds its shape. Set aside.
Assembly
Now we bring the pieces together to form the iconic calla lily silhouette.
- Position the Spadix: Place the spadix at the center of the petal's wrong side (the inside of the trumpet). The cone should point upward, toward the closed top of the petal. Sew it securely to the petal, stitching through the base of the spadix and the petal fabric. Make sure it's firmly attached.
- Fold the Petal: Carefully fold the petal around the spadix, overlapping the edges slightly to create the classic calla lily trumpet shape. The petal should wrap around the spadix with the golden spadix peeking out from the top. Adjust the overlap until you're happy with the spiral silhouette.
- Whipstitch the Edges: Using the long tail from the petal, whipstitch the overlapping edges together from the inside. This creates a seamless look on the outside. Ensure the bottom of the flower remains open—this is where the brooch pin will be attached.
- Attach the Brooch Pin: Turn the flower over. Using a strong thread or embroidery floss and a yarn needle, sew the brooch pin to the inside bottom of the flower. Stitch securely through the fabric, making several passes to ensure it's firmly attached and can support the weight of the brooch.
- Weave in All Ends: Use your yarn needle to weave in any remaining loose ends inside the flower, hiding them from view.
Finishing Touches
Your Serpentine Bloom Brooch is almost complete! The final step is to shape it beautifully.
- Shape the Petal: Gently curl the top edge of the petal outward with your fingers. This creates the graceful, flared lip of the calla lily.
- Steam Block (Optional): If you'd like to set the shape permanently, lightly steam block the brooch. Hold a steam iron or steamer a few inches away from the flower and let the steam relax the fibers. Allow it to cool completely before handling. Be careful not to flatten the texture or press down on the three-dimensional shape.
Attach your new creation to a lapel, a tote bag, a headband, or even a gift wrap ribbon. The Serpentine Bloom Brooch is a versatile accessory that adds a touch of handmade elegance to any outfit. Happy crocheting!


