The Whispering Pines Forest Canopy: A Free Knitting Pattern for a Textured, 3D Woodland Wall Hanging
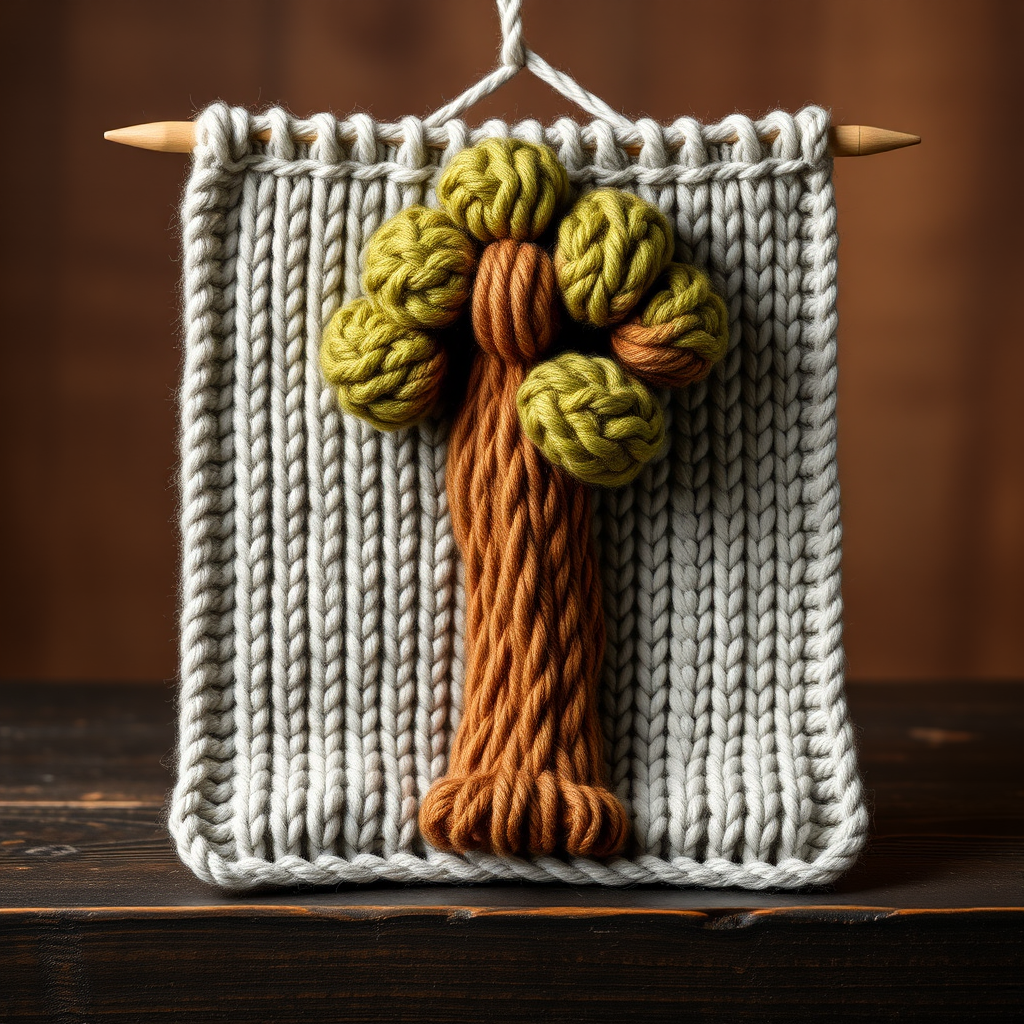
Bring the Outdoors In: Knit Your Own Whispering Pines Forest Canopy Wall Hanging
Imagine a piece of serene woodland magic, crafted by your own hands, gracing your wall. The Whispering Pines Forest Canopy is not just a knitted wall hanging; it's a textured, three-dimensional forest scene that brings a touch of cozy, boho charm to any room. With a soft, earthy palette of heather gray, warm brown, and moss green, this pattern is designed to be both inspiring and achievable for a dedicated beginner. The unique 'bubble' stitch creates a sculpted, leafy canopy that literally pops off the background, transforming a simple rectangle into a captivating work of art.
Materials Needed
Before you begin, gather the following supplies. Using the exact yarn weight and needle size is crucial for achieving the correct gauge and the beautiful, dense texture of the wall hanging.
- Yarn: Worsted weight (#4) yarn in three colors:
- Color A (Sky/Background): Light heather gray – approximately 200 yards
- Color B (Trunk): Warm brown – approximately 100 yards
- Color C (Canopy): Moss green – approximately 150 yards
- Needles & Notions:
- US Size 8 (5.0 mm) knitting needles (straight or circular for flat knitting)
- Tapestry needle (for seaming and weaving ends)
- Stitch markers (optional, but helpful for tracking bubble stitch placement)
- Gauge: 18 stitches and 24 rows = 4 inches in stockinette stitch. Always check your gauge to ensure your finished piece matches the intended dimensions.
Step-by-Step Instructions
This pattern is worked flat in three separate pieces and then assembled. The magic lies in the Bubble Stitch, which creates the 3D leaf clusters. Read through all instructions before starting.
Understanding the Bubble Stitch
The Bubble Stitch is worked over 5 stitches, but only on right-side (RS) rows. It turns 1 stitch into 5, then decreases them back to 1, forming a raised 'bubble'. Practice this on a swatch first.
Bubble Stitch (worked over 1 stitch, on RS rows only):
- Knit into the front, back, front, back, and front of the next stitch. (You now have 5 stitches on your right needle from that single stitch).
- Turn your work. Purl these 5 stitches.
- Turn your work. Knit these 5 stitches.
- Turn your work. Purl these 5 stitches.
- Turn your work. Now, using your left needle, slip the 2nd, 3rd, 4th, and 5th stitches over the 1st stitch and off the needle. (1 stitch remains on your right needle).
Piece 1: Background (Color A - Light Heather Gray)
This forms the serene sky backdrop. It is worked entirely in garter stitch (knit every row) for a flat, stable base.
- Cast on 40 stitches.
- Rows 1-60: Knit every row. (You will have 60 ridges of garter stitch on the right side).
- Bind off all stitches loosely. Set aside.
Piece 2: Tree Trunk (Color B - Warm Brown)
This is a simple, tall rectangle in stockinette stitch, with a slight taper at the top.
- Cast on 8 stitches.
- Row 1 (RS): Knit.
- Row 2 (WS): Purl.
- Repeat Rows 1-2 until the piece measures 18 inches from the cast-on edge, ending after a WS row.
- Next Row (RS - Decrease Row): K2tog, knit to the last 2 stitches, k2tog. (6 stitches remain).
- Next Row (WS): Purl.
- Bind off all stitches.
Piece 3: Canopy (Color C - Moss Green)
This is the star of the show, featuring the 3D bubble stitches. The pattern creates a staggered, organic leaf effect.
- Cast on 30 stitches.
- Row 1 (RS): Knit.
- Row 2 (WS): Purl.
- Row 3 (RS - First Bubble Row): K10, work Bubble Stitch over the next stitch, k9, work Bubble Stitch over the next stitch, k10. (2 bubbles created).
- Row 4 (WS): Purl.
- Row 5 (RS): Knit.
- Row 6 (WS): Purl.
- Row 7 (RS - Second Bubble Row): K5, work Bubble Stitch, k8, work Bubble Stitch, k8, work Bubble Stitch, k5. (3 bubbles created).
- Row 8 (WS): Purl.
- Row 9 (RS): Knit.
- Row 10 (WS): Purl.
- Repeat Rows 3-10 three more times. You will have completed a total of 4 sets of bubble rows (Rows 3, 7, 3, 7, 3, 7, 3, 7). The final row should be a WS row.
- Bind off all stitches.
Assembly: Bringing the Forest to Life
This is where the wall hanging takes its final, dimensional form.
- Position the Trunk: Lay the background piece flat. Center the tree trunk vertically on the background. The bottom of the trunk should be about 2 inches from the bottom edge of the background. Pin in place.
- Sew the Trunk: Using a tapestry needle and Color B yarn, sew the trunk securely to the background along all four edges. Use a whip stitch or mattress stitch for a neat finish.
- Position the Canopy: Place the canopy piece above the trunk. The bottom edge of the canopy should overlap the top of the trunk by about 1 inch. Center the canopy horizontally. Pin in place.
- Sew the Canopy (Critical for 3D effect): Using a tapestry needle and Color C yarn, sew the canopy to the background only along its bottom edge. Do not sew the sides or the top. This leaves the canopy free to curl and stand away from the background, creating the beautiful 3D, sculpted effect.
- Create the Hanging Loop: Cut a 12-inch length of Color A yarn. Fold it in half. Twist the two strands together tightly until they begin to kink, then let them fold over themselves to form a cord. Tie a knot at the open end. Sew the knotted ends securely to the top back corners of the background piece.
- Final Touches: Weave in all remaining yarn ends on the back of the piece. Gently fluff and shape the bubble stitches with your fingers to enhance the 3D leaf effect.
Your Whispering Pines Forest Canopy is now ready to hang. Enjoy the serene, tactile beauty you've created!


