Whimsical Woodland Bunting Free Pattern – A Knitted Acorn & Leaf Garland
Whimsical Woodland Bunting Free Pattern – A Knitted Acorn & Leaf Garland
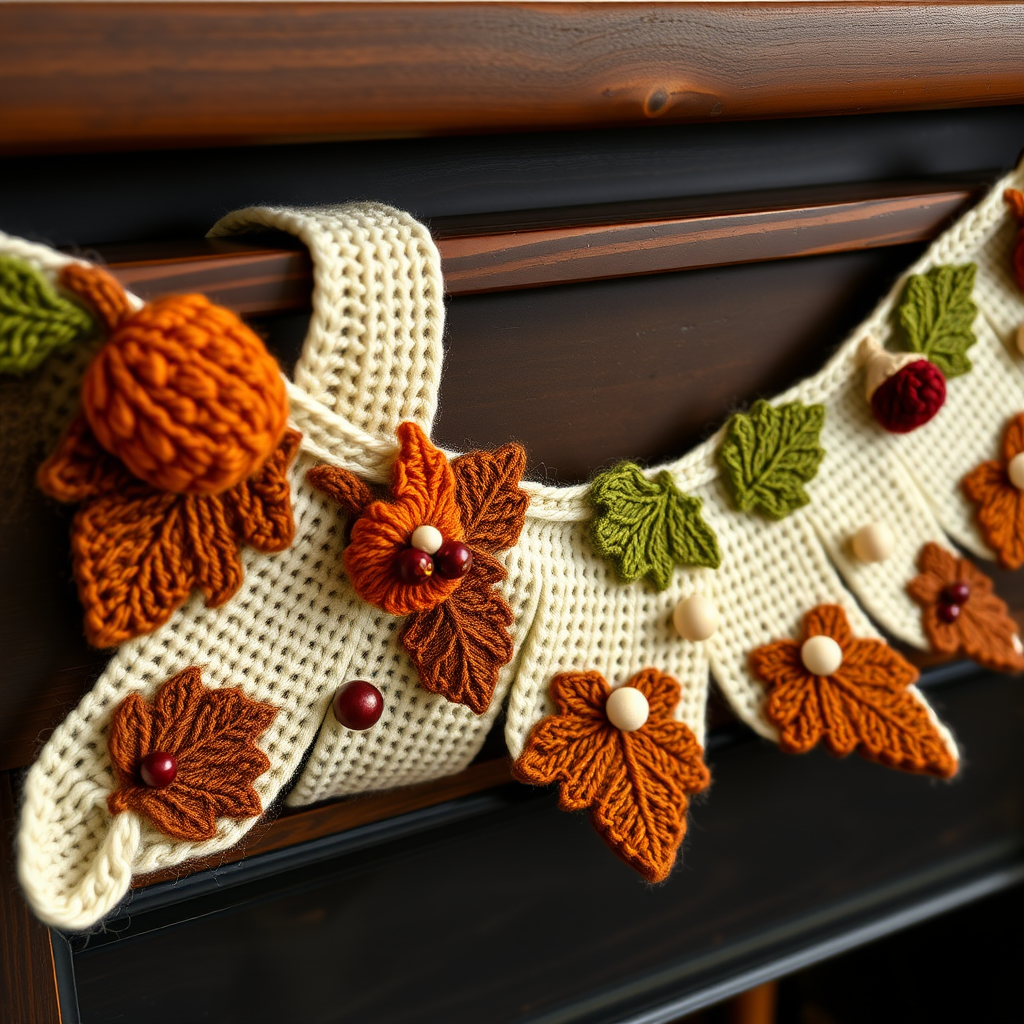
Bring the charm of a forest floor to your mantel with this knitted bunting of acorns, oak leaves, and textured berries. Each piece is worked flat and sewn together, creating a cozy, nature-inspired garland perfect for year-round decor. This pattern is designed with beginners in mind—if you can knit, purl, increase, and decrease, you can create this delightful woodland garland. The earthy palette of warm browns, moss greens, rust oranges, and deep burgundy will add a touch of autumn coziness to any room, no matter the season.
This bunting is made of three repeating motifs: an acorn, an oak leaf, and a berry cluster. Each motif is knitted flat and then sewn onto a simple i-cord or knitted ribbon. The result is a textured, handmade garland that looks like it was plucked straight from a storybook forest. Let's get started!
Materials Needed
Before you begin, gather the following supplies. All yarn is worsted weight, which is easy to work with and widely available.
- Yarn: Worsted weight yarn in earthy tones:
- Acorn brown (for acorn bodies)
- Rust orange (for acorn caps)
- Moss green (for oak leaves)
- Cream (for the ribbon and leaf veins)
- Deep burgundy (for berry clusters)
- Needles: US 7 (4.5 mm) knitting needles
- Notions: Tapestry needle for sewing and weaving in ends, scissors
- Gauge: 20 stitches and 28 rows = 4 inches in stockinette stitch (gauge is not critical for this project, but it helps to be consistent)
Step-by-Step Instructions
This pattern is broken down into three motif sections, followed by assembly. Read through each section carefully before starting. All motifs are worked flat (back and forth on straight needles).
Acorn Motif (Make 5)
The acorn is worked in two parts: the body (in brown) and the cap (in rust orange). The cap is picked up and knitted directly onto the cast-on edge of the body.
Acorn Body (Brown Yarn):
- Cast on 6 stitches.
- Row 1 (RS): Knit all stitches.
- Row 2: Purl all stitches.
- Row 3: K1, m1, k4, m1, k1 (8 stitches). (Note: m1 = make one. Lift the bar between stitches and knit it through the back loop to avoid a hole.)
- Row 4: Purl all stitches.
- Row 5: K1, m1, k6, m1, k1 (10 stitches).
- Rows 6-10: Work in stockinette stitch (knit on RS, purl on WS) for 5 rows.
- Row 11: K2tog, k6, k2tog (8 stitches). (Note: k2tog = knit two together, a right-leaning decrease.)
- Row 12: Purl all stitches.
- Row 13: K2tog, k4, k2tog (6 stitches).
- Row 14: Purl all stitches.
- Row 15: K2tog, k2, k2tog (4 stitches).
- Row 16: Purl all stitches.
- Row 17: K2tog, k2tog (2 stitches).
- Row 18: K2tog, then fasten off by pulling the yarn through the last loop. This forms the acorn body.
Acorn Cap (Rust Orange Yarn):
- With the right side of the acorn body facing you, use the rust orange yarn to pick up and knit 6 stitches along the cast-on edge (the flat bottom of the acorn).
- Work 2 rows in garter stitch (knit all stitches on both sides).
- Bind off all stitches loosely.
- Sew the cap over the top of the acorn body, folding it slightly so it cups the top. Weave in all ends securely.
Oak Leaf Motif (Make 5)
The oak leaf is a simple pointed shape created with increases and decreases. A cream center vein is embroidered on afterward for detail.
- Using moss green yarn, cast on 3 stitches.
- Row 1 (RS): K1, m1, k1, m1, k1 (5 stitches).
- Row 2: Purl all stitches.
- Row 3: K2, m1, k1, m1, k2 (7 stitches).
- Row 4: Purl all stitches.
- Row 5: K3, m1, k1, m1, k3 (9 stitches).
- Row 6: Purl all stitches.
- Row 7: K4, m1, k1, m1, k4 (11 stitches).
- Row 8: Purl all stitches.
- Row 9: K5, m1, k1, m1, k5 (13 stitches).
- Row 10: Purl all stitches.
- Row 11: K2tog, k9, k2tog (11 stitches).
- Row 12: Purl all stitches.
- Row 13: K2tog, k7, k2tog (9 stitches).
- Row 14: Purl all stitches.
- Row 15: K2tog, k5, k2tog (7 stitches).
- Row 16: Purl all stitches.
- Row 17: K2tog, k3, k2tog (5 stitches).
- Row 18: Purl all stitches.
- Row 19: K2tog, k1, k2tog (3 stitches).
- Row 20: Purl all stitches.
- Row 21: K2tog, k1 (2 stitches).
- Row 22: K2tog, fasten off. This creates a pointed leaf shape.
Adding the Vein: Using a tapestry needle and a length of cream yarn, embroider a straight line down the center of the leaf from the base to the tip. Use a simple running stitch or backstitch. Weave in ends.
Berry Cluster Motif (Make 4)
Each berry cluster is made of three small berries knitted separately and then sewn together at the base. French knots add texture.
Single Berry (Make 3 per cluster, so 12 total):
- Using deep burgundy yarn, cast on 5 stitches.
- Row 1 (RS): Knit all stitches.
- Row 2: Purl all stitches.
- Row 3: K1, m1, k3, m1, k1 (7 stitches).
- Row 4: Purl all stitches.
- Row 5: K1, m1, k5, m1, k1 (9 stitches).
- Rows 6-8: Work in stockinette stitch (knit RS, purl WS) for 3 rows.
- Row 9: K2tog, k5, k2tog (7 stitches).
- Row 10: Purl all stitches.
- Row 11: K2tog, k3, k2tog (5 stitches).
- Row 12: Purl all stitches.
- Row 13: K2tog, k1, k2tog (3 stitches).
- Row 14: Purl all stitches.
- Row 15: K2tog, k1 (2 stitches).
- Row 16: K2tog, fasten off. This makes a small berry.
Assembling the Cluster: Sew the three berries together at their bases (the cast-on edges) to form a cluster. Using cream yarn, embroider tiny French knots on the berries for texture. (French knot: Bring the needle up through the fabric, wrap the yarn around the needle 2-3 times, insert the needle back down close to where it came up, and pull through gently.)
Assembly
Now that you have all your motifs (5 acorns, 5 leaves, and 4 berry clusters), it's time to create the ribbon and sew everything together.
Knitted Ribbon
- Using cream yarn, cast on 5 stitches.
- Knit in garter stitch (knit every row) until the ribbon measures 60 inches (or your desired length).
- Bind off all stitches loosely.
Attaching the Motifs
- Lay the ribbon flat. Arrange your motifs along the ribbon, alternating them: acorn, leaf, berry cluster, acorn, leaf, berry cluster, etc. Space them evenly, leaving a few inches between each.
- Using a tapestry needle and matching yarn, sew each motif securely onto the ribbon. Sew through the back of the motif and into the ribbon, making sure the stitches are hidden.
- Weave in all ends carefully on the back side of the ribbon.
Finishing
- Attach small loops of yarn at each end of the ribbon for hanging. To make a loop, cut a 6-inch piece of cream yarn, fold it in half, and sew the ends to the back of the ribbon end.
- Block gently to shape. To block, lightly mist the bunting with water and lay it flat to dry, gently shaping the motifs. This helps the pieces lie flat and look polished.
- Hang your bunting across a mantel, bookshelf, or doorway and enjoy your handmade woodland decor!
This pattern is a wonderful way to practice increases, decreases, and simple seaming. The repetitive motifs make it a relaxing project, and the finished result is a beautiful, heirloom-quality garland that celebrates the cozy beauty of the forest. Happy knitting!


