Whirlwind Twisted Chain Beanie Free Pattern – Knit a Cozy Spiral Hat
Whirlwind Twisted Chain Beanie Free Pattern – Knit a Cozy Spiral Hat
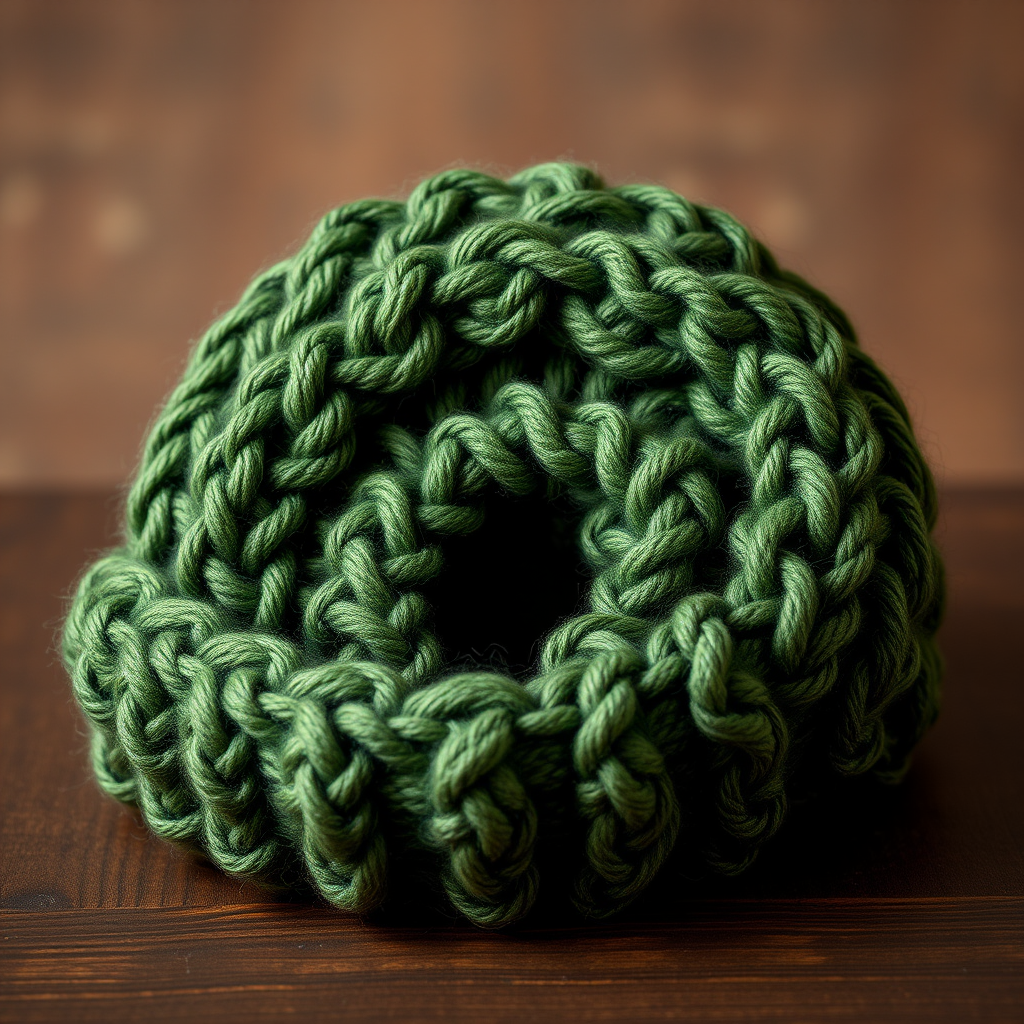
Wrap your head in a mesmerizing spiral of twisted cables with this uniquely textured beanie. The chunky yarn and dramatic chain-link design make it a statement piece that's both warm and wonderfully tactile. This free knitting pattern is perfect for intermediate beginners who want to try cable knitting without complicated charts—the twisted chain pattern is created with just two simple cable stitches, and the super bulky yarn means you'll have a finished hat in just a few cozy evenings. Let's dive in!
Materials Needed
Before you begin, gather these supplies to ensure a smooth knitting experience:
- Yarn: Super bulky weight yarn (approx. 150-180 yards), e.g., Lion Brand Wool-Ease Thick & Quick or any similar super bulky yarn. A rich, deep color like forest green, burgundy, or navy will showcase the cable texture beautifully.
- Needles: US 11 (8.0 mm) 16-inch circular knitting needle AND US 11 (8.0 mm) double-pointed needles (or size needed to obtain gauge). The circular needle is used for the body, and you'll switch to DPNs for the crown decreases.
- Cable needle: A small cable needle (or a spare DPN) for the C4F and C4B stitches.
- Stitch marker: One removable marker to indicate the beginning of the round.
- Tapestry needle: For weaving in ends and finishing the crown.
- Scissors
Gauge: 12 stitches and 16 rows = 4 inches in stockinette stitch. Always knit a gauge swatch to ensure your hat fits perfectly!
Step-by-Step Instructions
This pattern is worked in the round from the bottom up. The finished hat fits an Adult Medium (21-23 inch head circumference) with a relaxed, slouchy fit. Let's get started!
Abbreviations
- CO: cast on
- K: knit
- P: purl
- C4F: slip 2 stitches to cable needle, hold to front, knit next 2 stitches, then knit 2 stitches from cable needle
- C4B: slip 2 stitches to cable needle, hold to back, knit next 2 stitches, then knit 2 stitches from cable needle
- K2tog: knit 2 stitches together
- P2tog: purl 2 stitches together
- St(s): stitch(es)
- Rnd(s): round(s)
Ribbing
CO 72 sts. Join in the round, being careful not to twist. Place marker for beginning of round.
Rnds 1-8: *K2, P2; repeat from * to end of round. This creates a snug, stretchy brim that will hold the hat in place. Knit all 8 rounds of ribbing.
Body (Twisted Chain Pattern)
Now we'll create the dramatic spiral chain effect. The pattern alternates between cable twists and plain knit rounds to build the chain-link texture.
Rnd 9: *C4F, C4B; repeat from * to end of round. (This creates the first twist of the chain)
Rnds 10-12: Knit all sts. These plain knit rounds allow the cables to relax and form the chain link.
Rnd 13: *C4B, C4F; repeat from * to end of round. (This creates the second twist, forming the chain link)
Rnds 14-16: Knit all sts.
Repeat Rnds 9-16 two more times (total of 3 full chain-link sections). After completing the third section, you'll have a beautiful, spiraling cable pattern that wraps around the entire hat.
Crown Decreases
Now we'll shape the top of the hat. Switch to double-pointed needles when the circular needle becomes too long for the decreasing stitch count. The decreases are worked in a simple spiral pattern to create a neat, gathered crown.
Rnd 1: *K6, K2tog; repeat from * to end of round. (63 sts)
Rnd 2: Knit all sts.
Rnd 3: *K5, K2tog; repeat from * to end of round. (54 sts)
Rnd 4: Knit all sts.
Rnd 5: *K4, K2tog; repeat from * to end of round. (45 sts)
Rnd 6: *K3, K2tog; repeat from * to end of round. (36 sts)
Rnd 7: *K2, K2tog; repeat from * to end of round. (27 sts)
Rnd 8: *K1, K2tog; repeat from * to end of round. (18 sts)
Rnd 9: *K2tog; repeat from * to end of round. (9 sts)
Cut yarn, leaving a long tail (about 12 inches). Thread tail through remaining 9 sts, pull tight, and secure. Weave in all ends with your tapestry needle.
Finishing Touches
Once you've woven in all ends, give your beanie a gentle block. You can either wet block it (soak in lukewarm water, gently squeeze out excess, and lay flat to dry) or simply steam block it with an iron held above the surface. Blocking will help the cables relax and look their best. Flip the brim up slightly for that classic, cozy look, and you're done!
This Whirlwind Twisted Chain Beanie is a fantastic project for practicing cable techniques while creating a stunning, wearable accessory. The chunky yarn makes it a quick knit, and the dramatic texture is sure to turn heads. Happy knitting!


