Whispering Pines Forest Pillow Free Pattern – Textured Knit Cushion with Cable Branches
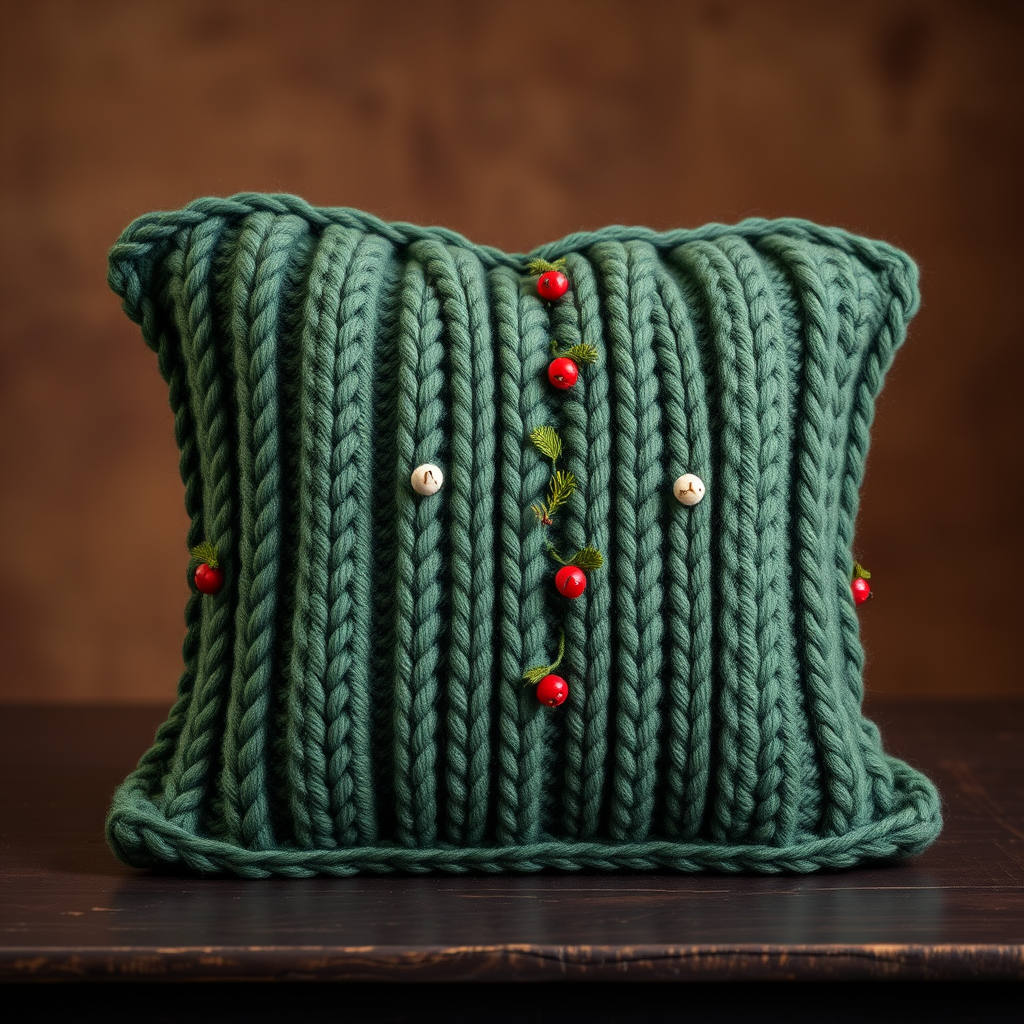
Bring the Forest Home: The Whispering Pines Pillow Pattern
Imagine curling up on your sofa with a cup of tea, surrounded by the quiet, calming energy of a pine forest. With the Whispering Pines Forest Pillow, you can bring that serene atmosphere directly into your living space. This richly textured knit cushion features bold, twisted cable branches that mimic the trunks of towering pines, creating a statement piece that blends rustic charm with modern comfort. This pattern is perfect for intermediate knitters ready to tackle their next favorite project—and the result is a plush, 16-inch square of pure coziness that will be the envy of every guest.
In this comprehensive guide, we'll walk you through every step, from gathering your materials to the final invisible seam. By the end, you'll have a beautiful, handmade pillow that adds a touch of woodland magic to any room. Let's get those needles clicking!
Materials Needed: Your Knitting Toolkit
Before you cast on, gather these essential supplies. Having everything ready will make your knitting session smooth and enjoyable.
- Yarn: Worsted weight yarn in three earthy tones:
- 250g of Forest Green (main color)
- 100g of Moss (for optional embellishments)
- 50g of Cream (for optional embellishments)
- Needles: US 8 (5mm) knitting needles. You can use straight or circular needles, whichever you prefer.
- Cable Needle: A small cable needle is essential for creating those beautiful twisted branches.
- Tapestry Needle: For weaving in ends and sewing the pillow together.
- Pillow Insert: A 16-inch square pillow form to give your creation its plush shape.
Gauge: 18 stitches and 24 rows = 4 inches in stockinette stitch. Always check your gauge to ensure your pillow finishes at the correct size!
Step-by-Step Instructions: Knitting Your Forest
This pattern is broken down into manageable sections. We'll start with the front panel, which features the stunning cable work, then move to the simple back panel, and finally assemble everything together.
Abbreviations You'll Need
- K: Knit
- P: Purl
- C4F: Slip 2 stitches to cable needle, hold in front, knit 2, knit 2 from cable needle.
- C4B: Slip 2 stitches to cable needle, hold in back, knit 2, knit 2 from cable needle.
- K2tog: Knit 2 together (decrease).
- M1: Make one (increase).
Front Panel (Make 1)
This is where the magic happens. The front panel features four vertical columns of twisted cables, separated by purl stitches and framed with a sturdy garter stitch border.
Cast On & Border:
With your forest green yarn, cast on 80 stitches.
Rows 1-4: Knit all rows (this creates a garter stitch edge that will prevent curling).
Setting Up the Cable Pattern:
Row 5 (Right Side): K4, P2, K8, P2, K4, P2, K8, P2, K4, P2, K8, P2, K4, P2, K8, P2, K4. (Total: 80 stitches). This row establishes the pattern: a 4-stitch garter border, a 2-stitch purl ditch, an 8-stitch cable panel, and so on.
Row 6 and all even rows (Wrong Side): Knit the knit stitches and purl the purl stitches as they appear. This means you'll knit the knits and purl the purls to maintain the ribbed texture between cables.
First Cable Twist:
Row 7: K4, P2, C4F, C4B, P2, K4, P2, C4F, C4B, P2, K4, P2, C4F, C4B, P2, K4, P2, C4F, C4B, P2, K4.
Tip: The C4F and C4B are worked over the 8 knit stitches of each cable panel. This creates a beautiful braided rope effect.
Rows 9-12: Repeat Rows 5 and 6 (Knit the knits, purl the purls).
Second Cable Twist (Opposite Direction):
Row 13: K4, P2, C4B, C4F, P2, K4, P2, C4B, C4F, P2, K4, P2, C4B, C4F, P2, K4, P2, C4B, C4F, P2, K4.
Note: By alternating the direction of the cables, you create a more organic, branch-like texture.
Rows 15-18: Repeat Rows 5 and 6.
Repeat the Pattern:
Continue repeating Rows 7 through 18 until your panel measures 16 inches from the cast-on edge. Be sure to end on a Row 6 or Row 18 (a wrong-side row) to ensure your border is symmetrical.
Finishing Border:
Final 4 Rows: Knit all rows (garter stitch) to match the bottom edge.
Bind off loosely. Weave in the yarn ends with your tapestry needle.
Back Panel (Make 1)
The back panel is wonderfully simple, providing a smooth contrast to the textured front.
Cast On: With forest green yarn, cast on 80 stitches.
Work in Stockinette Stitch: Knit the right side rows and purl the wrong side rows until the panel measures 16 inches from the cast-on edge.
Bind Off: Bind off loosely and weave in the ends.
Assembly: Bringing It All Together
Now for the satisfying part—watching your pillow take shape!
- Sew Three Sides: Place the front and back panels with right sides together. Using your tapestry needle and a length of forest green yarn, sew three sides closed using a mattress stitch or a simple whip stitch. Leave one side completely open.
- Turn Right Side Out: Carefully turn the cover right side out through the open side. Use a blunt object (like a knitting needle) to gently push out the corners.
- Insert the Pillow Form: Gently fold or roll your 16-inch pillow insert and slide it into the cover. Adjust it so it fills the corners nicely.
- Sew the Final Side: Tuck the raw edges of the open side inward. Using an invisible seam (ladder stitch), sew the fourth side closed. Weave in all remaining ends.
Optional Embellishment: Adding Woodland Charm
To truly make this pillow your own, add a touch of whimsy with the moss and cream yarn. Between the cable columns, you can embroider small pine sprigs and berries.
- Pine Needles: Use the moss yarn and a simple backstitch to create small, angled lines that radiate outward like pine needles.
- Berries: Use the cream yarn and French knots to create tiny clusters of berries at the base of your embroidered sprigs.
This simple addition adds a pop of color and a handcrafted detail that elevates the entire piece.
Your Whispering Pines Forest Pillow is now complete! This textured, cozy cushion is more than just home decor; it's a piece of art you created with your own hands. It's perfect for adding warmth to a reading nook, a bedroom, or as a thoughtful, handmade gift. Enjoy the quiet comfort of your very own pine forest, one stitch at a time.


