Aurora Dune Shawl Free Pattern – Knit a Shifting Gradient Desert Wrap

The Aurora Dune Shawl: A Free Knitting Pattern for a Desert Sunset Wrap
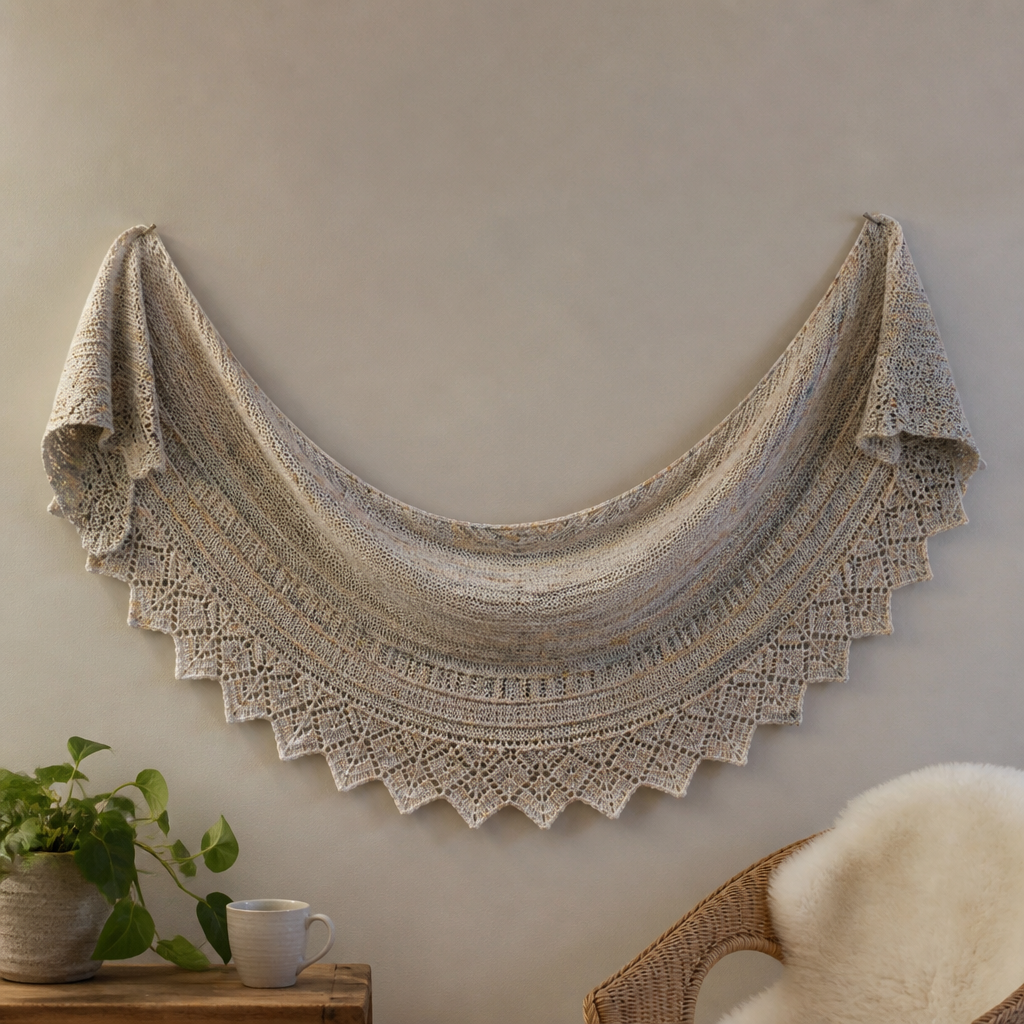
Imagine wrapping yourself in the warm, shifting hues of a desert sunset. The Aurora Dune Shawl is a crescent-shaped knitting project that captures the essence of rolling sand dunes through a mesmerizing gradient of burnt orange, dusty rose, and deep terracotta. This textured slip-stitch wrap is not just an accessory—it's a wearable piece of art that brings cozy, earthy warmth to any outfit.
Whether you're a seasoned knitter looking for a meditative project or a confident beginner ready to expand your skills, this pattern offers a rewarding experience. The slip-stitch ridges create a dense, woven-like fabric that's both warm and visually striking. Best of all, this pattern is completely free and designed to be approachable, with clear instructions that guide you from the first cast-on to the final blocking.
Why You'll Love This Shawl
This isn't just another shawl pattern. The Aurora Dune Shawl stands out for its unique construction and artistic color transitions. Worked from the top center down, the shawl grows symmetrically on both sides, forming a graceful crescent shape. The slip-stitch pattern adds a subtle diagonal texture that mimics wind-blown sand, while the three-color gradient creates a stunning ombre effect that's perfect for showing off your favorite worsted weight yarns.
Materials Needed
Before you begin, gather the following materials. The beauty of this pattern is that it uses accessible, worsted weight yarn, making it both affordable and quick to knit.
Yarn
- Color A (Burnt Orange): Approximately 130g of worsted weight yarn
- Color B (Dusty Rose): Approximately 135g of worsted weight yarn
- Color C (Deep Terracotta): Approximately 135g of worsted weight yarn
Total yarn needed: approximately 400g. A great choice is Lion Brand Wool-Ease or any similar worsted weight yarn that offers good stitch definition.
Needles
- US 8 (5mm) circular knitting needle with a 32-inch cable. The long cable is essential to accommodate the growing number of stitches as the shawl expands.
Additional Tools
- Stitch markers (optional, but helpful for tracking pattern repeats)
- Tapestry needle for weaving in ends
- Blocking mats and pins for finishing
Gauge
18 stitches and 24 rows = 4 inches in stockinette stitch (blocked). While gauge isn't critical for a shawl, matching it will ensure your finished piece has the intended drape and dimensions.
Understanding the Pattern Structure
This shawl is worked from the top center down, increasing on both sides to form a crescent shape. The slip-stitch pattern creates a dense, warm fabric with beautiful texture. Don't be intimidated by the slip-stitch technique—it's simple and repetitive, making this a perfect project for relaxing knitting sessions.
Abbreviations
- CO: cast on
- K: knit
- P: purl
- sl1: slip 1 stitch purlwise
- yo: yarn over
- k2tog: knit 2 together (note: this pattern doesn't use k2tog, but it's good to know for other projects)
- RS: right side
- WS: wrong side
Step-by-Step Instructions
Follow these detailed instructions carefully, and you'll have a beautiful Aurora Dune Shawl in no time. The pattern is broken down into manageable sections: setup, main pattern, color changes, and finishing.
Setup: Casting On and Foundation Rows
Begin by casting on 3 stitches. This small starting point will quickly grow into the full shawl.
Row 1 (RS): K1, yo, k1, yo, k1 (5 stitches)
Row 2 (WS): K2, p1, k2
Row 3 (RS): K2, yo, k1, yo, k2 (7 stitches)
Row 4 (WS): K2, p3, k2
Row 5 (RS): K2, yo, k3, yo, k2 (9 stitches)
Row 6 (WS): K2, p5, k2
After completing Row 6, you'll have 9 stitches on your needle. The garter stitch edges (knit stitches at the beginning and end of each row) create a neat, stable border that will frame your shawl beautifully.
Begin Slip-Stitch Pattern
Now you'll start the textured slip-stitch pattern that gives the Aurora Dune Shawl its distinctive look. This pattern is worked over the 9 stitches you've established, with increases happening on every right-side row.
Row 7 (RS): K2, yo, *sl1, k1* repeat from * to * until 2 stitches remain, yo, k2 (11 stitches)
Row 8 (WS): K2, purl all stitches until 2 stitches remain, k2
Row 9 (RS): K2, yo, *k1, sl1* repeat from * to * until 2 stitches remain, yo, k2 (13 stitches)
Row 10 (WS): K2, purl all stitches until 2 stitches remain, k2
Important tip: When you see "sl1," you're slipping the stitch as if to purl, with the yarn in back (on RS rows) or in front (on WS rows). This creates the elongated, woven-looking stitches that form the dune texture.
Increase Rows: Growing Your Shawl
Now that you've established the pattern, you'll repeat Rows 7-10 to grow your shawl. The key to the crescent shape is the yarn over increases on every right-side row.
Repeat Rows 7-10, but on every RS row, work a yo immediately after the first k2 and before the last k2. This increases the stitch count by 2 each RS row.
Here's how this works in practice:
- You'll always start each RS row with: K2, yo
- Then work the slip-stitch pattern across the middle stitches
- End each RS row with: yo, k2
On wrong-side rows, simply knit the first 2 stitches, purl across until 2 stitches remain, and knit the last 2 stitches. The yarn overs from the previous row are purled as regular stitches, creating small decorative holes along the edges that add to the shawl's charm.
Pro tip: Place a stitch marker after the first 2 stitches and before the last 2 stitches. This will help you remember where to place your yarn overs without counting.
Color Changes: Creating the Desert Gradient
The magic of the Aurora Dune Shawl comes from its beautiful color progression. Follow this schedule to achieve the desert sunset effect:
- Color A (Burnt Orange): Work for the first 30 rows of the pattern (after the setup rows). This vibrant color forms the top edge of the shawl.
- Color B (Dusty Rose): Switch to this soft, romantic color and work for the next 40 rows. The transition creates a beautiful blending effect.
- Color C (Deep Terracotta): Switch to this rich, earthy tone and work for the remaining 50 rows, or until the shawl reaches your desired length.
How to know when you're done: The finished shawl should measure approximately 60 inches across the top edge. You can check this by laying your work flat and measuring from one corner to the other along the straight top edge.
Changing colors: When switching colors, do so at the beginning of a right-side row. Simply drop the old color and start knitting with the new one, leaving a tail of about 6 inches to weave in later. Don't worry about carrying yarn up the sides—this shawl is worked in sections, so you'll weave in ends at the end.
Edging: The Perfect Finish
After your final pattern row, it's time to add a simple, elegant border that frames your work beautifully.
Work 4 rows of garter stitch (knit every row) in Color C. This creates a neat, textured edge that complements the slip-stitch pattern without competing with it.
After completing the 4 garter stitch rows, bind off loosely. A loose bind-off is crucial for a shawl—it ensures the edge remains stretchy and doesn't pucker. You can use a standard bind-off but work it loosely, or use a stretchy bind-off method like the "knit two together through back loop" technique for extra give.
Finishing: Weaving and Blocking
The final steps are what transform your knitting from a pile of stitches into a beautiful, polished shawl.
Weave in all ends using a tapestry needle. Take your time with this step—secure ends by weaving them through the wrong side of the work, changing direction at least once to ensure they stay put.
Block the shawl to open up the stitches and even out the texture. Here's how:
- Soak the shawl in lukewarm water with a gentle wool wash for 15-20 minutes.
- Gently squeeze out excess water—never wring or twist, as this can felt the yarn.
- Lay the shawl flat on a clean towel and roll it up to remove additional moisture.
- Place the shawl on blocking mats and pin it to shape. The top edge should be straight, while the bottom edge forms a gentle curve.
- Allow it to dry completely, which may take 24-48 hours depending on humidity.
Once dry, unpin and enjoy your beautiful Aurora Dune Shawl!
Tips for Success
- Count your stitches regularly: Especially after the increase rows, make sure you have the correct number of stitches before proceeding.
- Use lifelines: If you're worried about making mistakes, thread a lifeline (a piece of scrap yarn) through your stitches every 10-20 rows. If you need to rip back, you'll have a safe point to return to.
- Keep your tension consistent: The slip-stitch pattern looks best with even tension. Try to keep your yarn overs loose enough to be comfortable but not sloppy.
- Trust the process: The shawl may look small and unimpressive at first, but as you add rows and colors, it will transform into a stunning crescent shape.
Customization Ideas
While the burnt orange, dusty rose, and deep terracotta palette is stunning, don't be afraid to make this pattern your own:
- Change the colors: Try ocean blues and teals, forest greens, or even a monochromatic gradient from light to dark.
- Adjust the length: Work more or fewer rows in each color to change the proportions of the gradient.
- Add fringe: For a boho look, add fringe to the bottom edge after blocking.
- Use different yarn weights: While worsted weight is specified, you could use DK or aran weight yarn with adjusted needle sizes for a different drape.
Final Thoughts
The Aurora Dune Shawl is more than just a knitting pattern—it's an invitation to slow down, enjoy the rhythm of the needles, and create something beautiful with your own hands. The slip-stitch texture is meditative to work, and watching the colors shift from burnt orange to dusty rose to deep terracotta is deeply satisfying.
Whether you're knitting this for yourself or as a gift for someone special, the finished shawl will be a treasured piece that brings warmth and artistic beauty to any moment. So grab your yarn, settle into your favorite chair, and let the desert sunset inspire your next knitting adventure.
Happy knitting!