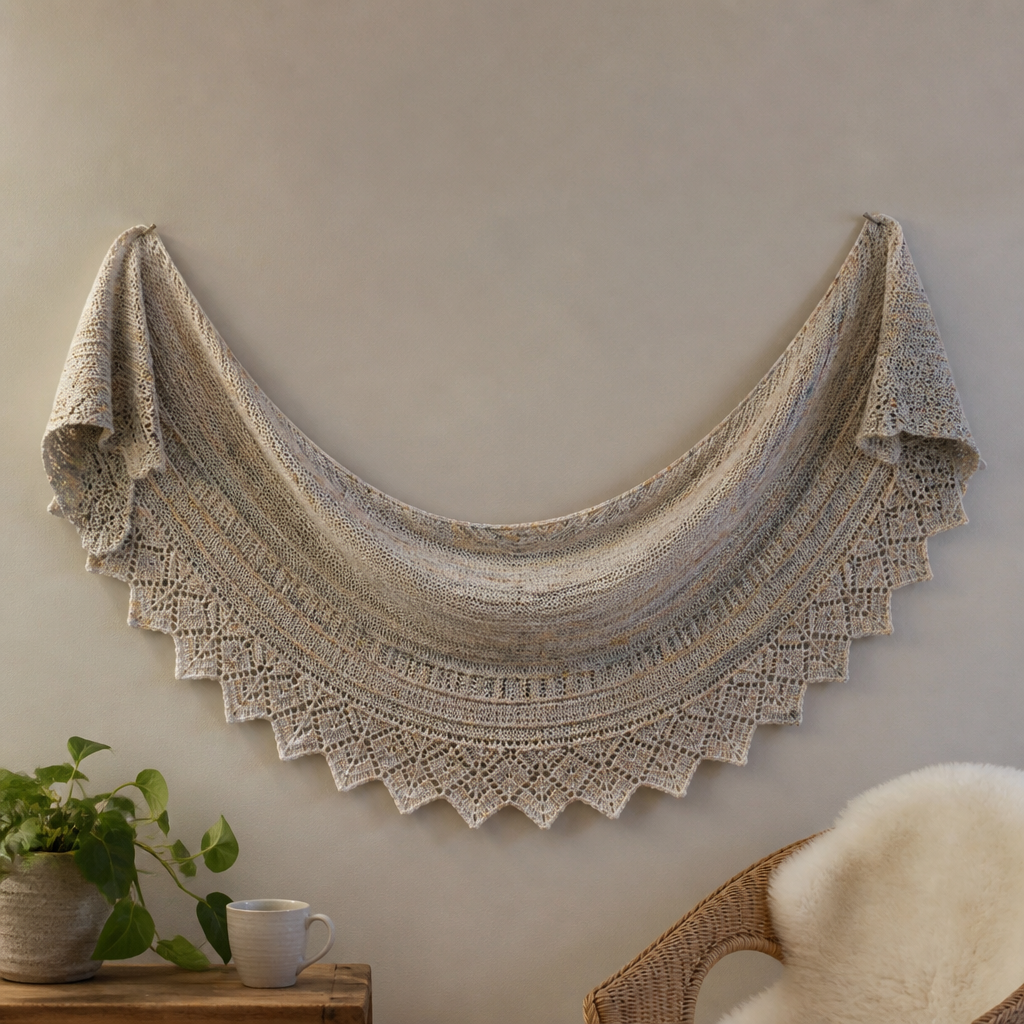
Aurora Dune Wrap Free Knitting Pattern

The Aurora Dune Wrap: A Beginner-Friendly Mosaic Knitting Adventure
Imagine wrapping yourself in the shifting colors of a desert sunset—warm sand melting into rich terracotta, then deepening into twilight purple. That's the magic of the Aurora Dune Wrap, a stunning gradient knit shawl that combines modern mosaic techniques with timeless, cozy texture. Despite its intricate, woven appearance, this pattern is surprisingly accessible, making it the perfect next project for confident beginners ready to explore colorwork.
This crescent-shaped wrap is worked flat from the top down, using simple slipped stitches and two-color rows to create a mesmerizing geometric pattern of diagonal lines and subtle diamonds. The result is a dense, drapey fabric that feels luxurious and looks far more complex than it actually is. Best of all, this free pattern uses just three colors of worsted weight yarn, making it an affordable and rewarding weekend project.
Materials Needed
Before you cast on, gather these simple supplies:
- Yarn: Worsted weight yarn in 3 colors:
- Color A (sand): 150g (approximately 300 yards)
- Color B (terracotta): 150g (approximately 300 yards)
- Color C (deep purple): 100g (approximately 200 yards)
- Needle: US 8 (5mm) circular knitting needle, 32 inches long (the long cord is essential to hold the increasing number of stitches).
- Gauge: 18 stitches and 24 rows = 4 inches in stockinette stitch. Gauge is important for achieving the correct drape and size, so take a moment to swatch!
- Notions: Stitch markers (optional, but helpful for marking the edge stitches), tapestry needle for weaving in ends, blocking pins and towels.
Step-by-Step Instructions
This wrap is worked flat from the top down, increasing at the edges to create a beautiful crescent shape. The mosaic pattern is created by slipping stitches and working with two colors in alternating rows. Don't be intimidated—once you get the rhythm, it's incredibly meditative!
Abbreviations
- k = knit
- p = purl
- sl = slip stitch purlwise (unless otherwise noted)
- yo = yarn over (increase)
- k2tog = knit two together (decrease)
- skpo = slip, knit, pass over (decrease)
- RS = right side
- WS = wrong side
Setup: Creating the Foundation
With Color A, cast on 3 stitches.
- Row 1 (RS): k1, yo, k1, yo, k1 (5 stitches)
- Row 2 (WS): k2, p1, k2
- Row 3 (RS): k1, yo, k1, yo, k1, yo, k1 (7 stitches)
- Row 4 (WS): k2, p3, k2
- Row 5 (RS): k1, yo, k2, yo, k1, yo, k2, yo, k1 (11 stitches)
- Row 6 (WS): k2, p7, k2
You now have 11 stitches and a small triangular base. This is the top center of your wrap.
The Mosaic Pattern: The Heart of the Wrap
Now you'll begin the 12-row mosaic pattern. Important: Always keep 2 stitches in garter stitch at each edge (knit on both RS and WS). These edge stitches create a clean, finished border. On every RS row, you'll also work a yo (yarn over) before the last 2 stitches to increase the width of the crescent.
Row 1 (RS, Color A): k2, *k1, sl1, k1, sl1, k1, sl1, k1, sl1, k1, sl1*, repeat from * to * until 2 stitches remain, yo, k2. (Increase made)
Row 2 (WS, Color A): k2, p all stitches until 2 remain, k2. When you encounter the slipped stitches from the previous row, slip them purlwise with yarn in front.
Row 3 (RS, Color B): k2, *sl1, k1, sl1, k1, sl1, k1, sl1, k1, sl1, k1*, repeat from * to * until 2 stitches remain, yo, k2. (Increase made)
Row 4 (WS, Color B): k2, p all stitches until 2 remain, k2. Slip the slipped stitches purlwise with yarn in front.
Row 5 (RS, Color A): k2, *k1, sl1, k1, sl1, k1, sl1, k1, sl1, k1, sl1*, repeat from * to * until 2 stitches remain, yo, k2. (Increase made)
Row 6 (WS, Color A): k2, p all stitches until 2 remain, k2. Slip slipped stitches purlwise with yarn in front.
Row 7 (RS, Color B): k2, *sl1, k1, sl1, k1, sl1, k1, sl1, k1, sl1, k1*, repeat from * to * until 2 stitches remain, yo, k2. (Increase made)
Row 8 (WS, Color B): k2, p all stitches until 2 remain, k2. Slip slipped stitches purlwise with yarn in front.
Row 9 (RS, Color C): k2, *k1, sl1, k1, sl1, k1, sl1, k1, sl1, k1, sl1*, repeat from * to * until 2 stitches remain, yo, k2. (Increase made)
Row 10 (WS, Color C): k2, p all stitches until 2 remain, k2. Slip slipped stitches purlwise with yarn in front.
Row 11 (RS, Color A): k2, *sl1, k1, sl1, k1, sl1, k1, sl1, k1, sl1, k1*, repeat from * to * until 2 stitches remain, yo, k2. (Increase made)
Row 12 (WS, Color A): k2, p all stitches until 2 remain, k2. Slip slipped stitches purlwise with yarn in front.
Continuing the Pattern
Repeat these 12 rows, alternating colors exactly as written, until the wrap measures approximately 60 inches from the cast-on edge, ending with a WS row. You should have used most of your yarn—save about 20g of Color A for the bind-off. The wrap will naturally curve into a crescent shape as you increase.
Bind-Off (RS, Color A)
This stretchy bind-off ensures your edge remains elastic and beautiful:
- K2, *k2tog, return the resulting stitch to the left needle*, repeat from * to * until 1 stitch remains.
- Cut yarn, leaving a 6-inch tail, and pull through the last loop to secure.
Weave in all ends carefully with your tapestry needle.
Blocking: The Final Transformation
Blocking is essential to open up the mosaic pattern and give your wrap its beautiful drape. Follow these steps:
- Soak the wrap in lukewarm water with a gentle wool wash for 20 minutes.
- Gently squeeze out excess water—do not wring or twist.
- Lay the wrap flat on a clean towel and roll it up to remove more water.
- Place the wrap on a blocking mat or dry towel, shape it into a crescent, and pin the edges to open up the mosaic pattern.
- Allow to dry completely before unpinning.
Once dry, your Aurora Dune Wrap is ready to wear! The geometric mosaic pattern will catch the light beautifully, and the gradient colors will transition like a desert sky. This pattern is a wonderful way to practice slipped stitches and two-color knitting while creating a stunning, wearable piece of art. Happy knitting!