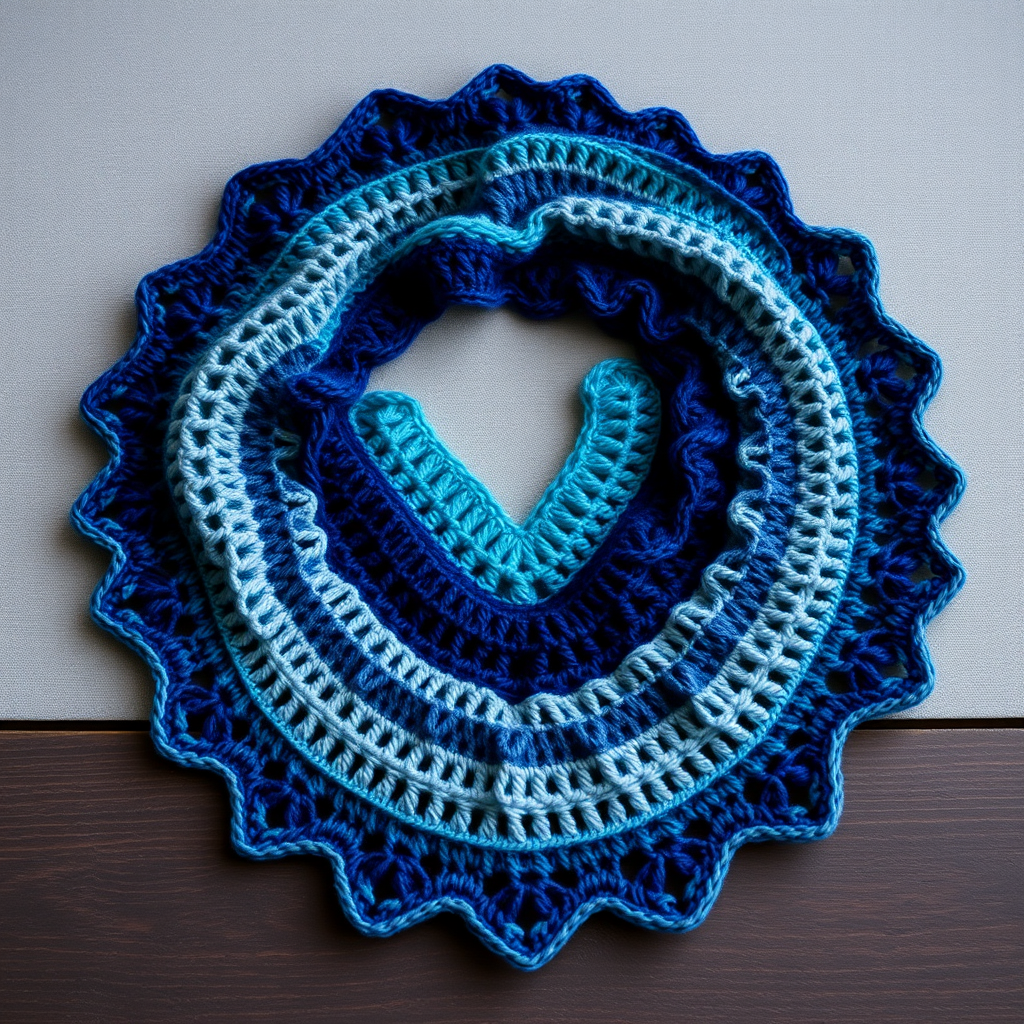
Aurora Wraplet Free Pattern – A Cozy Crochet Neck Warmer

The Aurora Wraplet: A Cozy Crochet Neck Warmer You'll Love to Make
Wrap yourself in the soft, textured beauty of the Aurora Wraplet, a modern twist on the classic scarflet that drapes elegantly around your neck. This quick crochet project uses a simple stitch pattern to create a stunning, wearable accessory. Perfect for beginners and experienced crocheters alike, this pattern combines the soothing rhythm of repetitive stitches with the joy of watching a beautiful, ribbed fabric take shape. The result is a cozy, handmade neck warmer that adds a touch of handcrafted charm to any outfit.
This free pattern is designed to be your new favorite go-to gift or a delightful treat for yourself. With just two colors of worsted weight yarn and a few hours of relaxing crochet, you'll have a chic and functional accessory ready to wear. Let's dive into the materials and steps to create your very own Aurora Wraplet.
Materials Needed
Before you begin, gather these simple supplies. The beauty of this project lies in its simplicity—you only need a few items to create something truly special.
- Yarn: Worsted weight yarn in two complementary colors (e.g., soft teal and cream) – approximately 200 yards of each color. This will give you plenty of yarn to complete the project with a little to spare.
- Crochet Hook: US G/6 (4.0 mm) crochet hook. This hook size is perfect for creating a dense, warm fabric that still has lovely drape.
- Other Tools: A yarn needle for weaving in ends and seaming, and a pair of scissors.
Gauge: 16 dc x 8 rows = 4 inches (10 cm) in pattern stitch. While gauge is important for achieving the exact finished size, this pattern is quite forgiving. A slightly different gauge will simply result in a slightly larger or smaller neck warmer, which is still perfectly wearable.
Step-by-Step Instructions
Follow these detailed instructions carefully, and you'll have your Aurora Wraplet finished in no time. The pattern is worked flat in rows, then joined at the ends to form a cozy loop. The combination of double crochet and front post double crochet creates a beautiful, ribbed texture that is both stylish and warm.
Getting Started: The Foundation Chain
Note: The pattern is worked flat in rows, then joined at the ends to form a loop. The pattern uses a combination of double crochet and front post double crochet to create a ribbed, textured fabric.
Step 1: Chain (ch) 26 loosely with Color A. Make sure your chain is not too tight, as this will make it difficult to work into on the first row. A loose foundation chain ensures a nice, stretchy edge.
Row 1: Establishing the Base
Step 2: Double crochet (dc) in the 4th chain from the hook. The first three chains you skip count as your first double crochet. Now, dc in each chain across. You should have a total of 24 double crochet stitches. Turn your work.
Row 2: Introducing the Texture
Step 3: Chain 3 (this counts as your first double crochet). Skip the first double crochet stitch. Now, work a front post double crochet (fpdc) around the next double crochet stitch. To do this, yarn over, insert your hook from front to back to front around the post of the stitch (not through the top loops), yarn over and pull up a loop, yarn over and pull through two loops, yarn over and pull through the remaining two loops. Then, dc in the next double crochet stitch.
Step 4: Repeat the sequence from * to * across the row: *fpdc around the next dc, dc in the next dc*. You will end the row with a dc in the top of the turning chain (the 3rd chain from the beginning of the row). You should have 24 stitches total. Turn your work.
Row 3: Creating the Ribbed Pattern
Step 5: Chain 3 (counts as first dc). Skip the first double crochet. Now, work a dc in the next fpdc (the top of the post stitch from the previous row), then fpdc around the next dc (the regular double crochet from the previous row).
Step 6: Repeat the sequence from * to * across the row: *dc in the next fpdc, fpdc around the next dc*. End the row with a dc in the top of the turning chain. You should have 24 stitches. Turn your work.
Rows 4-45: Building the Length and Adding Color
Step 7: Repeat Row 3 for all subsequent rows. This creates a beautiful, reversible ribbed texture. The key is to always work a regular dc into the top of the fpdc from the previous row, and a fpdc around the post of the regular dc from the previous row.
Step 8: Color Changes: To create the beautiful striped effect, alternate colors every 5 rows. For example, work 5 rows with Color A, then 5 rows with Color B, and so on. When changing colors, simply fasten off the old color and join the new color with a slip stitch at the beginning of the next row, or carry the yarn up the side if you prefer (though fastening off and weaving in ends is cleaner for this project).
Step 9: Continue repeating Row 3 and changing colors every 5 rows until your piece measures approximately 80 cm (31.5 inches) from the start. Make sure you end with a complete color change row (i.e., you've just finished 5 rows of a color). Fasten off, leaving a long tail (about 12 inches) for seaming.
Finishing: Creating the Loop
Step 10: Fold your piece in half so the short ends meet. The right sides should be facing each other.
Step 11: Thread your yarn needle with the long tail. Use a whip stitch to sew the two short ends together. To whip stitch, simply insert the needle through both layers of fabric, from back to front, and pull the yarn through. Continue this motion, creating a neat, even seam. This will form your neck warmer into a loop.
Step 12: Weave in all loose ends with your yarn needle, being careful to weave them in securely so they don't come undone with wear.
Step 13: Block gently to shape. To block, you can lightly mist the piece with water and lay it flat to dry, gently shaping it to ensure the seams lie flat and the stitches are even. This step helps give your Aurora Wraplet a professional, polished finish.
And there you have it—your very own Aurora Wraplet! This cozy, textured neck warmer is perfect for chilly days, and the beautiful ribbed pattern is sure to draw compliments. Enjoy wearing your handmade creation, and don't be surprised if you find yourself making one in every color combination!