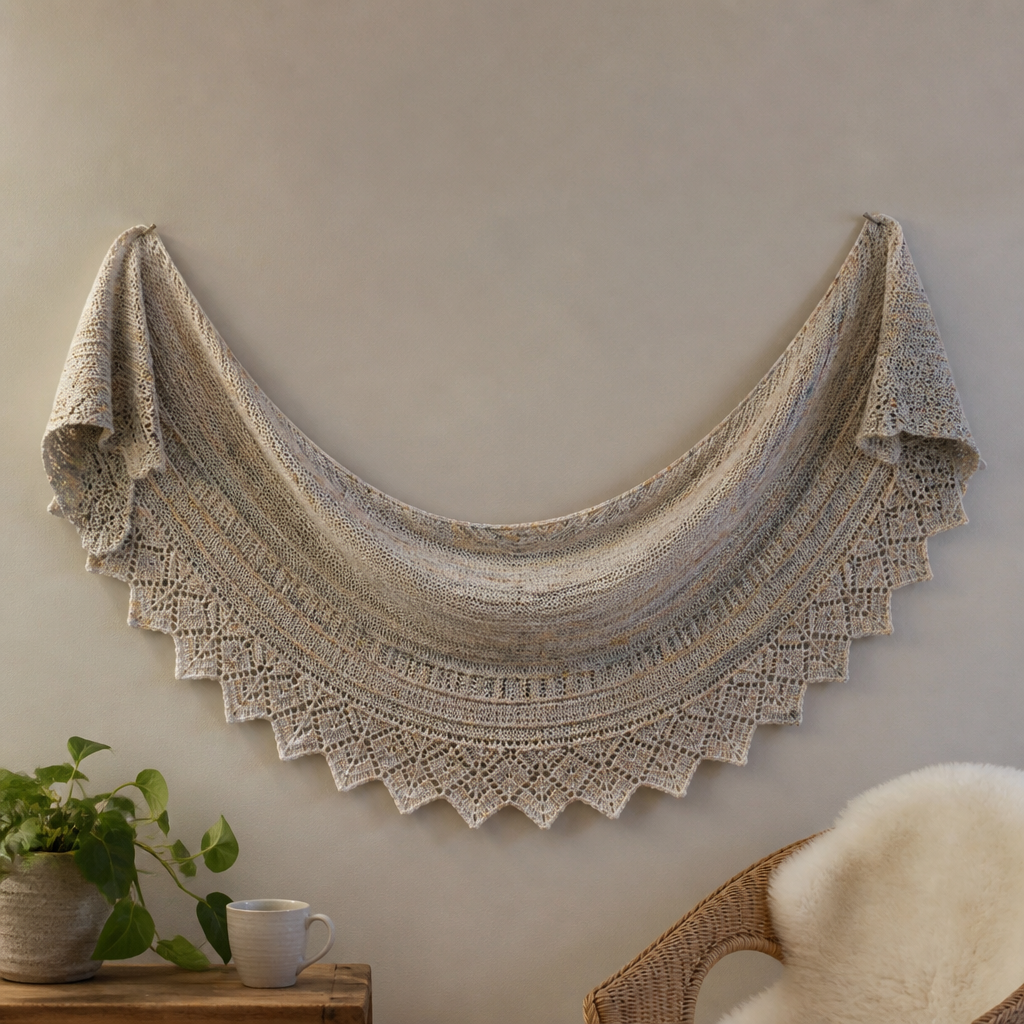
Celestial Weave Crescent Shawl Free Pattern

Wrap Yourself in the Night Sky: The Celestial Weave Crescent Shawl
There are some knitting projects that feel less like crafting and more like magic. The Celestial Weave Crescent Shawl is exactly that—a breathtaking accessory that captures the ethereal beauty of a twilight sky in every stitch. Knitted from the top down, this pattern uses a mesmerizing gradient of deep indigo, midnight blue, and soft silver to create a flowing, celestial-inspired drape. Whether you're looking for a statement piece for a special occasion or a cozy, elegant wrap for cool evenings, this shawl delivers. The delicate lace motifs resemble a map of stars and constellations, making it a truly unique and inspiring project. Best of all, this free pattern is accessible to knitters who are ready to move beyond the basics and dive into the world of lace.
Materials Needed for Your Celestial Shawl
Before you begin your journey into the night sky, gather the following materials. The quality of your yarn will significantly impact the drape and sheen of your finished shawl, so choose a soft, smooth fingering weight yarn that you love.
- Yarn: Fingering weight yarn in 3 colors (approximately 400g total):
- Color A: Deep Indigo (for the top center)
- Color B: Midnight Blue (for the middle section)
- Color C: Soft Silver (for the outer edge and edging)
- Needles: US 6 (4.0 mm) circular knitting needle, 32-inch or longer. The long cable is essential to accommodate the increasing number of stitches as the shawl grows.
- Notions: Stitch markers (at least 2), tapestry needle for weaving in ends, blocking pins and mats for finishing.
Gauge: 20 stitches and 28 rows = 4 inches in stockinette stitch, after blocking. While gauge is important for size, the lace pattern is forgiving. Focus on consistent tension for the best results.
Step-by-Step Instructions: Knitting the Celestial Weave
This shawl is knitted from the top center down, increasing on both sides to form a crescent shape. The circular needle is used to hold the growing number of stitches comfortably. Take your time, follow the pattern closely, and you'll be amazed at what you create.
Abbreviations
- k = knit
- p = purl
- yo = yarn over (creates an eyelet and an increase)
- k2tog = knit two together (a right-leaning decrease)
- ssk = slip, slip, knit (a left-leaning decrease)
- pm = place marker
- sm = slip marker
- RS = right side (the front of the work)
- WS = wrong side (the back of the work)
Setup: Creating the Center Point
With Color A (Deep Indigo), cast on 3 stitches.
- Row 1 (RS): k1, yo, k1, yo, k1 (5 stitches)
- Row 2 (WS): k2, p1, k2
- Row 3 (RS): k2, yo, k1, yo, k2 (7 stitches)
- Row 4 (WS): k2, p3, k2
- Row 5 (RS): k2, yo, k3, yo, k2 (9 stitches)
- Row 6 (WS): k2, p5, k2
Body: Continue in this manner, increasing 2 stitches every RS row (one at each edge) until you have 21 stitches on the needle, ending with a WS row. This creates the initial "spine" of your shawl.
The Lace Pattern: Weaving the Stars
Now you will begin the beautiful lace pattern while continuing the edge increases. The lace pattern is a multiple of 6 + 1 stitches.
- Row 1 (RS): k2, yo, *k1, yo, ssk, k3, yo, k2tog, k1, yo* repeat from * to * until last 3 stitches, k1, yo, k2
- Row 2 (WS): k2, p to last 2 stitches, k2
- Row 3 (RS): k2, yo, *k2, yo, ssk, k1, k2tog, yo, k2* repeat from * to * until last 3 stitches, k1, yo, k2
- Row 4 (WS): k2, p to last 2 stitches, k2
- Row 5 (RS): k2, yo, *k3, yo, ssk, yo, k3* repeat from * to * until last 3 stitches, k1, yo, k2
- Row 6 (WS): k2, p to last 2 stitches, k2
Important: On every RS row, you will continue to increase 1 stitch at each edge by working k2, yo at the beginning and yo, k2 at the end. This maintains the crescent shape.
Repeat these 6 rows, working in Color A for 10 full repeats of the lace pattern. Remember to keep your edge increases consistent.
Changing Colors: The Twilight Transition
After completing 10 repeats with Color A, switch to Color B (Midnight Blue). Work 10 more repeats of the lace pattern, continuing the edge increases on every RS row. The color change will create a beautiful, subtle gradient.
Finally, switch to Color C (Soft Silver) and work 10 repeats of the lace pattern, again continuing the edge increases. Your shawl will now have a beautiful, three-stage gradient.
Edging: The Picot Bind-Off
With Color C, you'll add a delicate picot edge to finish your shawl beautifully.
- Knit 2 stitches.
- *Insert the left needle into the first stitch on the right needle, pass it over the second stitch and off the needle (bind off 1). You now have 1 stitch on the right needle.
- Knit 1 more stitch (now 2 stitches on the right needle).
- Bind off 1 more stitch (now 1 stitch on the right needle).
- Cast on 2 stitches using the knitted cast-on method.
- Bind off 4 stitches (one at a time).
- Repeat from * until all stitches are bound off. Fasten off.
This creates a series of small, decorative loops along the edge, adding a touch of elegance.
Finishing: Bringing the Stars to Life
Weave in all ends carefully with your tapestry needle. The final and most crucial step is blocking. This is where the magic truly happens.
Soak the shawl in lukewarm water with a gentle wool wash for about 20 minutes. Gently squeeze out the excess water (do not wring). Lay the shawl on a clean towel and roll it up to remove more moisture. Then, pin the shawl out on blocking mats to its full dimensions. Gently stretch the edges to open up the lace pattern and shape the crescent curve. Pin the top edge straight and the bottom edge into a gentle curve. Allow it to dry completely. This process will transform your knitting from a crumpled mass into an airy, delicate, and beautifully defined celestial shawl.
Your Celestial Weave Crescent Shawl is now complete. Drape it over your shoulders and enjoy the beauty of the night sky, handcrafted by you.