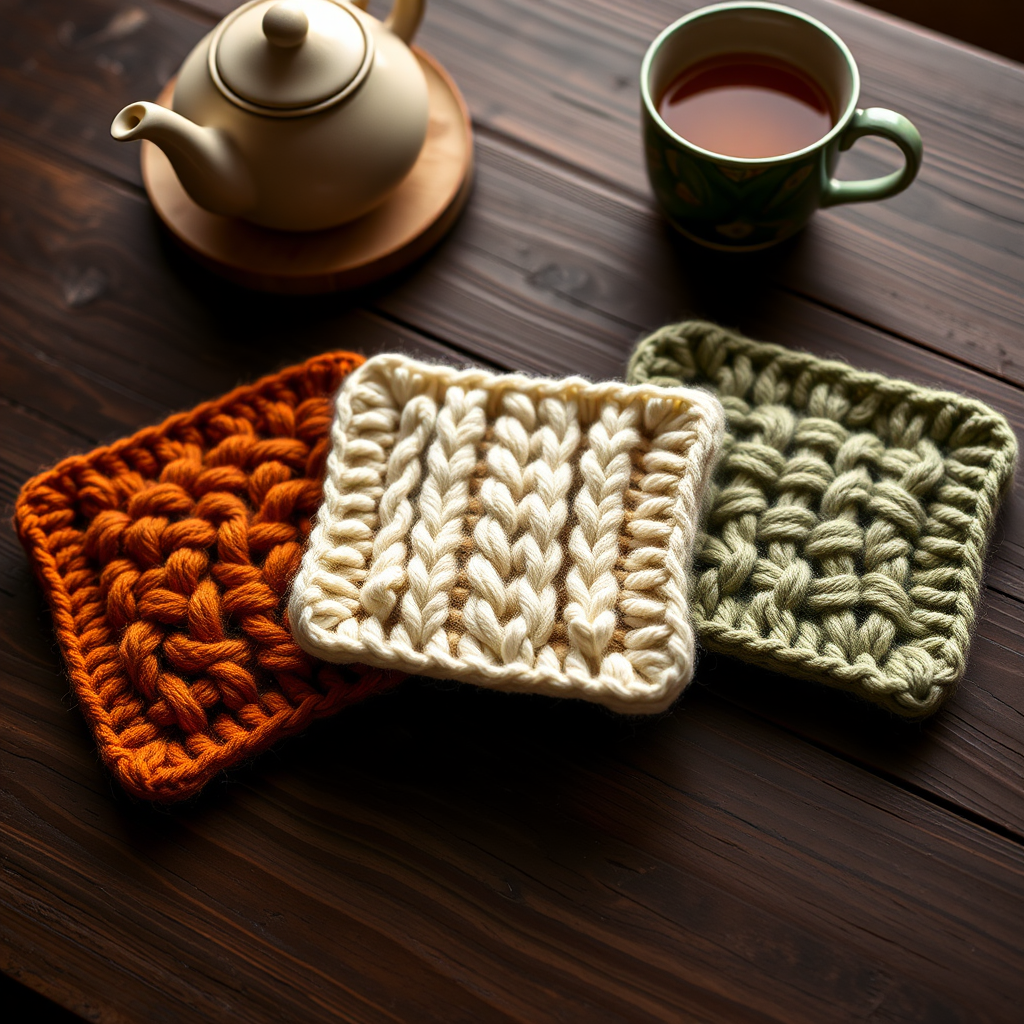
Citrus Splash Kitchen Set Free Pattern – Textured Knit Coasters & Trivet

Brighten Your Kitchen with the Citrus Splash Knit Set
Are you ready to add a pop of sunshine to your kitchen? The Citrus Splash Kitchen Set is a delightful, beginner-friendly knitting project that brings the cheerful energy of fresh oranges and lemons right to your table. This pattern creates a set of four textured coasters and one large trivet, all worked flat in a simple yet stunning bubble stitch that beautifully mimics the pebbled peel of citrus fruit. It's a quick, satisfying project that uses only basic knit and purl stitches, making it perfect for those looking to expand their skills or create a thoughtful, handmade gift. Let's dive into this vibrant and practical project that's sure to become a favorite in your home decor.
Materials Needed
Before you begin, gather the following materials to ensure a smooth and enjoyable knitting experience. The quality of your materials will directly impact the final look and durability of your kitchen set.
- Yarn: Worsted weight 100% cotton yarn in three vibrant colors:
- Color A (Orange): Approximately 100g – for the trivet and two coasters
- Color B (Lemon Yellow): Approximately 100g – for two coasters
- Color C (White): Approximately 100g – for the trivet's center stripe
- Knitting Needles: US 7 (4.5 mm) knitting needles. Straight needles are perfectly fine for this flat-knit project.
- Other Tools: A tapestry needle for weaving in ends, scissors, and a blocking mat with pins (optional but recommended for a professional finish).
Note on Yarn: 100% cotton is highly recommended for kitchen items because it is absorbent, durable, and can withstand high heat, making it perfect for trivets and coasters. The worsted weight ensures your project works up quickly and has a nice, substantial feel.
Step-by-Step Instructions
This pattern is worked flat in a textured Bubble Stitch. Don't be intimidated by the name – it's simply a combination of knits, purls, and a clever increase/decrease technique that creates a beautiful, bumpy texture. Follow these detailed instructions carefully, and you'll have a gorgeous set in no time.
Understanding the Bubble Stitch Pattern
First, let's master the stitch that gives this set its unique character. The pattern is a multiple of 4 stitches + 2 for the edge stitches. Here’s the breakdown:
- Row 1 (Right Side): Knit all stitches.
- Row 2 (Wrong Side): Purl all stitches.
- Row 3: K2, *bubble, k3; repeat from * to last 2 sts, K2.
- Row 4: Purl all stitches.
- Row 5: Knit all stitches.
- Row 6: Purl all stitches.
- Row 7: K4, *bubble, k3; repeat from * to last 4 sts, K4.
- Row 8: Purl all stitches.
How to make a "bubble" (bobble): This is the key maneuver. Into the next single stitch, you will knit, purl, knit, purl, and knit again (k1, p1, k1, p1, k1). This creates 5 new stitches from one. Then, carefully pass the 2nd, 3rd, 4th, and 5th stitches over the 1st stitch (the one closest to your needle tip) and off the needle. This gathers them into a tight, raised bobble. It sounds complex, but with a little practice, it becomes second nature.
Pro Tip: Keep your tension relaxed when creating the bubble to make passing the stitches over easier. After completing a bubble, give the yarn a gentle tug to snug it up.
Knitting the Coasters (Make 4 – 2 Orange, 2 Yellow)
These charming coasters are quick to knit and make excellent gifts. Each one measures about 4.5 inches square after blocking.
- Cast On: With your chosen color (Color A for orange or Color B for yellow), cast on 22 stitches using your preferred method. A long-tail cast-on works beautifully here.
- Knit the Pattern: Work in the Bubble Stitch pattern as described above for a total of 24 rows. This equals exactly 3 full repeats of the 8-row pattern. Remember to start with Row 1 (knit all) and end with Row 8 (purl all).
- Bind Off: Bind off all stitches loosely. A loose bind-off is crucial to prevent the edges from pulling in and curling. You can use a larger needle to bind off if you tend to knit tightly.
- Weave in Ends: Using your tapestry needle, carefully weave in all loose yarn ends on the wrong side of the work. Make sure to secure them well so they don't come undone with use.
- Block: To achieve a perfect square and even out the texture, wet block your coasters. Soak them in lukewarm water, gently squeeze out excess water (do not wring), and lay them flat on a blocking mat. Pin them to 4.5 inches square and allow them to dry completely.
Knitting the Trivet (Make 1 – Orange with White Center)
This larger piece is the centerpiece of the set, featuring a beautiful white stripe that adds a crisp, modern contrast. It measures approximately 8.5 inches square after blocking.
- Cast On: With Color A (orange), cast on 42 stitches.
- First Orange Section: Work in the Bubble Stitch pattern for 8 rows (one full repeat). This creates the first orange border.
- Switch to White: Cut the orange yarn, leaving a 6-inch tail. Join Color C (white) and work 8 rows in the Bubble Stitch pattern. This forms the crisp white center stripe.
- Switch Back to Orange: Cut the white yarn, leaving a tail. Rejoin Color A (orange) and work a final 8 rows in the Bubble Stitch pattern. This completes the bottom orange border.
- Bind Off: Bind off all stitches loosely, just as you did for the coasters.
- Weave in Ends: Weave in all ends securely, paying extra attention to the color-change points to ensure they are well-hidden and secure.
- Block: Block the trivet to 8.5 inches square using the same wet-blocking method described for the coasters. This is especially important for the trivet to ensure it lies perfectly flat for holding hot dishes.
Finishing Touches
To give your Citrus Splash set a truly polished, professional look, consider adding a simple crochet edging. This is optional but highly recommended as it neatens the edges and adds a touch of elegance.
- Crochet Edging (Optional): Using a crochet hook and matching yarn, work a round of single crochet (sc) around the entire perimeter of each piece. Work 1 sc into each bound-off stitch along the top and bottom, and work evenly along the sides (approximately 1 sc for every 2 rows). At each corner, work 3 sc into the same corner stitch to create a neat, flat turn.
- Final Weave: After adding the edging, weave in any new ends. Give your finished pieces a final gentle press with a cool iron (if your yarn allows) or simply re-pin them to ensure they are perfectly flat.
Your Citrus Splash Kitchen Set is now complete! These vibrant, textured pieces are not only functional but also serve as a beautiful handmade accent that brings a slice of summer into your home year-round. Enjoy your creation, and don't be surprised if friends and family start requesting their own sets!