Copper Kettle Coasters Free Pattern – Knit a Rustic Tea Time Trio
Copper Kettle Coasters Free Pattern – Knit a Rustic Tea Time Trio
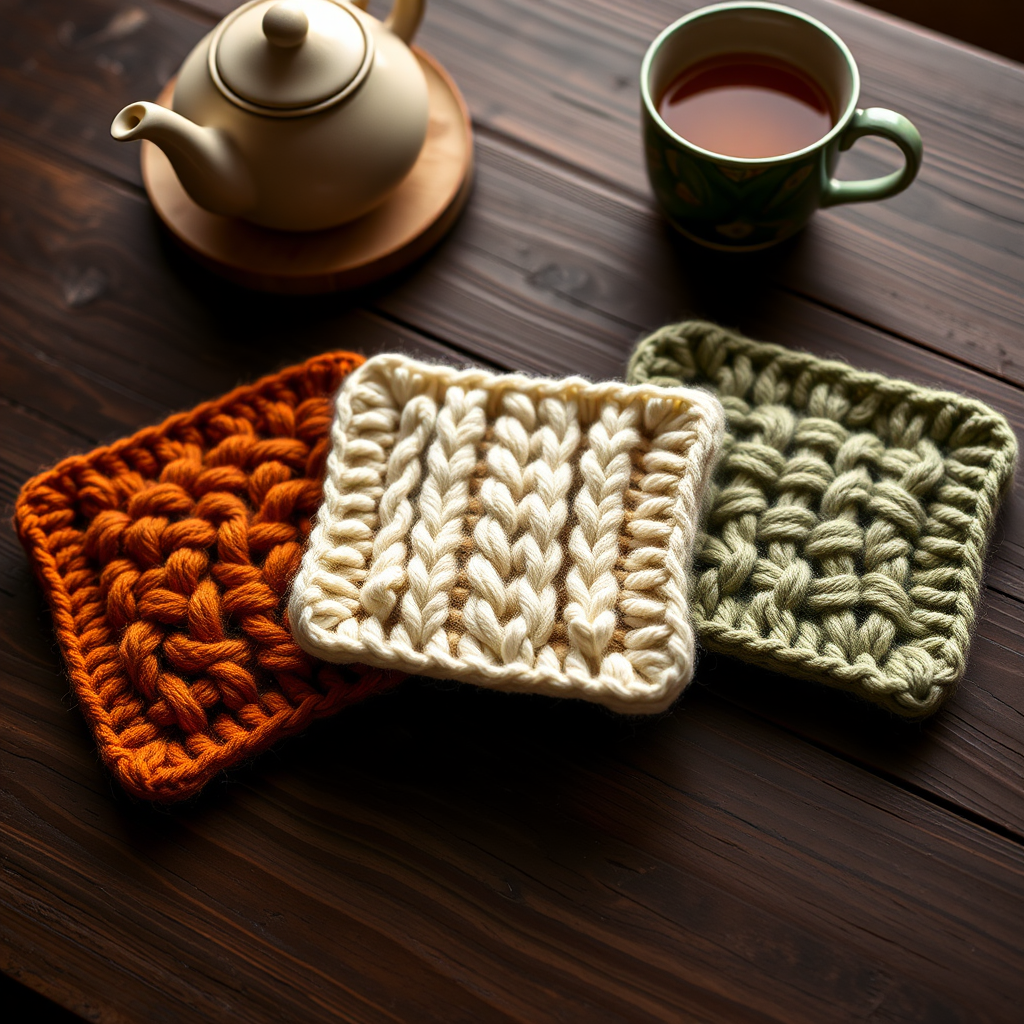
Wrap your tea table in warmth with these textured, copper-toned knitted coasters that echo the charm of a countryside cottage. Each coaster features a unique stitch pattern, creating a cozy, handmade set perfect for slow afternoons. Whether you're an experienced knitter looking for a quick weekend project or a beginner ready to practice new stitches, this free pattern offers three distinct textures—seed stitch, cable, and linen stitch—all in one delightful set. The warm copper, creamy off-white, and soft sage shades evoke autumn afternoons and steaming cups of tea, making these coasters a beautiful addition to any home.
Materials Needed
Before you begin, gather the following supplies. This project uses simple, readily available materials and is perfect for using up small amounts of worsted weight cotton yarn from your stash.
- Yarn: Worsted weight cotton yarn in three shades: Copper (MC), Cream (CC1), and Sage (CC2) – approximately 50g of each. Cotton is ideal for coasters because it absorbs moisture and holds its shape well.
- Needles: US 7 (4.5 mm) knitting needles. Straight or circular needles both work fine for these flat-knit squares.
- Gauge: 20 stitches and 28 rows = 4 inches in stockinette stitch (blocked). Gauge is important for achieving the correct finished size, so take a moment to knit a small swatch if you're unsure.
- Extras: Tapestry needle for weaving in ends, cable needle (for the cable coaster), blocking pins or mats, and scissors.
Step-by-Step Instructions
This pattern creates three matching coasters, each with a different stitch texture: one in a seed stitch, one in a simple cable, and one in a linen stitch. Each coaster is worked flat and measures approximately 4.5 inches square. Work them one at a time, and enjoy the variety of techniques as you go.
Coaster 1 – Seed Stitch Coaster (MC)
The seed stitch creates a bumpy, textured surface that's perfect for protecting your table from hot mugs. It's also one of the easiest stitch patterns to memorize, making it ideal for beginners.
- Cast on: Cast on 24 stitches using your preferred method (long-tail cast on works well).
- Row 1: *K1, P1* repeat to end of row. This means you'll knit 1 stitch, then purl 1 stitch, alternating across all 24 stitches.
- Row 2: *P1, K1* repeat to end of row. Notice that this row is offset from Row 1—you're purling the stitches that were knit in the previous row, and knitting the stitches that were purled. This creates the "seed" texture.
- Repeat: Continue repeating Rows 1 and 2 until the piece measures 4.5 inches from the cast-on edge. This will take approximately 30-32 rows, depending on your gauge.
- Bind off: Bind off in pattern. This means you'll knit the knit stitches and purl the purl stitches as you bind off, maintaining the seed stitch pattern. Bind off loosely so the edge doesn't pucker.
Coaster 2 – Cable Coaster (CC1)
This coaster features a beautiful braided cable running vertically down the center, framed by simple ribbing. The cable adds a touch of elegance and is easier than it looks—you'll only need to use a cable needle every 8 rows.
- Cast on: Cast on 24 stitches.
- Row 1 (RS - Right Side): K3, P2, K6, P2, K6, P2, K3. Let's break this down: knit 3, purl 2, knit 6, purl 2, knit 6, purl 2, knit 3. Total = 24 stitches.
- Row 2 (WS - Wrong Side): P3, K2, P6, K2, P6, K2, P3. This is the reverse of Row 1—knit the purl stitches and purl the knit stitches from the previous row.
- Row 3: K3, P2, C6F (slip 3 stitches to cable needle, hold in front, knit 3, then knit 3 from cable needle), P2, C6F, P2, K3. The C6F creates the cable twist. Here's how to do it:
- Slip the next 3 stitches onto your cable needle and hold it at the front of your work.
- Knit the next 3 stitches from your left needle normally.
- Then knit the 3 stitches from the cable needle.
- This creates a left-leaning cable twist.
- Row 4: Repeat Row 2 (P3, K2, P6, K2, P6, K2, P3).
- Rows 5-8: Repeat Rows 1 and 2 twice. This means you'll work Row 1, then Row 2, then Row 1 again, then Row 2 again.
- Repeat: Continue repeating Rows 1-8 until the piece measures 4.5 inches, ending with a WS row (Row 2, 4, 6, or 8). This ensures the cable is complete before binding off.
- Bind off: Bind off in pattern—knit the knit stitches and purl the purl stitches as you bind off.
Coaster 3 – Linen Stitch Coaster (CC2)
The linen stitch creates a dense, woven fabric that looks like linen cloth. It's a beautiful, subtle pattern that's perfect for coasters because it lies flat and doesn't curl.
- Cast on: Cast on 24 stitches.
- Row 1 (RS): *K1, slip 1 purlwise with yarn in front* repeat to end. Here's the technique:
- Knit 1 stitch normally.
- Bring the yarn to the front of your work (between the needles).
- Slip the next stitch purlwise (as if to purl, inserting the right needle from right to left) without knitting it.
- Bring the yarn to the back again.
- Repeat across the row.
- Row 2 (WS): *P1, slip 1 purlwise with yarn in back* repeat to end. This is the reverse:
- Purl 1 stitch normally.
- Bring the yarn to the back of your work.
- Slip the next stitch purlwise without knitting it.
- Bring the yarn to the front again.
- Repeat across the row.
- Repeat: Continue repeating Rows 1 and 2 until the piece measures 4.5 inches. The slipped stitches create the woven effect.
- Bind off: Bind off loosely. Because the linen stitch is dense, a tight bind-off will make the edge curl. Use a larger needle for binding off if needed, or bind off with a loose tension.
Finishing
Once all three coasters are complete, it's time to finish them properly for a professional look.
- Weave in ends: Thread your tapestry needle with the yarn tails and weave them through the wrong side of the work, following the path of the stitches. Weave in at least 2-3 inches to ensure they don't come loose. Trim any excess yarn.
- Block each coaster: Blocking evens out the stitches and sets the shape. To block:
- Soak each coaster in lukewarm water with a drop of mild soap for 10-15 minutes.
- Gently squeeze out excess water (don't wring or twist).
- Lay flat on a towel and roll up to remove more water.
- Pin each coaster to 4.5 inches square on a blocking mat or towel-covered surface.
- Allow to dry completely before unpinning.
- Optional fringe: For extra charm, add a small fringe to one edge of each coaster. Cut 6-inch lengths of matching yarn, fold each in half, and use a crochet hook to pull the folded end through the edge stitches. Pull the tails through the loop and tighten. Trim evenly.
Your Copper Kettle Coasters are now ready to grace your tea table! These make wonderful gifts, housewarming presents, or a special treat for your own home. The set of three textures adds visual interest and demonstrates your knitting skills beautifully. Enjoy your cozy tea time with these handmade treasures!


