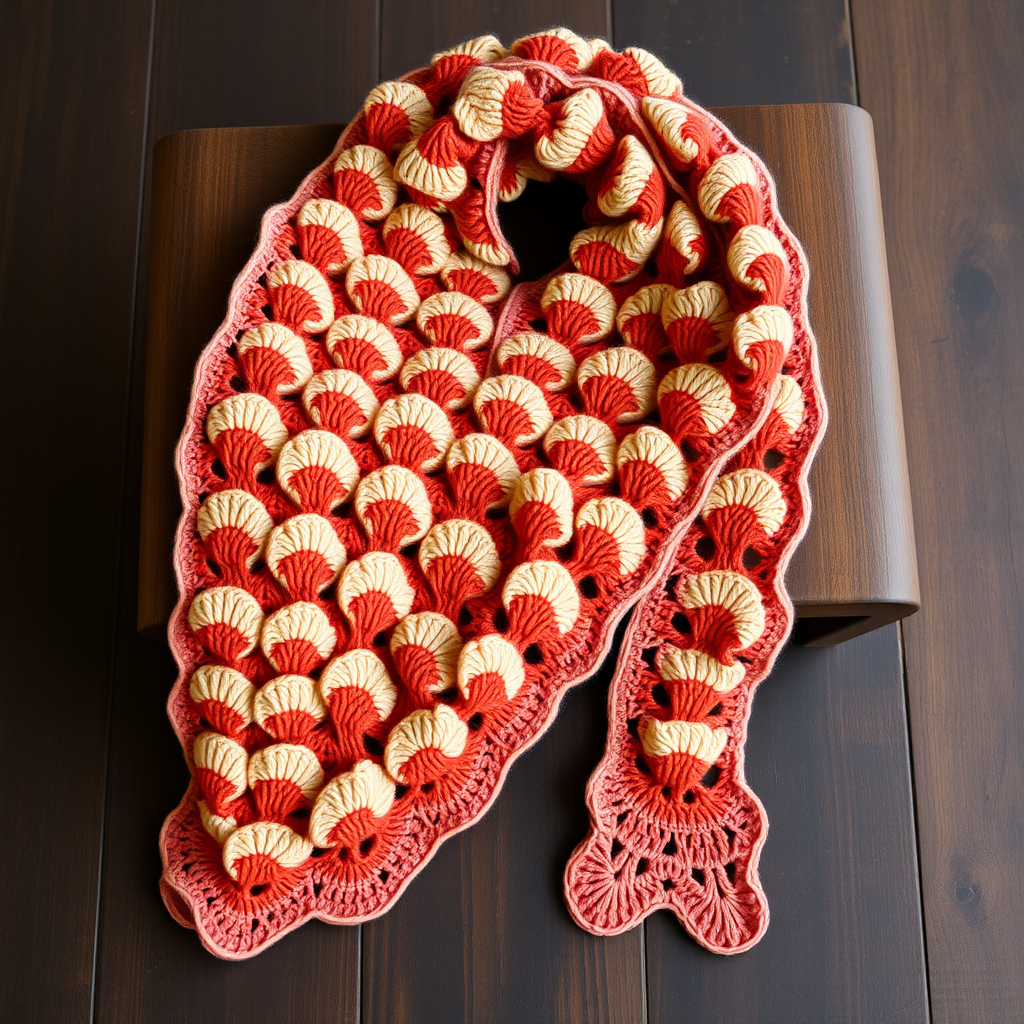
Dune Drift Tunisian Honeycomb Wrap Free Pattern

Dune Drift Tunisian Honeycomb Wrap: A Free Beginner-Friendly Pattern
Wrap yourself in the mesmerizing geometry of the Tunisian honeycomb stitch, worked in a serene gradient of coastal sands and sea glass. This free pattern creates a luxuriously textured, drapey shawl that feels like a warm breeze on a cool evening. Whether you're new to Tunisian crochet or a seasoned maker looking for a meditative project, this wrap delivers stunning results with a simple two-row repeat. The honeycomb texture is surprisingly easy to achieve, and the color transitions add a professional, hand-dyed look without the complexity. Let's dive into this rewarding project that will become a staple in your handmade wardrobe.
Materials Needed
Before you begin, gather the following supplies. All materials are readily available at most craft stores or online retailers.
- Yarn: Worsted weight yarn in 3 colors:
- Color A (sand) – 200 yards
- Color B (seafoam) – 200 yards
- Color C (deep teal) – 200 yards
- Tunisian Crochet Hook: Size 6.5 mm (K-10.5) with a 12-inch cord. The cord is essential for holding the many loops on the hook.
- Standard Crochet Hook: Size 5.5 mm (I-9) for the border.
- Other: Yarn needle for weaving in ends, scissors, stitch markers (optional).
Gauge: 14 stitches and 12 rows in Tunisian honeycomb stitch = 4 inches (10 cm). Adjust hook size if needed to achieve gauge. Gauge is important for the final dimensions, but this wrap is forgiving—slight variations will not ruin the project.
Step-by-Step Instructions
This wrap is worked flat in rows, using the Tunisian honeycomb stitch which creates a beautiful, honeycomb-like texture. The pattern uses a simple two-row repeat. Note: The Tunisian honeycomb stitch is worked with a forward pass (picking up loops) and a return pass (working them off). Each "row" in the instructions below includes both a forward and return pass.
Foundation Row
- With Color A, make a slip knot and chain 60 stitches. Tip: Chain loosely to make the first pass easier.
- Work a Tunisian simple stitch (TSS) in each chain across. To do this: insert your hook into the second chain from the hook, yarn over, pull up a loop. Repeat in each chain until you have 60 loops on your hook.
- Work the return pass: yarn over, pull through one loop (this is your first chain stitch), *yarn over, pull through two loops* repeat across until one loop remains on the hook. This completes your foundation row.
Row 1 (Forward Pass)
- Insert hook between the first and second vertical bars of the first stitch (not into the top loop, but into the space between the vertical strands). Yarn over, pull up a loop. You now have 2 loops on the hook.
- *Skip the next vertical bar (do not work into it), insert hook between the next two bars, yarn over, pull up a loop.* Repeat from * to * across until you have 60 loops on the hook.
- Return pass: yarn over, pull through one loop, *yarn over, pull through two loops* repeat across until one loop remains. This completes Row 1.
Row 2 (Forward Pass)
- Insert hook into the first vertical bar (the one you skipped in the previous row), yarn over, pull up a loop.
- *Skip the next vertical bar, insert hook between the next two bars, yarn over, pull up a loop.* Repeat from * to * across. You should again have 60 loops on the hook.
- Return pass as before: yarn over, pull through one loop, *yarn over, pull through two loops* repeat across until one loop remains.
Understanding the Pattern: Rows 1 and 2 create the honeycomb effect. Row 1 works into the spaces, while Row 2 works into the skipped bars. This interlocking creates the hexagonal, cellular texture. The key is to always skip one vertical bar and work into the space between the next two bars, alternating which bars you skip each row.
Color Sequence and Repetition
Repeat Rows 1 and 2, changing colors every 10 rows (5 repeats of the two-row pattern) in the following sequence:
- Color A (sand): Rows 1-10
- Color B (seafoam): Rows 11-20
- Color C (deep teal): Rows 21-30
- Color B (seafoam): Rows 31-40
- Color A (sand): Rows 41-50
Continue this pattern, repeating the color sequence, until the wrap measures approximately 60 inches long. Tip: To change colors, work the last return pass of the final row in the old color, but pull the new color through the last two loops. This creates a clean, seamless color change. End with a Color A section for symmetry.
Final Row and Bind-Off
- Work a row of Tunisian simple stitch (TSS) across. To do this: insert hook into the first vertical bar, yarn over, pull up a loop. Repeat in each vertical bar across until you have 60 loops on the hook.
- Work the return pass as usual: yarn over, pull through one loop, *yarn over, pull through two loops* repeat across until one loop remains.
- Now work the slip stitch bind-off: insert hook into the first vertical bar, yarn over, pull through both loops on the hook (this is a slip stitch). Continue across, inserting into the next vertical bar, yarn over, and pulling through both loops on the hook, until one loop remains.
- Cut yarn, leaving a 6-inch tail, and pull through the last loop to secure. Weave in this end later.
Border
- With the standard crochet hook (5.5 mm) and Color A, attach yarn to any corner of the wrap with a slip stitch.
- Work a round of single crochet (sc) evenly around the entire edge. At each corner, work 3 sc in the same stitch to create a smooth, rounded corner. Tip: Work approximately 1 sc per row along the sides and 1 sc per stitch along the top and bottom edges.
- When you return to the starting corner, work a round of reverse single crochet (crab stitch) for a neat, finished edge. To do this: working from left to right (opposite of normal), insert hook into the next stitch to the right, yarn over, pull up a loop, yarn over, pull through both loops. Repeat around the entire edge.
- Fasten off and weave in all ends with a yarn needle. Block the wrap gently to open up the honeycomb texture and even out the edges.
Pro Tips for Success
- Keep tension consistent: Tunisian crochet can tighten as you go. Periodically check that your loops are not too tight on the hook—they should slide easily.
- Count your loops: After each forward pass, count your loops to ensure you still have 60. It's easy to accidentally add or skip a stitch.
- Use stitch markers: Place a marker every 10 rows to track your color changes without counting constantly.
- Blocking is key: This stitch pattern really shines after blocking. Soak the wrap in lukewarm water, gently squeeze out excess, and lay flat to dry, pinning the edges to your desired dimensions.
Your Dune Drift Tunisian Honeycomb Wrap is now complete! This versatile piece can be worn as a shawl, scarf, or even a cozy throw. The gradient colors evoke the peaceful transition from sandy shore to deep ocean, making it a beautiful, meaningful handmade gift or a treat for yourself. Enjoy the meditative rhythm of the honeycomb stitch and the stunning texture you've created!