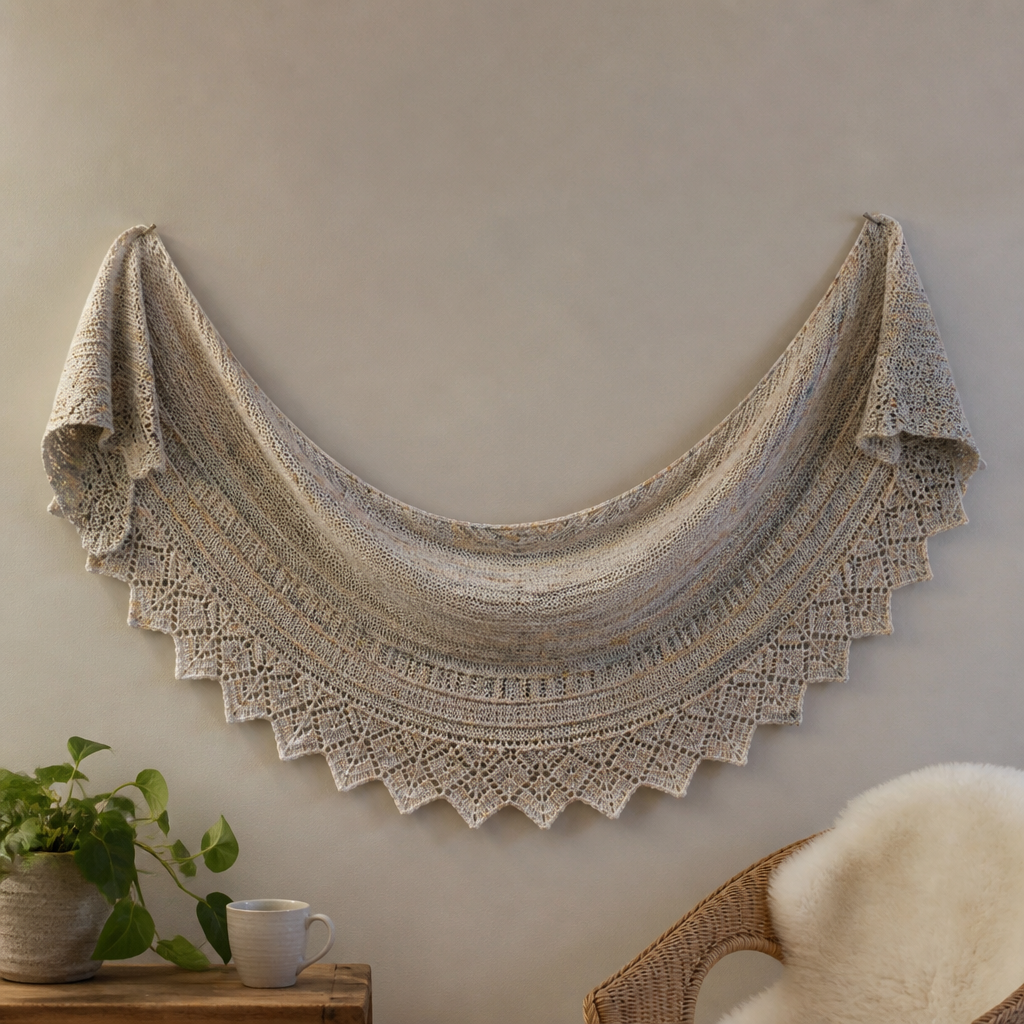
Emberfall Crescent Shawl Free Pattern – Knitted with Autumn Flame Lace and Twisted Fringe

Emberfall Crescent Shawl Free Pattern – Knitted with Autumn Flame Lace and Twisted Fringe
Wrap yourself in the cozy warmth of falling leaves with this crescent-shaped shawl, featuring a unique flame-like lace pattern that dances across a gradient of burnt sienna, amber, and deep rust. The twisted fringe adds a touch of rustic elegance, making it a perfect statement piece for crisp autumn evenings. This free knitting pattern is designed for beginners and intermediate knitters alike, with a simple 8-row lace repeat that's easy to memorize and a construction that flows naturally from cast-on to bind-off.
Whether you're curled up by a fireplace or taking a brisk walk through golden woods, this shawl will keep you snug while turning heads with its stunning ombre effect. The worsted weight yarn makes it a quick and satisfying project, and the crescent shape drapes beautifully over shoulders without slipping. Let's dive into this cozy autumn knit!
Materials Needed
Before you begin, gather the following supplies. All items are readily available at your local yarn shop or online.
Yarn
- Worsted weight yarn in 3 colors (approx. 600g total, 200g each):
- Color A: Burnt Sienna
- Color B: Amber
- Color C: Deep Rust
Needles & Tools
- US 8 (5.0mm) circular knitting needle, 32-inch or longer (to accommodate the growing stitch count)
- Tapestry needle for weaving in ends
- Crochet hook (any size, for making twisted fringe)
- Stitch markers (2 markers)
- Lifeline thread (optional but recommended)
Gauge
18 stitches and 24 rows = 4 inches in stockinette stitch (blocked). Gauge is important for achieving the correct size, but this shawl is forgiving—a slightly tighter or looser gauge will simply change the final dimensions slightly.
Step-by-Step Instructions
This shawl is knitted from the top center down, increasing on both sides to create a crescent shape. The lace pattern is a simple 8-row repeat that is easy to memorize. Worked in three color sections with a gradient effect, each color is used for a third of the shawl, transitioning with a subtle stripe of the next color.
Abbreviations
- k = knit
- p = purl
- yo = yarn over
- k2tog = knit two together (right-leaning decrease)
- ssk = slip, slip, knit (left-leaning decrease)
- kfb = knit front and back (increase)
- pm = place marker
- sm = slip marker
- rep = repeat
Pattern Notes
- The shawl is worked flat, back and forth, on a circular needle to accommodate the increasing number of stitches.
- Use a lifeline every 10 rows to easily rip back if needed. Thread a contrasting piece of waste yarn through the stitches on your needle after completing a row.
- The lace pattern is worked on the right side; wrong side rows are purled.
- Always slip markers as you come to them.
Cast On & Setup
With Color A, cast on 3 stitches.
Row 1 (RS): kfb, k1, kfb (5 stitches)
Row 2 (WS): purl all stitches
Row 3 (RS): kfb, k1, yo, k1, yo, k1, kfb (9 stitches)
Row 4 (WS): purl all stitches
Row 5 (RS): kfb, k3, yo, k1, yo, k3, kfb (13 stitches)
Row 6 (WS): purl all stitches
Row 7 (RS): kfb, k5, yo, k1, yo, k5, kfb (17 stitches)
Row 8 (WS): purl all stitches
Row 9 (RS): kfb, k7, yo, k1, yo, k7, kfb (21 stitches)
Row 10 (WS): purl all stitches
Now you have 21 stitches. Place a marker after the first stitch and before the last stitch to mark the increase points. These markers will stay in place throughout the entire shawl, and you will always increase (kfb) after the first marker and before the last marker.
Body of Shawl (Worked in Color A for first third)
Now you'll begin the lace pattern. The pattern repeat is worked between the markers, with the kfb increases at the edges. Here's how it works:
Row 1 (RS): kfb, sm, *k2tog, yo, k1, yo, ssk, k1; rep from * to last stitch, sm, kfb (increase 2 stitches)
Row 2 (WS): purl all stitches
Row 3 (RS): kfb, sm, *yo, ssk, k1, k2tog, yo, k1; rep from * to last stitch, sm, kfb
Row 4 (WS): purl all stitches
Row 5 (RS): kfb, sm, *k1, yo, ssk, k1, k2tog, yo; rep from * to last stitch, sm, kfb
Row 6 (WS): purl all stitches
Row 7 (RS): kfb, sm, *k2, yo, ssk, k1, k2tog; rep from * to last stitch, sm, kfb
Row 8 (WS): purl all stitches
Repeat Rows 1-8 until the shawl measures approximately 12 inches from the cast-on edge, ending with a WS row. You should have about 150 stitches. Don't worry if your stitch count varies slightly—the lace pattern is flexible and the increases at the edges will naturally add stitches over time.
Color Transition
To create a smooth gradient, work 2 rows in Color A, then 2 rows in Color B, then continue with Color B for the next section. This subtle striping effect blends the colors beautifully. Repeat this transition method when moving from Color B to Color C.
Transition rows:
Work Rows 1-2 of the lace pattern in Color A.
Work Rows 3-4 in Color B.
Continue with Color B from Row 5 onward.
Middle Section (Color B)
Continue repeating Rows 1-8 of the lace pattern with Color B until the shawl measures approximately 24 inches from the cast-on edge, ending with a WS row. You should have about 250 stitches.
Final Section (Color C)
Switch to Color C using the same transition method (2 rows Color B, 2 rows Color C, then continue with Color C). Continue repeating Rows 1-8 until the shawl measures approximately 36 inches from the cast-on edge, or until you have about 350 stitches. End with a WS row.
Edging
The edging is simply the same lace pattern worked once more, which creates a beautiful scalloped edge that complements the twisted fringe.
Row 1 (RS): kfb, sm, *k2tog, yo, k1, yo, ssk, k1; rep from * to last stitch, sm, kfb
Row 2 (WS): purl all stitches
Row 3 (RS): kfb, sm, *yo, ssk, k1, k2tog, yo, k1; rep from * to last stitch, sm, kfb
Row 4 (WS): purl all stitches
Row 5 (RS): kfb, sm, *k1, yo, ssk, k1, k2tog, yo; rep from * to last stitch, sm, kfb
Row 6 (WS): purl all stitches
Row 7 (RS): kfb, sm, *k2, yo, ssk, k1, k2tog; rep from * to last stitch, sm, kfb
Row 8 (WS): purl all stitches
Bind off loosely on the next RS row: k2tog, *slip resulting stitch back to left needle, k2tog; rep from * until one stitch remains. Cut yarn and pull through. This stretchy bind-off ensures the edge doesn't pucker.
Twisted Fringe
Cut strands of Color C (and a few of Color B for variation) about 12 inches long. For each fringe, take 3 strands, fold in half, and use a crochet hook to pull the folded loop through the edge of the shawl at regular intervals (every 2-3 stitches). Pull the ends through the loop and tighten.
Then twist each fringe tightly and let it coil naturally. To do this, hold the fringe between your thumb and forefinger and twist it in one direction until it's tight, then release—it will coil on its own. Trim ends evenly for a polished look.
Finishing
Weave in all ends with a tapestry needle. Block the shawl gently to open up the lace pattern: soak in lukewarm water with a drop of wool wash, gently squeeze out excess water (don't wring!), lay flat on a towel, and shape to measurements. Allow to dry completely. Blocking is essential for lace—it opens up the eyelets and makes the flame pattern truly shine.
Once dry, your Emberfall Crescent Shawl is ready to wear! The gradient of burnt sienna to amber to deep rust will wrap you in autumn's glow, and the twisted fringe adds that perfect rustic, bohemian touch. Enjoy your handmade masterpiece!