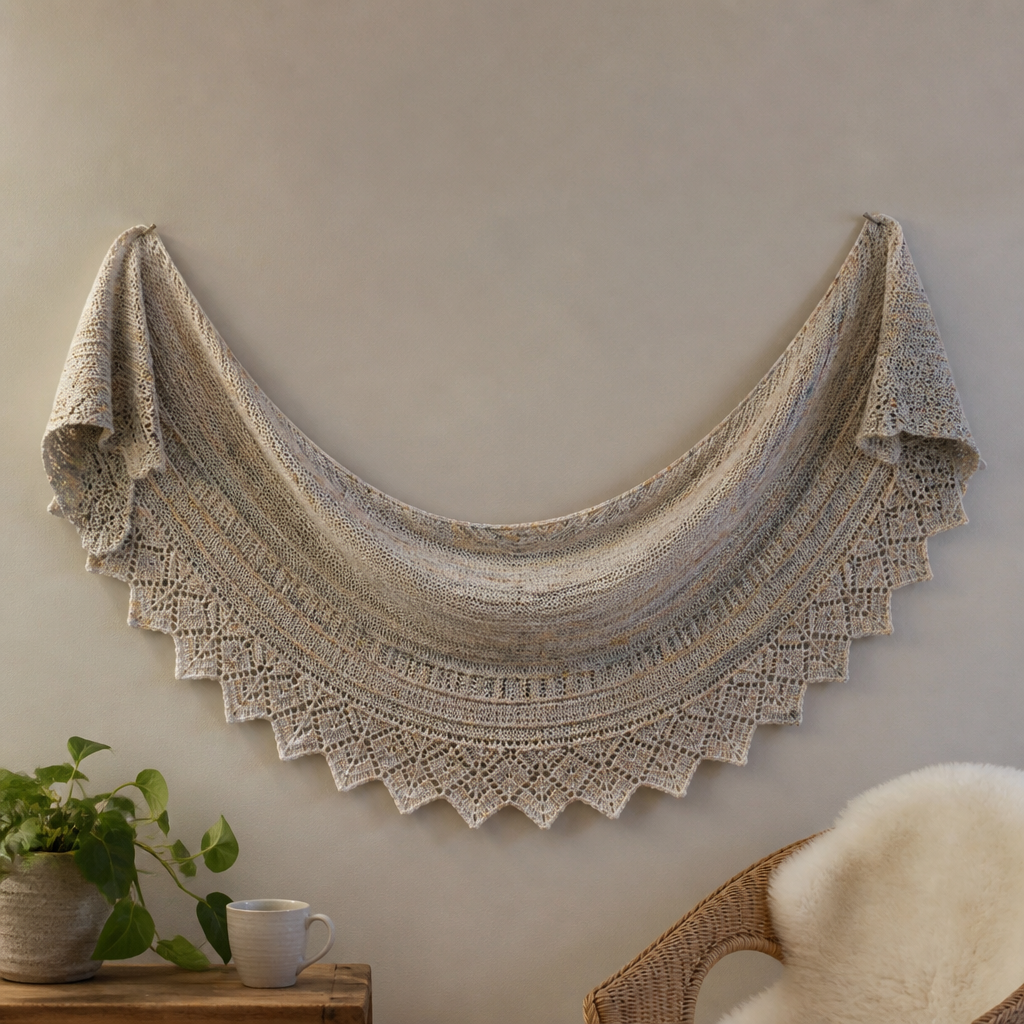
Enchanted Fern Lace Shawl Free Knitting Pattern

Enchanted Fern Lace Shawl Free Knitting Pattern
Wrap yourself in the delicate beauty of a fern-filled forest with this ethereal lace shawl. The intricate leaf motifs and soft gradient yarn create a stunning accessory that feels both magical and modern. Whether you're a seasoned lace knitter or ready to take your first steps into the world of openwork stitches, this pattern offers a rewarding project that results in a breathtaking, wearable piece of art.
This triangular shawl is knitted from the top center down, allowing the gradient yarn to transition beautifully from deep forest green to delicate aqua-teal. The symmetrical fern leaf motifs cascade down both sides of a central spine, creating a botanical, airy texture that catches the light with every movement. With clear instructions and detailed charts in written form, you'll be amazed at how achievable this heirloom-quality piece truly is.
Materials Needed
Before you begin your knitting journey, gather these essential supplies:
- Yarn: Fingering weight yarn in a gradient colorway (e.g., Malabrigo Sock in 'Cactus Flower' or a hand-dyed gradient from green to teal), approximately 400-450 yards
- Needle: US 6 (4.0 mm) circular knitting needle, 32 inches or longer (the long cord is essential for accommodating the growing number of stitches)
- Notions: Stitch markers (at least 2), tapestry needle for weaving in ends, blocking mats and pins
- Gauge: 20 stitches and 28 rows = 4 inches in stockinette stitch (blocked) - gauge is important for achieving the correct drape and size
Pro tip: Choose a gradient yarn with long color transitions for the most dramatic effect. The color changes will naturally highlight the lace pattern's structure.
Understanding the Pattern Structure
This shawl is constructed in three main sections: the setup, the increase section, and the lace pattern section. The shawl grows from just 3 stitches at the cast-on to a generous triangular shape with a central spine that creates perfect symmetry.
Abbreviations
- k = knit
- p = purl
- yo = yarn over
- k2tog = knit two together (right-leaning decrease)
- ssk = slip, slip, knit (left-leaning decrease)
- kfb = knit front and back (increase)
- pm = place marker
- sm = slip marker
Step-by-Step Instructions
Setup Section
Begin your shawl with these foundation rows:
Cast on: Cast on 3 stitches loosely.
Row 1 (RS): kfb, k1, kfb (5 stitches)
Row 2 (WS): Knit all stitches
Row 3 (RS): kfb, k1, pm, k1, pm, k1, kfb (7 stitches)
Row 4 (WS): Knit all stitches
You now have 7 stitches with markers on either side of the center stitch. This center stitch will remain the spine of your shawl throughout the entire project.
Increase Section
Now you'll work the increase section, which creates the triangular shape of the shawl. The increases happen at the beginning and end of each right-side row, plus on either side of the center spine.
Row 5 (RS): kfb, knit to 1 stitch before marker, kfb, sm, k1, sm, kfb, knit to last stitch, kfb (4 increases made)
Row 6 (WS): Knit all stitches
Repeat Rows 5-6 until you have 99 stitches on the needle. This will take approximately 23 repeats. Each repeat adds 4 stitches, so you'll go from 7 stitches to 99 stitches.
Helpful hint: Count your stitches after every few repeats to ensure accuracy. The pattern is very forgiving, but catching mistakes early saves time.
Lace Pattern Section
Now the magic begins! The fern lace pattern is worked over 12 stitches, with the center spine stitch between the markers. The pattern creates beautiful leaf motifs with yarn overs and paired decreases.
Row 1 (RS): kfb, *yo, k2tog, k3, yo, k1, yo, k3, ssk, yo* repeat from * to * until 1 stitch before marker, kfb, sm, k1, sm, kfb, repeat from * to * until 1 stitch before end, kfb
Row 2 (WS): Purl all stitches
Row 3 (RS): kfb, *k1, yo, k2tog, k2, yo, k3, yo, k2, ssk, yo, k1* repeat until 1 stitch before marker, kfb, sm, k1, sm, kfb, repeat from * to * until 1 stitch before end, kfb
Row 4 (WS): Purl all stitches
Row 5 (RS): kfb, *k2, yo, k2tog, k1, yo, k5, yo, k1, ssk, yo, k2* repeat until 1 stitch before marker, kfb, sm, k1, sm, kfb, repeat from * to * until 1 stitch before end, kfb
Row 6 (WS): Purl all stitches
Row 7 (RS): kfb, *k3, yo, k2tog, yo, k7, yo, ssk, yo, k3* repeat until 1 stitch before marker, kfb, sm, k1, sm, kfb, repeat from * to * until 1 stitch before end, kfb
Row 8 (WS): Purl all stitches
Row 9 (RS): kfb, *k4, yo, ssk, k5, k2tog, yo, k4* repeat until 1 stitch before marker, kfb, sm, k1, sm, kfb, repeat from * to * until 1 stitch before end, kfb
Row 10 (WS): Purl all stitches
Row 11 (RS): kfb, *k5, yo, ssk, k3, k2tog, yo, k5* repeat until 1 stitch before marker, kfb, sm, k1, sm, kfb, repeat from * to * until 1 stitch before end, kfb
Row 12 (WS): Purl all stitches
Row 13 (RS): kfb, *k6, yo, ssk, k1, k2tog, yo, k6* repeat until 1 stitch before marker, kfb, sm, k1, sm, kfb, repeat from * to * until 1 stitch before end, kfb
Row 14 (WS): Purl all stitches
Row 15 (RS): kfb, *k7, yo, k3tog, yo, k7* repeat until 1 stitch before marker, kfb, sm, k1, sm, kfb, repeat from * to * until 1 stitch before end, kfb
Row 16 (WS): Purl all stitches
Repeat Rows 1-16 of the lace pattern until the shawl measures approximately 24 inches from the cast-on edge, or until you have used most of your yarn, ending with a wrong-side row.
Reading the pattern: The asterisks (*) indicate the repeat section. Work from the first * to the second * across the row, then repeat as many times as needed before reaching the marker section.
Edging
The delicate picot-like border adds the perfect finishing touch:
Row 1 (RS): kfb, *yo, k2tog* repeat until 1 stitch before marker, kfb, sm, k1, sm, kfb, repeat from * to * until 1 stitch before end, kfb
Row 2 (WS): Purl all stitches
Row 3 (RS): kfb, *yo, k2tog* repeat until 1 stitch before marker, kfb, sm, k1, sm, kfb, repeat from * to * until 1 stitch before end, kfb
Row 4 (WS): Purl all stitches
Bind off loosely on the next right-side row (knitwise). A loose bind-off is crucial for maintaining the stretchy, drapey edge of the shawl. Consider using a larger needle or a stretchy bind-off method if needed.
Finishing and Blocking
Blocking is where the true magic of lace knitting reveals itself. The stitches will open up and the pattern will become crisp and defined.
- Weave in all ends using a tapestry needle, being careful not to pull too tightly.
- Soak the shawl in lukewarm water with a gentle wool wash for 20 minutes. This allows the fibers to relax completely.
- Gently squeeze out excess water - do not wring or twist the fabric.
- Lay the shawl flat on a clean towel and roll it up to remove additional water.
- Place the shawl on a blocking mat and pin out to shape, stretching the lace points and opening up the leaf motifs. Pay special attention to the bottom edge points.
- Allow to dry completely before unpinning. This may take 24-48 hours depending on humidity.
Tips for Success
- Use lifelines: Thread a contrasting piece of waste yarn through the stitches after every lace repeat. If you make a mistake, you can easily rip back to the lifeline without losing your work.
- Count regularly: The stitch count should remain consistent within each lace repeat. If your count is off, check your yarn overs and decreases.
- Choose your gradient wisely: For the most dramatic effect, select a yarn with long color transitions. Short transitions can create a busy look that obscures the lace pattern.
- Block generously: Lace knitting always looks small and scrunched before blocking. Trust the process and pin aggressively to reveal the full beauty of the pattern.
This Enchanted Fern Lace Shawl is more than just an accessory - it's a wearable piece of art that captures the serene beauty of a forest floor. The gradient yarn creates a stunning ombre effect that transitions from deep forest green through soft sage to delicate aqua-teal, making each shawl unique. Whether you're knitting it for yourself or as a cherished gift, this pattern will become a treasured addition to your knitting repertoire.
Happy knitting, and may your needles always be full of enchantment!