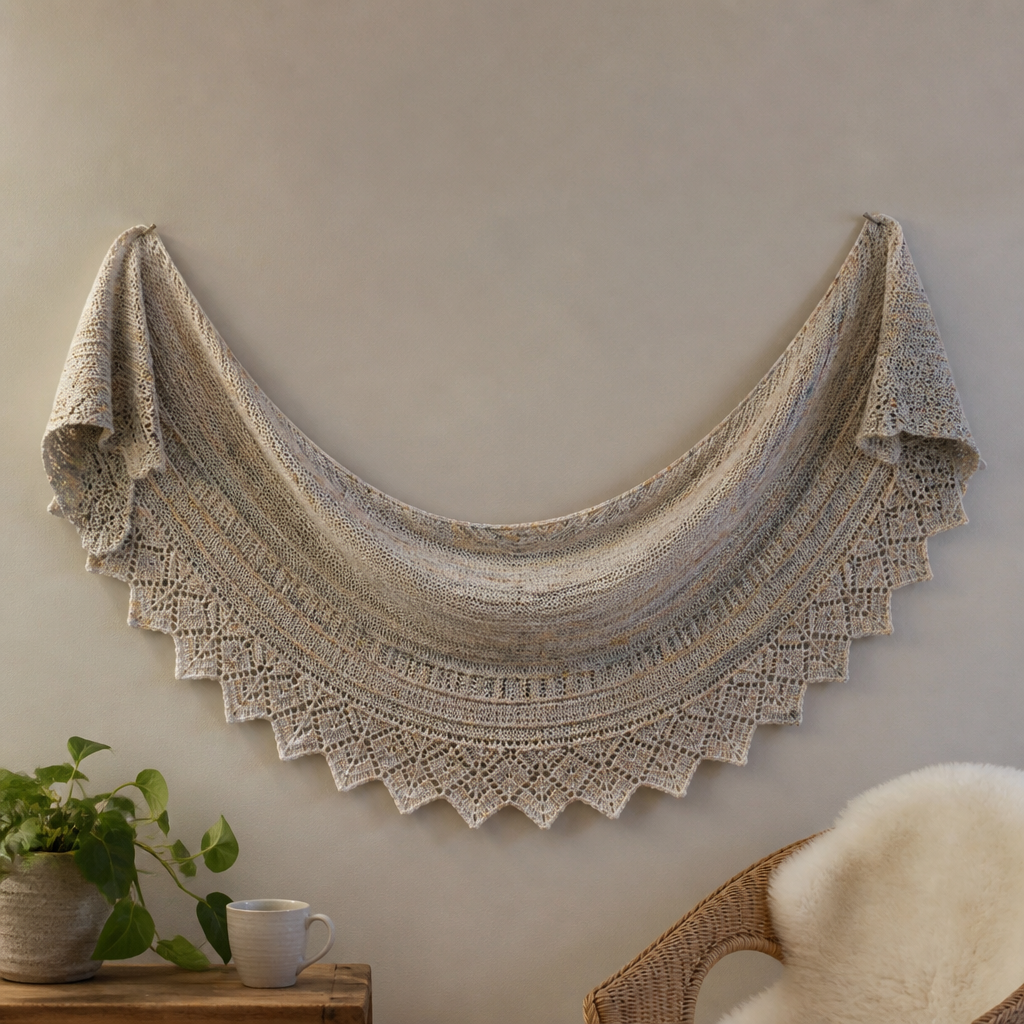
Luminous Lagoon Crescent Shawl Free Knitting Pattern

Luminous Lagoon Crescent Shawl: A Free Knitting Pattern for Dreamy Summer Evenings
Imagine wrapping yourself in the shifting, iridescent colors of a tropical lagoon—turquoise melting into seafoam, then deepening into rich teal. That's the magic of the Luminous Lagoon Crescent Shawl. This free knitting pattern creates a breathtaking crescent-shaped shawl knit from the top down, featuring a mesmerizing gradient and an open, airy lace stitch that keeps it light and breezy. Perfect for cool evenings by the water or adding a touch of ethereal elegance to any outfit, this pattern is surprisingly accessible for confident beginners ready to explore lace work.
In this comprehensive guide, we'll walk you through every step, from gathering your materials to binding off a beautifully draped masterpiece. Let's dive into creating your own piece of wearable art.
Materials Needed: Gathering Your Lagoon-Inspired Supplies
Before you cast on, let's ensure you have everything you need. The beauty of this pattern lies in its simplicity of materials—just yarn, needles, and a few notions.
Yarn
You have two fantastic options for achieving the gradient effect:
- Option 1 (Gradient Yarn Set): The easiest route is to purchase a pre-dyed gradient set in fingering weight. Look for a set that transitions through blues, greens, and teals. You'll need approximately 900 yards total.
- Option 2 (Three Colors): For a more customized look, choose three complementary fingering weight yarns:
- Color A: 350 yards (e.g., Turquoise)
- Color B: 300 yards (e.g., Seafoam Green)
- Color C: 250 yards (e.g., Deep Teal)
Needles & Notions
- Circular Needle: US Size 6 (4.0 mm), 32 inches or longer. The long cord is essential to accommodate the growing number of stitches as the shawl expands.
- Stitch Markers: At least one removable marker to denote the center spine.
- Tapestry Needle: For weaving in ends.
- Blocking Mats & Pins: To shape and open up the lace pattern for a professional finish.
Gauge
18 stitches and 24 rows = 4 inches in stockinette stitch (blocked). While gauge isn't critical for a shawl's fit, it affects the final size and drape. Knitting a small swatch and blocking it will help you achieve the intended airy fabric.
Step-by-Step Instructions: Knitting Your Luminous Lagoon Shawl
This shawl is knit from the top center down, increasing on both sides of a central spine. The construction is intuitive, and the lace pattern is a simple repeat of yarn overs and decreases. Let's get started!
Abbreviations
- k = knit
- p = purl
- yo = yarn over
- k2tog = knit two together (right-leaning decrease)
- ssk = slip, slip, knit (left-leaning decrease)
- pm = place marker
- sm = slip marker
- RS = right side
- WS = wrong side
Part 1: The Setup & Garter Stitch Base
Step 1: Cast On & Initial Pick-Up
Cast on 3 stitches. Knit 6 rows (this creates a small garter stitch tab).
Now, turn your work 90 degrees clockwise. Pick up and knit 3 stitches along the side edge of the tab. Then, pick up and knit 3 stitches from the cast-on edge. You should now have 9 stitches on your needle. This clever technique creates a seamless, rounded starting point.
Step 2: Establish the Spine
Row 1 (RS): k3, yo, k1, yo, pm (center), k1, yo, k1, yo, k3. (13 stitches)
Row 2 (WS): k3, purl to last 3 stitches, k3.
Note: The first and last 3 stitches of every row are always knit, creating a neat garter stitch border. The yarn overs in Row 1 establish the increase points.
Step 3: Grow the Base
Row 3 (RS): k3, yo, knit to 1 stitch before marker, yo, k1, sm, k1, yo, knit to last 3 stitches, yo, k3. (17 stitches)
Row 4 (WS): k3, purl to last 3 stitches, k3.
Pro Tip: You are now increasing 4 stitches on every RS row: one at each edge and one on each side of the center marker.
Repeat Rows 3 and 4 until you have 45 stitches total (about 10 repeats of the increase rows). This forms a solid, structured garter stitch base that will anchor the delicate lace.
Part 2: The Lace Pattern
Now for the fun part—watching the open, airy lace emerge! This section uses a simple 4-row repeat that combines eyelet rows with plain knit rows.
Row 1 (RS - Eyelet Increase Row): k3, yo, *k2tog, yo* repeat from * to * until 1 stitch before marker, yo, k1, sm, k1, yo, *yo, ssk* repeat from * to * until 3 stitches before end, yo, k3. (Increase 4 stitches)
Explanation: This row creates the decorative holes. On the left side of the center, you use k2tog (right-leaning), and on the right side, you use ssk (left-leaning) to keep the lace symmetrical.
Row 2 (WS): k3, purl to last 3 stitches, k3.
Row 3 (RS - Plain Increase Row): k3, yo, knit to 1 stitch before marker, yo, k1, sm, k1, yo, knit to last 3 stitches, yo, k3.
Row 4 (WS): k3, purl to last 3 stitches, k3.
Color Sequence:
Repeat these 4 rows, alternating colors every 2 repeats (8 rows) as follows:
- Work 2 repeats (8 rows) with Color A.
- Work 2 repeats (8 rows) with Color B.
- Work 2 repeats (8 rows) with Color C.
- Repeat the color sequence (A, B, C) until the shawl measures approximately 24 inches from the center spine (or your desired length).
Part 3: The Final Edging & Bind-Off
To give your shawl a beautiful, scalloped edge that mirrors the lace, we'll work two final eyelet rows before binding off.
Row 1 (RS): k3, yo, *k2tog, yo* repeat from * to * until 1 stitch before marker, yo, k1, sm, k1, yo, *yo, ssk* repeat from * to * until 3 stitches before end, yo, k3.
Row 2 (WS): k3, purl to last 3 stitches, k3.
Row 3 (RS): k3, yo, *k2tog, yo* repeat from * to * until 1 stitch before marker, yo, k1, sm, k1, yo, *yo, ssk* repeat from * to * until 3 stitches before end, yo, k3.
Row 4 (WS): Bind off loosely purlwise. For an extra stretchy edge, use a "lace bind-off" (k1, *yo, k2tog, pass the yo over the k2tog* repeat) or simply bind off with a larger needle.
Finishing Touches: Weave & Block
Weave in all loose ends carefully with your tapestry needle, being sure to secure them on the wrong side of the work.
Blocking is crucial for this pattern. It transforms the fabric, opening up the lace and giving the shawl its signature drape. Soak the shawl in lukewarm water with a drop of wool wash for 20 minutes. Gently squeeze out excess water (never wring!). Lay it on blocking mats and pin it out to its full crescent shape, stretching the edges to emphasize the scallops. Allow it to dry completely before unpinning.
Congratulations! You've created a stunning Luminous Lagoon Crescent Shawl. Drape it over your shoulders and enjoy the beautiful, shifting colors you've knit with your own hands.