Meadow Mist Child's Poncho Free Pattern
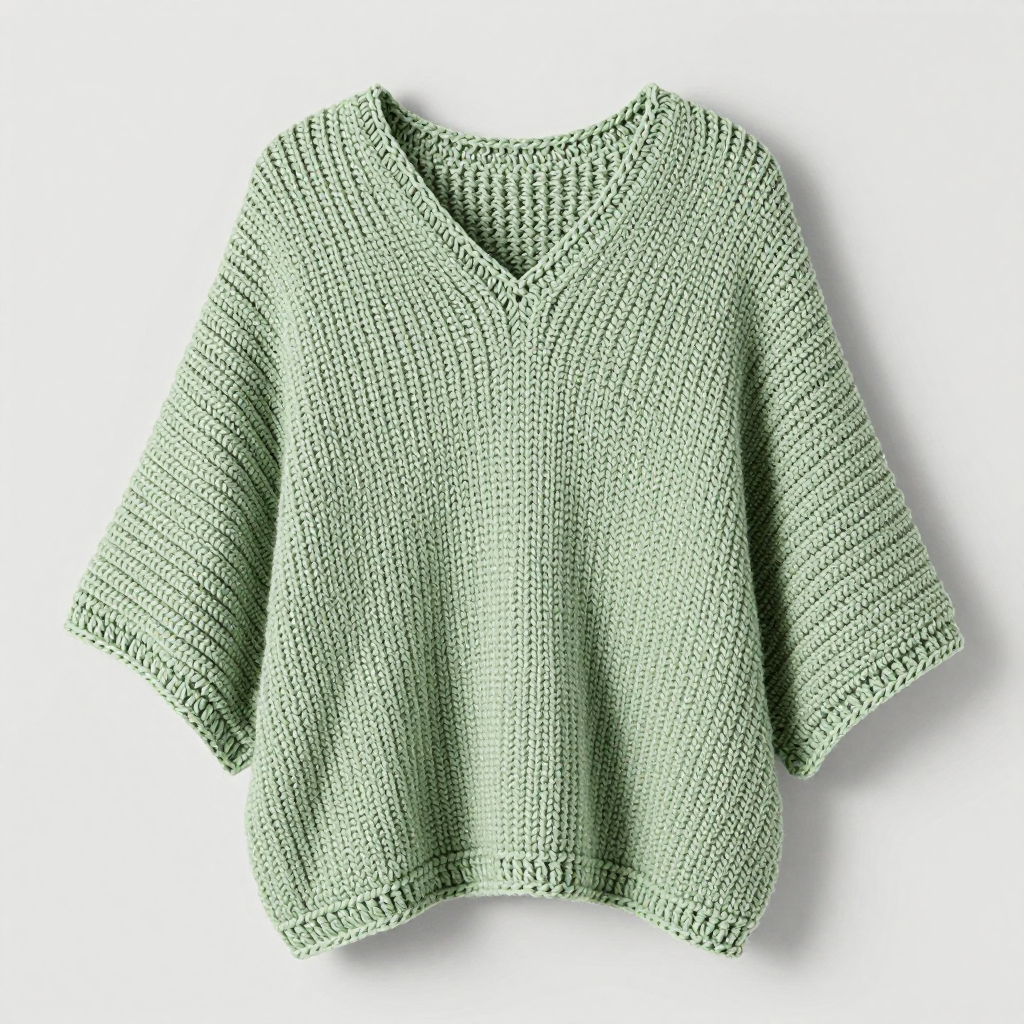
Meadow Mist Child's Poncho — A Free, Beginner-Friendly Crochet Pattern
Introduction
If you have never held a crochet hook before, this is the perfect first garment for you. The Meadow Mist Child's Poncho is worked almost entirely in one simple, soothing stitch — the double crochet — so you only need to learn a single motion before you can make something a little girl will actually wear. It is soft, lightweight, and airy, with a gentle V-neck at the front and a relaxed flare that drapes beautifully over the shoulders. Made in a pale sage green DK yarn, the finished poncho feels like a warm hug: dense enough to block a chill, but flexible and light enough to layer over a t-shirt in spring or a long-sleeve top in autumn. There are no sleeves to set in, no shaping to stress over, and no complicated stitch patterns — just round after round of easy stitches that grow quickly under your hands.
Materials Needed
- Yarn: DK weight (also called weight category 3 or "light worsted") yarn, approximately 350–400 yards total for child sizes 4–6. The sample uses a soft acrylic-cotton blend in pale sage green. For the larger size (6–8), buy an extra skein so you do not run short.
- Crochet hook: Size J/10 (6.0 mm). (The "J/10" is the US size; "6.0 mm" is the metric size. They are the same hook.)
- Stitch markers: At least 4. These are small plastic clips or safety pins you clip onto a stitch to mark your place.
- Tapestry needle: A large, blunt-tipped sewing needle with an eye big enough for yarn. Used for weaving in ends.
- Scissors: Any sharp pair for cutting yarn.
- Measuring tape: For checking gauge and finished size.
Finished size / dimensions: Child 4–6 (6–8). The smaller size measures approximately 26 inches around the bottom hem and 14 inches from neck to hem. The larger size measures approximately 29 inches around the bottom hem and 16 inches from neck to hem. The neck opening stretches to approximately 20 (22) inches around, which slips easily over a child's head.
Abbreviations and Beginner Glossary
Read this list once before you begin. Every abbreviation used in this pattern is explained here in plain English — nothing is assumed.
- ch — chain. Make a loop with the yarn, then pull a new loop through it. Each loop you pull through is one chain. Chains are the foundation you build on.
- sl st — slip stitch. Insert your hook into the stitch, wrap the yarn over the hook, and pull it straight through both the stitch and the loop already on your hook. It makes a nearly invisible joining stitch.
- dc — double crochet. Wrap the yarn over your hook once, insert the hook into the stitch, wrap the yarn over again and pull up a loop (3 loops on hook), wrap yarn over and pull through 2 loops (2 loops left), wrap yarn over and pull through the last 2 loops (1 loop left). This is the main stitch of the whole poncho.
- sc — single crochet. Insert hook into the stitch, wrap yarn over and pull up a loop (2 loops on hook), wrap yarn over and pull through both loops. A short, firm stitch used for the edging.
- dc2tog — double crochet two stitches together. This is a decrease: it turns two stitches into one. Wrap yarn over, insert hook into the first stitch, pull up a loop (3 loops on hook), pull through 2 loops (2 loops left), wrap yarn over, insert hook into the next stitch, pull up a loop (4 loops on hook), pull through 2 loops (3 loops left), wrap yarn over and pull through all 3 remaining loops. One stitch is now where two used to be.
- sts — stitches. The individual loops you have made.
- rep — repeat. Do the instruction again the number of times stated.
- tog — together. Used in dc2tog above.
- ch-2 — chain-2 space. The little gap made by two chains; you work into it as if it were a stitch.
- ch-1 space — chain-1 space. Same idea, made by a single chain.
- RS — right side. The "good" side of the fabric that faces outward when worn.
- turn — turn your work. Flip the piece over so you work back across the row you just made, in the opposite direction.
- join — join with a slip stitch. After working all the way around a round, slip stitch into the top of the first stitch (or the turning chain) to close the circle.
- turning chain — The ch-2 you make at the start of each round or row. It lifts your yarn up to the height of a double crochet. In this pattern, the ch-2 counts as the first double crochet unless stated otherwise.
- fasten off — Cut the yarn a few inches from your work, pull the tail all the way through the last loop, and tug gently to lock it.
- weave in ends — Thread a yarn tail onto a tapestry needle and sew it back and forth through the fabric so it disappears.
- block — Dampen the finished piece and lay it flat to dry in shape, so the stitches relax and even out.
Gauge
Gauge: 14 stitches and 8 rows = 4 inches in double crochet.
Why gauge matters: Gauge is simply how big your stitches come out. If your stitches are bigger than the pattern's, the poncho will be too large; if they are smaller, it may not fit over the child's head. Because this poncho is worked from the neck down, an off-gauge fabric can make the neck opening too tight or too loose. Checking gauge first saves you hours of work.
How to make a gauge swatch: With your J/10 (6.0 mm) hook and your DK yarn, chain 20. Work 10 rows of double crochet (ch 2 to turn at the start of each row, then dc in each stitch across). Lay the swatch flat without stretching it and measure a 4-inch section in the middle with your measuring tape. Count how many stitches fit across those 4 inches and how many rows fit in 4 inches vertically. If you have more than 14 stitches in 4 inches, your stitches are too small — try a larger hook. If you have fewer than 14, your stitches are too big — try a smaller hook. Change hook size and swatch again until you match.
Beginner Tips Before You Start
- Use stitch markers to track your rounds. Clip a marker into the very first stitch of each round. When you come back around and meet the marker, you know you have completed a full round and where to join. This single habit prevents most beginner mistakes.
- Do not pull your yarn too tight. Tension is the number one beginner issue. Hold the yarn loosely enough that your hook slides easily through each loop. Tight stitches make a stiff, small poncho that is hard to work.
- Count every round. The stitch count in parentheses at the end of each round is your safety net. Count your stitches before you join. If the number is off, fix it now rather than three rounds later.
- Keep the starting ring untwisted. When you join your first chain into a ring, make sure the chain lies flat and does not spiral. A twisted ring cannot be fixed later — you would have to start over.
- Remember the turning chain counts as a stitch. The ch-2 at the start of each round is your first double crochet. When you join at the end of the round, slip stitch into the top of that ch-2, not into the base of it.
- Work the V-neck rows slowly. Rows 4–10 are worked flat (back and forth) rather than in the round, which feels different. Lay the piece down and read the instructions for each row before you begin it.
Step-by-Step Instructions
Sizes: Child 4–6 (6–8). Instructions are written for the smaller size; the larger size is in parentheses. Where only one number is given, it applies to both sizes.
Notes: The poncho is worked in the round from the neck down. The turning chain counts as the first stitch unless otherwise noted. The V-neck is created by working back and forth for a few rows before joining the front again.
Neck Opening
Round 1: Ch 60 (66), join with sl st to first ch to form a ring, being careful not to twist. Ch 2 (counts as first dc), dc in each ch around. Join with sl st to top of ch-2. (60/66 dc)
Round 2: Ch 2, dc in same st, *dc in next 4 sts, 2 dc in next st; rep from * around, ending with dc in last 4 sts. Join. (72/80 dc)
Round 3: Ch 2, dc in each st around. Join. (72/80 dc)
V-Neck Shaping (worked flat)
Row 4: Ch 2, dc in next 17 (19) sts, turn. Leave remaining sts unworked for now. (18/20 dc)
Row 5: Ch 2, dc in each st across, turn. (18/20 dc)
Row 6: Ch 2, dc2tog over first 2 sts, dc in each st to last 2 sts, dc2tog. Turn. (16/18 dc)
Row 7: Ch 2, dc in each st across, turn. (16/18 dc)
Row 8: Ch 2, dc2tog, dc in each st to last 2 sts, dc2tog. Turn. (14/16 dc)
Fasten off.
Rejoin yarn to the next unworked st of Round 3 (skipping the center front sts for the V opening), and repeat Rows 4–8 for the second front section. (14/16 dc)
Joining the Front
Row 9: Ch 2, dc across first front section, ch 1 (or ch 2 for larger size) to bridge the V gap, dc across second front section. Turn. (28/32 dc plus ch-1 space)
Row 10: Ch 2, dc in each st and ch-1 space across. Turn. (29/33 dc)
Body (worked in the round again)
Round 11: Ch 2, dc in each st around entire poncho, join with sl st to top of ch-2. (72/80 dc)
Round 12: Ch 2, dc in same st, *dc in next 5 sts, 2 dc in next st; rep from * around. Join. (84/93 dc)
Round 13: Ch 2, dc in each st around. Join. (84/93 dc)
Round 14: Ch 2, dc in same st, *dc in next 6 sts, 2 dc in next st; rep from * around. Join. (96/106 dc)
Round 15: Ch 2, dc in each st around. Join. (96/106 dc)
Round 16: Ch 2, dc in same st, *dc in next 7 sts, 2 dc in next st; rep from * around. Join. (108/119 dc)
Rounds 17–22: Ch 2, dc in each st around. Join. (108/119 dc) — this means you work six identical rounds: Round 17, Round 18, Round 19, Round 20, Round 21, and Round 22, each one being "Ch 2, dc in each st around, join."
Edging
Round 23: Ch 1, sc in each st around, join with sl st to first sc. Fasten off. (108/119 sc)
Neck Trim
With right side facing, join yarn at back neck.
Round 1: Ch 1, sc evenly around neck opening, join with sl st to first sc. Fasten off. (60/66 sc)
Weave in all ends. Block lightly to relax stitches.
Assembly and Finishing
Seaming: This poncho has no seams to sew — it is worked in one piece from the neck down, so there is nothing to stitch together. The only "assembly" is closing the small V-neck gap you bridged in Row 9. If the ch-1 bridge looks loose, thread a tapestry needle with a short length of matching yarn and take two or three tiny stitches across the gap on the wrong side, then knot and weave in. Keep it invisible from the front.
Weaving in ends: Thread each yarn tail onto your tapestry needle. Turn the poncho to the wrong side (the inside). Sew the tail back and forth through the backs of several stitches — about 2 inches — changing direction once so it cannot pull out. Trim the yarn close to the fabric. Do this for every tail: the starting tail, the fasten-off tails at the V-neck, the edging, and the neck trim.
Blocking: Fill a sink with cool water and a drop of gentle soap. Submerge the poncho and let it soak for 15 minutes. Squeeze — do not wring or twist — the water out, then roll it in a towel and press to remove more moisture. Lay it flat on a dry towel or blocking mat, gently pat the neck opening and hem into shape, and smooth the V-neck flat. Leave it to dry completely, away from direct sun or heat, for 24 hours. Blocking relaxes the stitches, evens out any tight spots, and gives the poncho its soft drape.
Pro Tips and Variations
- Change colors for a striped look. Work Rounds 1–10 in one color, then switch to a second color for the body and a third for the edging. Change colors at the join at the end of a round: fasten off the old color, join the new color with a slip stitch into the same stitch, then continue. Weave in the tails as you go.
- Adjust the size. To make the poncho longer, simply add more plain double crochet rounds (like Rounds 17–22) before the edging — each extra round adds about half an inch. To make it wider, add one more increase round following the same pattern (dc in next 8 sts, 2 dc in next st, repeat) before the plain rounds.
- Substitute yarn. Any DK weight (category 3) yarn works: cotton for a crisp summer poncho, acrylic for easy washing, or a wool blend for warmth. Always crochet a gauge swatch with the new yarn, because different fibers behave differently.
- Add a decorative edge. Replace the plain single crochet edging with a simple shell edging: *sc in next st, skip 2 sts, 5 dc in next st, skip 2 sts; repeat from * around. It adds a pretty scalloped hem with no extra skills required.


