Opal Cascade Wrap Free Pattern – Knit a Shimmering Desert Mirage Shawl

Opal Cascade Wrap Free Pattern – Knit a Shimmering Desert Mirage Shawl
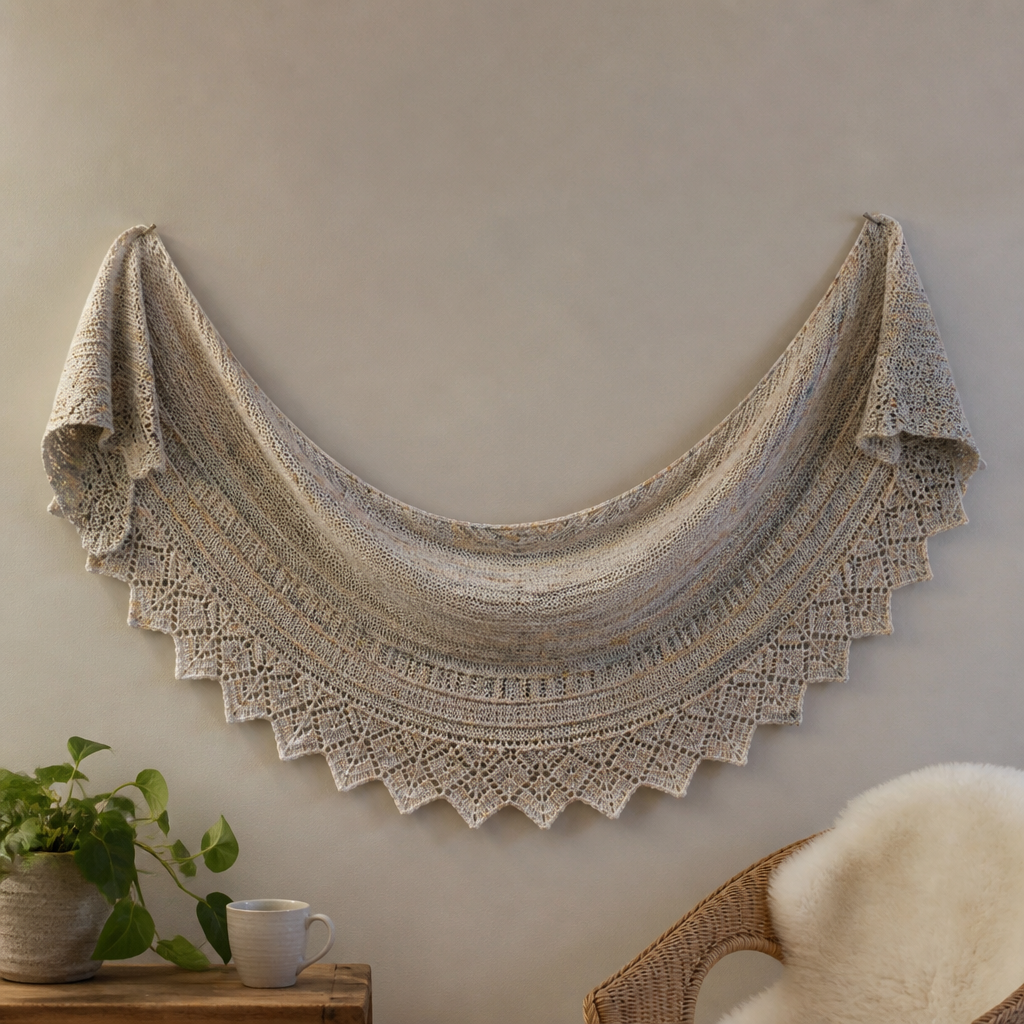
Drape yourself in the shifting hues of a desert sunset with this mesmerizing knit wrap. The Opal Cascade Wrap uses gradient yarns to create an opal-like play of light and shadow, while the textured honeycomb stitch adds a cozy, dimensional warmth that feels like a gentle embrace. This free knitting pattern is perfect for intermediate beginners who want to create a stunning, wearable piece of art. The long, tapered triangle shape starts narrow at the top, widens gracefully through the middle, and tapers to a point—a silhouette that flatters every body type and adds a touch of earthy elegance to any outfit.
Whether you're curling up with a book on a cool evening or heading out for a crisp autumn walk, this wrap will become your go-to accessory. The gradient color transitions—from warm terracotta through dusty rose to soft sand—mimic the natural beauty of a desert landscape, making every stitch a small celebration of nature's palette. Best of all, this pattern is worked flat in one piece, so there's no seaming or complicated shaping to worry about. Let's dive in and create something beautiful together!
Materials Needed
Before you begin, gather the following supplies. Having everything ready will make your knitting experience smooth and enjoyable.
Yarn
- Worsted weight yarn in 3 coordinating gradient colors (e.g., terracotta, dusty rose, and sand)
- Approximately 800 yards total (roughly 267 yards per color)
- Tip: Choose yarns with similar fiber content (wool, acrylic, or blends) to ensure consistent drape and gauge. A smooth, non-fuzzy yarn will showcase the honeycomb stitch best.
Needles & Notions
- US 9 (5.5 mm) circular knitting needle, 32-inch length (the long cord accommodates the growing stitch count)
- Tapestry needle for weaving in ends
- Stitch markers (optional, but helpful for tracking pattern repeats)
- Scissors
- Blocking mats and pins (for finishing)
Gauge
16 stitches and 22 rows = 4 inches in honeycomb stitch pattern. Always knit a gauge swatch before starting to ensure your finished wrap has the correct dimensions. If your gauge is off, adjust your needle size accordingly.
Step-by-Step Instructions
This wrap is knitted flat in one piece from the top center down, using a simple honeycomb stitch that creates a beautiful textured fabric. Follow these detailed instructions carefully, and you'll have a gorgeous wrap in no time.
Abbreviations
- CO: cast on
- K: knit
- P: purl
- K2tog: knit two together (decrease)
- YO: yarn over (increase)
- Sl: slip
- wyif: with yarn in front
- Rep: repeat
- RS: right side
- WS: wrong side
Honeycomb Stitch Pattern (multiple of 4 + 2)
This stitch creates the beautiful dimensional texture of the wrap. Practice it on a small swatch first if you're unfamiliar with slipped stitches.
- Row 1 (RS): K2, *Sl 2 wyif, K2; rep from * to end.
- Row 2 (WS): Purl all stitches.
- Row 3: K2, *K2, Sl 2 wyif; rep from * to end.
- Row 4: Purl all stitches.
Note: When slipping stitches wyif, simply move the yarn to the front of your work, slip the two stitches purlwise, then move the yarn back to the back before knitting the next stitches. This creates the honeycomb effect.
Section 1: Cast On and Increase
We'll start at the top point of the wrap and gradually increase stitches to create the widening shape.
- With Color A (terracotta), CO 2 stitches using your preferred method (long-tail cast on works well).
- Row 1 (RS): K1, YO, K1. (3 stitches)
- Row 2 (WS): K1, P1, K1. (3 stitches)
- Row 3: K1, YO, K1, YO, K1. (5 stitches)
- Row 4: K1, P3, K1. (5 stitches)
- Continue increasing 2 stitches every RS row by working YO after the first stitch and before the last stitch. Work WS rows as: K1, Purl to last stitch, K1.
- Repeat these increases until you have 20 stitches on the needle.
Pro tip: The edge stitches (first and last stitch of every row) are your garter stitch border. Always knit them on RS rows and purl them on WS rows to create a neat, finished edge.
Section 2: Begin Honeycomb Stitch
Now we'll incorporate the honeycomb pattern while continuing to shape the wrap.
- Next RS row: K1 (edge), work Honeycomb Stitch pattern across the next 18 stitches, K1 (edge).
- Continue in pattern, maintaining the edge stitches as K on RS and P on WS.
- Increase 2 stitches every 6th row by working YO after the first edge stitch and before the last edge stitch. This keeps the wrap widening gradually.
- Continue until the wrap measures 20 inches from the cast-on edge. You will have approximately 80 stitches on your needle.
Counting tip: Place a stitch marker after the first edge stitch and before the last edge stitch. This makes it easy to remember where to work your increases.
Section 3: Color Changes
This is where the magic happens! The gradient effect comes from switching colors at specific intervals.
- When the wrap measures 8 inches from the cast-on edge, switch to Color B (dusty rose). Simply start knitting with the new color, leaving a tail to weave in later.
- When the wrap measures 14 inches from the cast-on edge, switch to Color C (sand).
- Continue in pattern until the total length is 28 inches from the cast-on edge.
Tip: When changing colors, knit the first stitch of the new color loosely to avoid puckering. You can also twist the old and new yarns together on the WS to secure them.
Section 4: Decrease for Bottom Edge
Now we'll shape the bottom point of the wrap by decreasing stitches.
- Next RS row: K1, K2tog, work in pattern to last 3 stitches, K2tog, K1. (Decrease 2 stitches)
- Work WS row in pattern (K1, Purl to last stitch, K1).
- Repeat these two rows until you have 20 stitches remaining on your needle.
Note: The decreases should be worked on either side of the honeycomb pattern, just inside the edge stitches. This maintains the clean border while shaping the point.
Section 5: Final Decrease and Bind Off
We're in the home stretch! These final decreases create the elegant point at the bottom of the wrap.
- Next RS row: K1, K2tog, work to last 3 stitches, K2tog, K1. (18 stitches)
- Next WS row: K1, Purl to last stitch, K1.
- Repeat these two rows until you have 6 stitches remaining.
- Next RS row: K1, K2tog, K2tog, K1. (4 stitches)
- Next WS row: K1, P2, K1.
- Next RS row: K2tog, K2tog. (2 stitches)
- Next WS row: K2tog, fasten off.
Pull the yarn through the last loop and weave in the end securely.
Finishing
Your wrap is almost complete! These final steps will make it look professionally finished.
- Weave in all ends with a tapestry needle. Be sure to weave in the color change tails securely, going back and forth through the stitches to prevent unraveling.
- Block the wrap gently to open up the honeycomb texture and even out the edges. Wet block by soaking in lukewarm water with a drop of wool wash, gently squeeze out excess water (don't wring!), and lay flat on blocking mats. Pin the edges to your desired dimensions and allow to dry completely.
- Optional: Add a simple fringe to the two short ends using leftover yarn in all three colors for a playful desert vibe. Cut yarn strands about 10 inches long, fold in half, and pull the loop through the edge stitches using a crochet hook. Pull the ends through the loop and tighten. Space fringe every 0.5–1 inch along the short edges.
Final Thoughts
Congratulations! You've just created your very own Opal Cascade Wrap—a stunning piece that captures the beauty of a desert sunset in every stitch. The honeycomb texture casts gentle shadows that enhance the opal-like color transitions, making this wrap as beautiful to look at as it is cozy to wear.
This pattern is wonderfully versatile. Experiment with different color combinations to match your personal style—think ocean blues, forest greens, or even bold jewel tones. The wrap also makes a thoughtful handmade gift for someone special.
We'd love to see your finished creation! Share your Opal Cascade Wrap on social media with the hashtag #OpalCascadeWrap and tag us so we can admire your handiwork. Happy knitting!