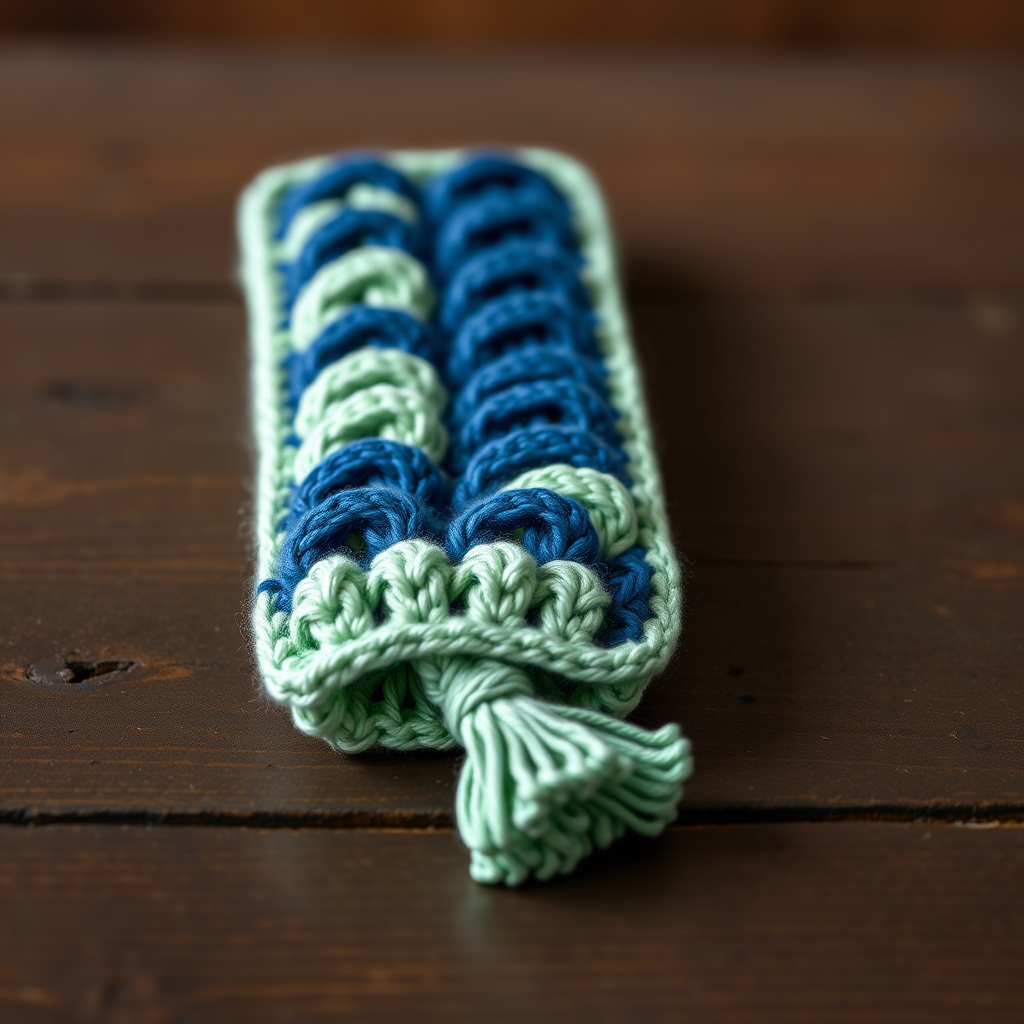
Sage Hibiscus Flat Bookmark Free Crochet Pattern

Sage Hibiscus Flat Bookmark: A Beginner's First Crochet Project
If you have never held a crochet hook before, this is the perfect place to begin. This slim, flat bookmark is worked in a soft sage green cotton using a clever textured stitch called basketweave, then finished with one tiny cream hibiscus flower tucked into the top corner. It is small enough to finish in an evening, forgiving enough that small mistakes disappear into the texture, and useful enough that you will actually want to keep it. When it is done, you will have a firm, flat, slightly raised woven fabric that slides perfectly between the pages of your favorite book without leaving a bump. Best of all, you will have learned real stitches, real texture, and real finishing skills on a project that costs almost nothing to make.
Materials Needed
- Yarn (main color): Worsted weight (category 4) cotton yarn, approximately 30 yd (27 m) in sage green. Cotton is recommended because it holds the basketweave texture crisply and lies flat.
- Yarn (flower): Worsted weight (category 4) cotton yarn, approximately 8 yd (7 m) in cream.
- Crochet hook: US size H-8 (5.0 mm).
- Stitch markers: 2 or 3, to mark the first stitch of a row and to mark where your blocks swap.
- Tapestry needle: A blunt-tipped needle with a large eye, for weaving in ends and sewing on the flower.
- Scissors: Any small sharp pair.
- Finished size: Approximately 2 in (5 cm) wide by 7 in (18 cm) long, plus the cream flower appliqué (about 1.5 in / 4 cm across) at the top corner.
Abbreviations and Beginner Glossary
Every term below is explained as if you have never crocheted. Read this list once before you begin and keep it beside you.
- ch – chain. Make a loop of yarn on your hook (a slip knot), then wrap the yarn over the hook and pull it through the loop already on the hook. That is one chain. A row of chains is your starting foundation.
- st(s) – stitch(es). One completed unit of crochet in your fabric.
- sc – single crochet. Insert your hook into the stitch, wrap yarn over the hook and pull up a loop (2 loops on hook), wrap yarn over again and pull through both loops. One loop remains. That is one single crochet.
- dc – double crochet. Wrap yarn over the hook first, insert hook into the stitch, pull up a loop (3 loops on hook), wrap yarn over and pull through 2 loops (2 loops remain), wrap yarn over and pull through the last 2 loops (1 loop remains).
- FPDC – front post double crochet. Work a double crochet, but instead of going into the top of the stitch, insert your hook from front to back around the vertical "post" (the body) of the stitch below, then complete the double crochet normally. This pushes the stitch forward, creating a raised ridge.
- BPDC – back post double crochet. The same as FPDC, but insert your hook from back to front around the post of the stitch below. This pushes the stitch backward, creating a recessed ridge.
- sl st – slip stitch. Insert hook into the stitch, wrap yarn over, and pull that loop straight through the loop on your hook. No height is added; it is used to join rounds.
- beg – beginning. Refers to the first stitch or chain of a row.
- rep – repeat. Do the instruction again the stated number of times.
- magic ring – an adjustable loop of yarn used to start a circle. You wrap the yarn into a loop, work your stitches into it, then pull the tail tight so the center closes with no hole.
- turn – flip your work over so you can work back along the row you just made.
- fasten off – cut the yarn leaving a tail, then pull the tail all the way through the last loop to lock it.
- weave in ends – thread a yarn tail onto a tapestry needle and sew it back and forth through the fabric so it is hidden and secure.
Gauge
14 sts and 16 rows = 4 in (10 cm) in basketweave stitch pattern.
Gauge means how many stitches and rows fit into a square of fabric. It matters because it controls the finished size: if your stitches are looser than mine, your bookmark will come out wider and longer than 2 by 7 inches. For a bookmark, exact gauge is not critical, but a firm, flat fabric is important — a loose, floppy bookmark will not slide neatly between pages.
How to make a gauge swatch: With your sage yarn and H-8 hook, chain 18. Work the basketweave pattern (Row 3 style: 4 FPDC, then 4 BPDC, swapping blocks every 4 rows) for about 20 rows. Lay it flat without stretching and measure a 4-inch square in the middle. Count the stitches across and the rows up. If you have far more stitches than 14, go up one hook size; if far fewer, go down one. Then begin the bookmark.
Beginner Tips Before You Start
- Mark your first stitch of every row. The turning chain (the ch 2 at the start of each row) can look like a stitch and trick you into adding extras. A stitch marker in the true first stitch keeps your edges straight.
- Do not pull the yarn too tight. Tension is the number one beginner struggle. Hold the yarn gently; if your hook squeaks or fights you, you are pulling too hard. Relaxed hands make flat, even fabric.
- Remember the blocks swap every 4 rows. Rows 3–6 have the front block on the left; Rows 7–10 have the back block on the left. Say it out loud: "four front, four back, then swap."
- Count your 8 stitches at the end of every row. If you have 7 or 9, you dropped or added a stitch — fix it now rather than discovering it ten rows later.
- Keep the flower for last. Finish and block the bookmark body completely before you make the flower, so you can place it exactly where it looks best.
Step-by-Step Instructions
Part 1: Bookmark Body (sage green, worked flat in rows)
Note on basketweave: The pattern is worked in blocks of 4 stitches. Because the bookmark is 8 stitches wide, it uses exactly two blocks — one front block and one back block — and they swap every 4 rows to create the woven look.
Row 1 (right side): Ch 10. Sc in the 2nd ch from hook and in each ch across. (8 sc)
Row 2: Ch 2 (this counts as your first dc), turn. Dc in each st across. (8 dc)
Row 3: Ch 2, turn. FPDC around each of the first 4 sts, BPDC around each of the last 4 sts. (8 sts)
Rows 4–6: Repeat Row 3. (8 sts)
Row 7: Ch 2, turn. BPDC around each of the first 4 sts, FPDC around each of the last 4 sts — the blocks swap here. (8 sts)
Rows 8–10: Repeat Row 7. (8 sts)
Rows 11–14: Repeat Rows 3–6 (front block first, then back block). (8 sts)
Rows 15–18: Repeat Rows 7–10 (back block first, then front block). (8 sts)
Rows 19–22: Repeat Rows 3–6. (8 sts)
Rows 23–26: Repeat Rows 7–10. (8 sts)
Rows 27–30: Repeat Rows 3–6. (8 sts)
Row 31: Ch 1, turn. Sc in each st across. (8 sc)
Fasten off sage green, leaving a 6 in (15 cm) tail, and weave in the ends. You now have 31 rows total, which at the stated gauge gives you approximately 7 in (18 cm) of length. Gently steam or block flat to set the basketweave texture.
Part 2: Cream Hibiscus Flower Appliqué (make 1, cream)
Round 1: Make a magic ring. Ch 1, work 5 sc into the ring, join with a sl st to the first sc. Pull the tail tight to close the center. (5 sc)
Round 2: Ch 1, work 2 sc in each sc around, join with a sl st to the first sc. (10 sc)
Round 3 (petals): Ch 3, then in the same stitch work (dc, ch 1, sl st). *Sl st in the next st, ch 3, then in that same st work (dc, ch 1, sl st). Repeat from * around for 5 petals total. Join with a sl st to the base of the first petal. Fasten off, leaving a 6 in (15 cm) tail for sewing.
Assembly and Finishing
- Place the flower. Lay the sage bookmark flat, right side up. Arrange the cream hibiscus at the top corner, letting it overlap the top edge slightly so it looks like it is blooming over the corner.
- Sew it down. Thread the cream tail onto your tapestry needle. Working from the back of the flower, take small, even stitches that catch only the back of the flower and the surface of the bookmark. Do not sew all the way through to the front of the bookmark — this keeps the front neat and the pages clean. Go around the flower center and the base of each petal, then secure with two tiny hidden stitches.
- Weave in all ends. Thread each remaining tail onto the tapestry needle and run it back and forth through the fabric for about 1 inch, changing direction once so it cannot pull loose. Trim close to the fabric.
- Block. Lightly mist the bookmark with water (or steam it with an iron held just above the surface — never press the iron directly onto the stitches). Pin it flat to a towel or blocking mat, straighten the edges, and let it dry completely. The bookmark should lie perfectly flat.
Pro Tips and Variations
- Change the colors. Swap the sage for dusty blue, terracotta, or mustard, and make the flower in white, blush pink, or bright coral. A cream bookmark with a sage flower is equally lovely.
- Make it longer or shorter. Each 4-row block adds roughly 1 in (2.5 cm). To lengthen, add extra repeats of Rows 3–6 and 7–10 in pairs, always finishing with a Row 31 single-crochet row. To shorten, simply stop after any complete 4-row block and work Row 31.
- Try a different yarn. Any worsted weight (category 4) yarn works, but cotton gives the crispest basketweave. If you use acrylic, go down one hook size so the fabric stays firm and flat.
- Add a tassel or a second flower. A tiny cream tassel at the bottom edge adds weight so the bookmark hangs nicely, and a second small flower at the opposite corner makes a sweet matching set.