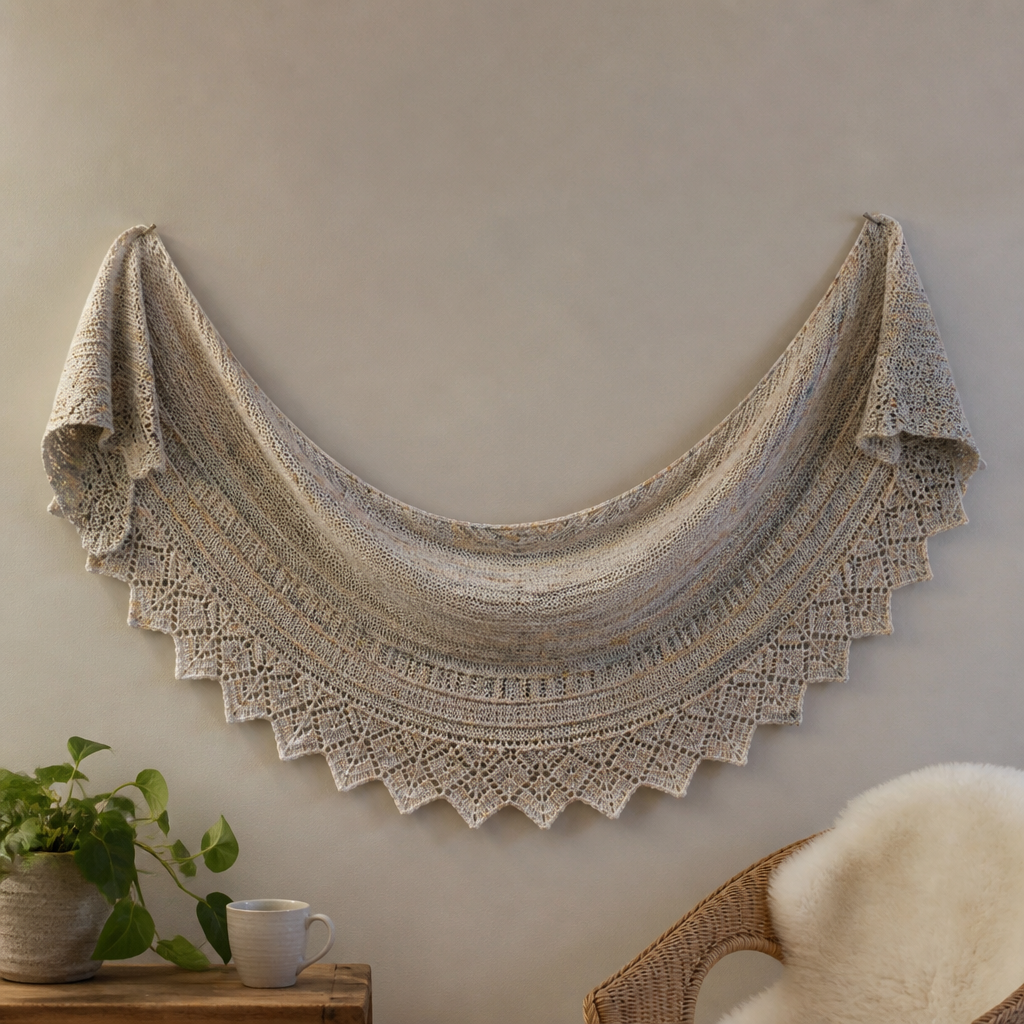
Silverwood Sideways Shawl Free Knitting Pattern

The Silverwood Sideways Shawl: A Beginner-Friendly Crescent Knit
Drape yourself in the quiet luxury of the Silverwood Sideways Shawl, a crescent-shaped knit that flows like a silvered stream through a twilight forest. This pattern weaves garter ridges with delicate eyelet lace, creating a fabric that is both substantial and ethereal. Knitted sideways from tip to tip, this shawl is surprisingly simple to construct, making it an ideal project for adventurous beginners and seasoned knitters alike. The rhythmic repeat is easy to memorize, and the result is a stunning, reversible accessory that adds a touch of handmade elegance to any outfit.
Whether you're curling up with a good book or heading out for a crisp evening walk, the Silverwood Shawl is your perfect companion. Its worsted-weight yarn ensures a quick knit, while the lace details keep your hands and mind engaged. Let's dive into this free knitting pattern and create something beautiful together.
Materials Needed
Before you begin, gather your supplies. This project requires minimal materials, making it a great stash-buster or a wonderful excuse to visit your local yarn shop.
- Yarn: Worsted weight yarn in a silver-grey heather (approx. 400-450 yards). The sample uses Malabrigo Rios in 'Piedras', but any soft, worsted-weight yarn will work beautifully.
- Needle: US 8 (5.0 mm) circular needle, 32-inch or longer, or size needed to obtain gauge. The long cord is essential to hold the many stitches as the shawl grows.
- Gauge: 18 stitches and 28 rows = 4 inches in garter stitch (after blocking). Gauge is not critical for this project, but it will affect the final size and yardage used.
- Notions: Tapestry needle for weaving in ends, stitch markers (optional, but helpful for tracking the lace repeat), and blocking pins/mats.
Step-by-Step Instructions
This shawl is knitted sideways from one pointed tip to the other, with increases and decreases shaping the crescent. The pattern is written for a one-piece construction, with a simple repeat that is easy to memorize. All rows are worked on the right side, making this a reversible piece.
Special Stitches
Familiarize yourself with these basic stitches before you start. If you're new to lace, don't worry—these are all beginner-friendly techniques.
- K2tog (knit two together): Insert your right needle into two stitches on the left needle as if to knit, and knit them together. This decreases your stitch count by one, leaning to the right.
- Yo (yarn over): Bring the yarn to the front of your work, then over the right needle to the back. This creates an increase and a decorative eyelet hole.
- Ssk (slip, slip, knit): Slip two stitches knitwise, one at a time, to the right needle. Insert the left needle into the front of these two stitches and knit them together. This decreases by one stitch, leaning to the left.
- Kfb (knit front and back): Knit into the front of the next stitch, but don't slip it off the left needle. Instead, knit into the back of the same stitch, then slip the original stitch off. This increases your stitch count by one.
Pattern Notes
- The shawl is worked in one piece, starting at the left tip.
- The edge stitches are worked in garter stitch (knit every row) to create a neat, non-curling border.
- Take your time with the yarn overs—they are the key to the beautiful lace pattern.
Cast On and Increase Section
We'll start by creating the pointed tip of the shawl and gradually increasing stitches to form the body.
- Cast on 3 stitches.
- Row 1 (RS): K1, kfb, k1. (You now have 4 stitches)
- Row 2: Knit all stitches.
- Row 3: K1, kfb, knit to end. (You now have 5 stitches)
- Repeat Rows 2-3 until you have 45 stitches on your needle. End with a wrong-side row (knit all). This section creates the gentle slope of the shawl's first edge.
Body Section (Lace Pattern)
Now we'll introduce the eyelet lace pattern. This 4-row repeat is the heart of the shawl and is incredibly rhythmic once you get going.
- Row 1 (RS): K1, kfb, k1, yo, k2tog, k1; repeat from to last 2 stitches, k2. (This row increases 1 stitch)
- Row 2 (WS): Knit all stitches.
- Row 3 (RS): K1, kfb, k2, yo, k2tog, k1; repeat from to last 3 stitches, k3. (This row increases 1 stitch)
- Row 4 (WS): Knit all stitches.
- Repeat Rows 1-4 until the shawl measures approximately 60 inches from the cast-on edge, or until you have about 30 yards of yarn left. End with a Row 4 (a wrong-side row). This is the longest part of the knit, so settle in and enjoy the rhythm.
Decrease Section
Once you've reached the desired length, we'll begin shaping the opposite tip by decreasing stitches.
- Row 1 (RS): K1, ssk, k1, yo, k2tog, k1; repeat from to last 2 stitches, k2. (This row decreases 1 stitch)
- Row 2 (WS): Knit all stitches.
- Row 3 (RS): K1, ssk, k2, yo, k2tog, k1; repeat from to last 3 stitches, k3. (This row decreases 1 stitch)
- Row 4 (WS): Knit all stitches.
- Repeat Rows 1-4 until you have 3 stitches left on your needle. End with a wrong-side row.
- Final Row (RS): K1, k2tog, pass the first stitch over the second to bind off. Fasten off by pulling the yarn tail through the last loop.
Finishing Touches
Your shawl is almost complete! The final steps are crucial for transforming your knitting into a beautiful, drapey accessory.
- Weave in all ends using your tapestry needle. Be sure to weave them in securely along the garter stitch edges so they don't show.
- Block the shawl gently: Soak it in lukewarm water with a drop of wool wash for about 15-20 minutes. This allows the fibers to relax.
- Press out excess water: Do not wring or twist the shawl. Instead, roll it in a clean towel to absorb the moisture.
- Lay flat to dry: Place the shawl on a dry towel or blocking mat. Gently stretch it to shape, paying special attention to the lace points to open them up. Pin the edges if desired to hold the shape.
- Allow to dry completely before unpinning. This step is magical—it opens up the lace and evens out the stitches, giving your shawl that professional, polished look.
And there you have it—your very own Silverwood Sideways Shawl! This cozy, elegant piece is perfect for gifting or keeping for yourself. The combination of garter stitch and lace makes it a versatile project that you'll be proud to wear. Happy knitting!