Sunset Horizon Crochet Top Free Pattern
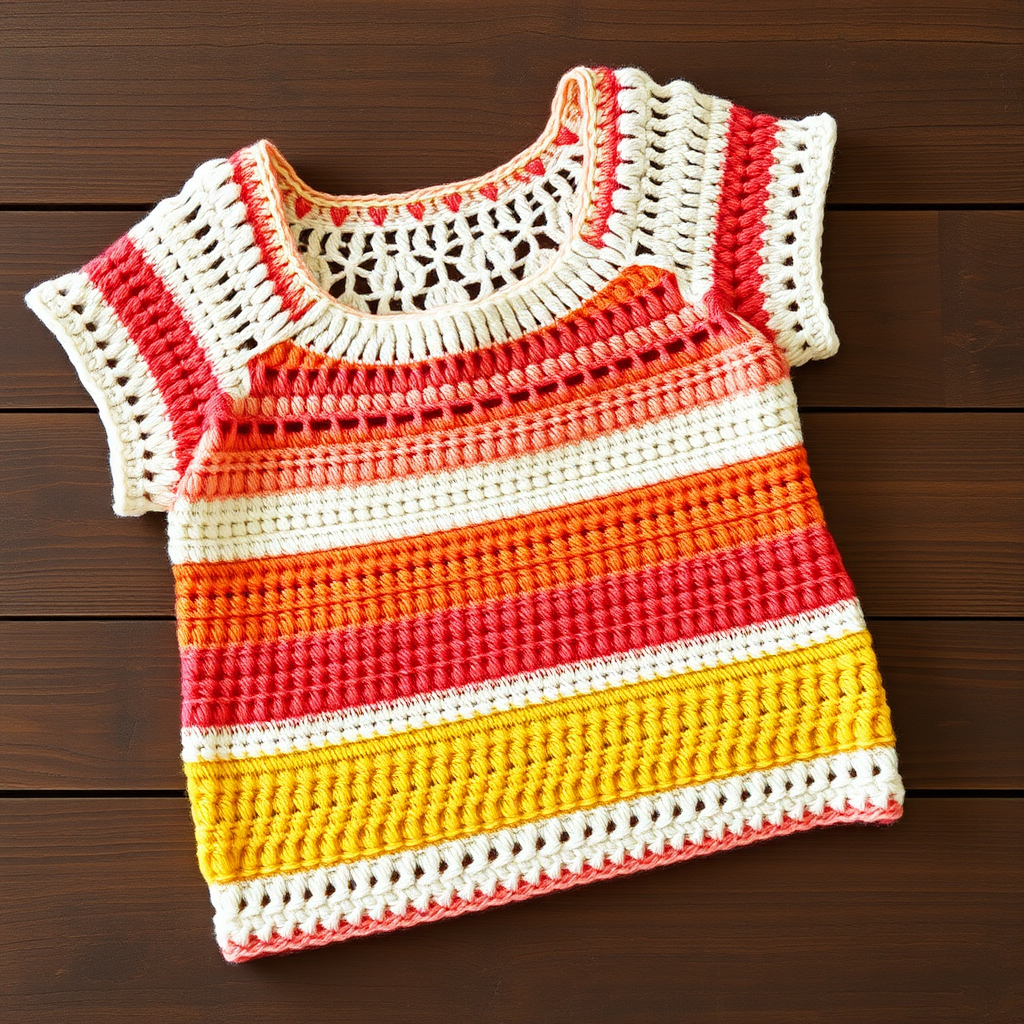
Sunset Horizon Crochet Top: A Free Pattern for Breezy Summer Style
Imagine wearing the warm, golden glow of a summer sunset. That's the magic of the Sunset Horizon Crochet Top. This breezy, color-blocked design captures a beautiful gradient—from sunny yellow through coral and peach to crisp white—making it the perfect statement piece for beach days, festivals, or any warm-weather adventure. The construction is wonderfully simple, relying on basic half-double crochet stitches worked in horizontal stripes. It's a quick, satisfying project that yields a stunning, wearable result, making it ideal for confident beginners ready to move beyond scarves and into garments.
This free pattern is designed to be your complete guide. We'll walk you through every step, from gathering your materials to seaming the final pieces, ensuring you can recreate this gorgeous top at home with confidence and ease.
Materials Needed: Gathering Your Sunset Palette
Before you begin, collect these simple materials. The project uses worsted-weight cotton, which is perfect for summer—it's breathable, durable, and holds its shape beautifully.
- Yarn: Worsted weight cotton or cotton-blend yarn in 4 colors. Approx. 400-700 yards total depending on size.
- Color A (Sunny Yellow): For the bottom stripes.
- Color B (Coral): For the next set of stripes.
- Color C (Peach): For the following stripes.
- Color D (White): For the top stripes and edging.
- Crochet Hook: US K/10.5 (6.5 mm) crochet hook.
- Other Tools: Yarn needle for weaving in ends and seaming, scissors, and a tape measure.
- Gauge: 11 half double crochet (hdc) stitches and 8 rows = 4 inches (10 cm) in pattern. Always check your gauge to ensure the correct fit!
Step-by-Step Instructions: Crafting Your Sunset Horizon Top
This pattern is worked flat in two separate panels (front and back) from the bottom up. You'll then seam them together at the shoulders and sides. Let's get started!
Understanding the Pattern Basics
- Sizes: XS (S, M, L, XL, 2XL, 3XL, 4XL, 5XL). Finished bust: 32 (36, 40, 44, 48, 52, 56, 60, 64) inches. Instructions are written for the smallest size, with larger sizes in parentheses.
- Color Sequence: You will repeat this stripe pattern throughout the entire top: *Rows 1-6: Color A, Rows 7-12: Color B, Rows 13-18: Color C, Rows 19-24: Color D*. Repeat this sequence until you reach the armhole shaping.
- Turning Chain: The ch 2 at the beginning of a row counts as your first half double crochet (hdc) stitch.
Creating the Front Panel
This is the main piece of the top. Follow these steps carefully.
Foundation: With Color A, chain (ch) 46 (52, 58, 64, 70, 76, 82, 88, 94).
Row 1: Work 1 half double crochet (hdc) in the 3rd ch from your hook (the skipped chains count as your first hdc). Work 1 hdc in each ch across the row. Turn your work. You should now have 44 (50, 56, 62, 68, 74, 80, 86, 92) stitches.
Row 2: Ch 2 (counts as first hdc), work 1 hdc in each stitch across the row. Turn.
Continue the Body: Repeat Row 2 for all subsequent rows, meticulously following the color sequence. Work even in this manner until your piece measures 10 (10, 11, 11, 12, 12, 13, 13, 14) inches from the beginning. Important: Ensure you end after completing a full 6-row block of one color (e.g., after Row 6, 12, 18, or 24 of the sequence).
Shaping the Armholes
Now we will create the openings for your arms.
Next Row (Decrease Row): Slip stitch (sl st) into the first 4 (5, 6, 7, 8, 9, 10, 11, 12) stitches. Ch 2 (counts as first hdc), then work 1 hdc in each stitch across until you have 4 (5, 6, 7, 8, 9, 10, 11, 12) stitches remaining. Turn, leaving those last stitches unworked. You will now have 36 (40, 44, 48, 52, 56, 60, 64, 68) stitches.
Continue Straight: Work even in your established hdc pattern (continuing the color sequence) until the armhole measures 7 (7, 8, 8, 9, 9, 10, 10, 11) inches from the start of the armhole shaping.
Shaping the Neckline
This step creates the opening for your head and the front neckline.
Right Shoulder: In the next row, work 1 hdc in each of the first 12 (14, 16, 18, 20, 22, 24, 26, 28) stitches. Turn, leaving the remaining stitches unworked for the back of the neck.
Neck Decreases: You will now decrease 1 stitch at the neck edge (the edge closest to the center) every row, 3 times total. To decrease: ch 2, hdc2tog (half double crochet 2 together) over the next two stitches, then hdc in each remaining stitch across. After completing 3 decrease rows, work even on the remaining 9 (11, 13, 15, 17, 19, 21, 23, 25) stitches until the armhole measures 9 (9, 10, 10, 11, 11, 12, 12, 13) inches. Fasten off.
Left Shoulder: Return to the unworked stitches for the front. Skip the center 12 (12, 12, 14, 14, 14, 16, 16, 16) stitches for the neck opening. Join your yarn in the very next stitch. Ch 2, and work 1 hdc in each stitch to the end of the row. Now, repeat the same neck decrease process on this side: decrease 1 stitch at the neck edge every row, 3 times. Then work even to match the length of the first shoulder. Fasten off.
Creating the Back Panel
The back panel is worked identically to the front, but with one key difference: you will not shape the neckline.
Work the foundation chain and body of the back panel exactly as you did for the front, including the armhole shaping. Then, simply continue working straight in the pattern until the armhole measures the same length as the front panel's armhole (9 (9, 10, 10, 11, 11, 12, 12, 13) inches). Fasten off.
Finishing and Assembly
This is where your top comes together.
Seaming: With your yarn needle, sew the shoulder seams together. Then, sew the side seams, but be sure to leave an opening at the top for the armholes. The opening should measure 8 (8, 9, 9, 10, 10, 11, 11, 12) inches from the shoulder seam down.
Edging: Join Color D (White) with a slip stitch at the underarm. Work 1 round of single crochet (sc) evenly around the entire armhole opening. Repeat this process for the other armhole. Then, work 1 round of single crochet evenly around the neckline. Fasten off.
Final Touches: Weave in all loose ends with your yarn needle to give your top a clean, professional finish.
Congratulations! You've just completed your very own Sunset Horizon Crochet Top. Lay it flat to let it settle into its shape. This beautiful, breezy top is ready to be worn and admired. Enjoy the compliments!


