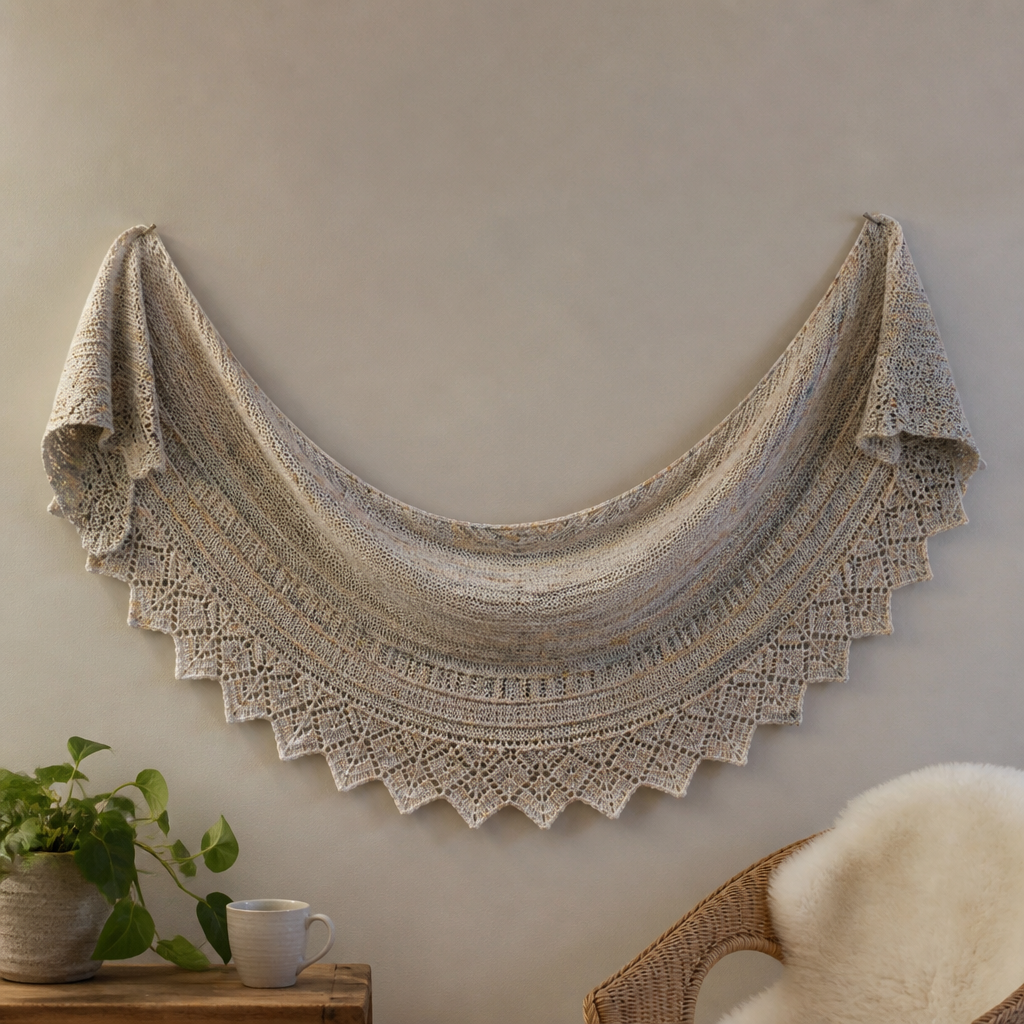
The Aurora Borealis Wrap Free Pattern – Knit a Celestial Gradient Lace Shawl

The Aurora Borealis Wrap: Knit a Celestial Gradient Lace Shawl
Imagine wrapping yourself in the ethereal dance of the northern lights—swirling teals, emerald greens, and soft lavenders cascading across your shoulders. The Aurora Borealis Wrap is more than just a shawl; it's a wearable piece of the night sky, knitted with delicate leaf motifs and a stunning ombre effect that transitions from deep polar twilight to the soft glow of dawn.
This free knitting pattern is designed for intermediate knitters who are ready to explore lacework while creating something truly breathtaking. The top-down construction means you'll watch your shawl grow organically, and the simple 8-row lace repeat makes it meditative yet engaging. Whether you're cozying up by the fire or adding a touch of celestial magic to an evening outfit, this wrap delivers both warmth and wonder.
Materials Needed
Before you begin your journey into the aurora, gather these supplies:
- Yarn: Fingering weight yarn in 3 colors (approximately 400g total):
- Color A: Deep teal (approx. 150g)
- Color B: Emerald green (approx. 150g)
- Color C: Soft lavender (approx. 100g)
- Needle: US 6 (4.0 mm) circular knitting needle with a 32-inch cable
- Notions: Stitch markers (at least 2), tapestry needle for weaving in ends, blocking pins and mats
Gauge: 20 stitches and 28 rows = 4 inches in stockinette stitch (blocked). Gauge is important for achieving the correct drape and size, so take a moment to swatch!
Step-by-Step Instructions
Abbreviations
Familiarize yourself with these standard knitting abbreviations before starting:
- CO: Cast on
- K: Knit
- P: Purl
- YO: Yarn over
- K2tog: Knit two stitches together (right-leaning decrease)
- SSK: Slip, slip, knit (left-leaning decrease)
- PM: Place marker
- SM: Slip marker
- BO: Bind off
Getting Started: The Cast-On and Setup
Step 1: CO 3 stitches with Color A.
Step 2: Knit 6 rows in garter stitch (all knit stitches). This creates a small tab that will form the center top of your shawl.
Step 3: Now, rotate your work 90 degrees clockwise. Pick up and knit 3 stitches along the side edge of the tab (one stitch for every two rows). Then rotate again and pick up and knit 3 stitches from the cast-on edge. You should now have 9 stitches on your needle.
Step 4: Place a marker after the 3rd stitch and another after the 6th stitch. These markers will help you keep track of the center and edges as you increase. The first 3 and last 3 stitches of every row will be worked in garter stitch (knit on both sides) to create a clean border.
Shaping the Shawl: Initial Increases
These first rows establish the crescent shape and set up your stitch count for the lace pattern.
Row 1 (Right Side): K3, YO, K1, YO, K1, YO, K1, YO, K3. (13 stitches)
Row 2 (Wrong Side): K3, Purl to the last 3 stitches, K3.
Row 3: K3, YO, K1, YO, K3, YO, K1, YO, K3, YO, K1, YO, K3. (19 stitches)
Row 4: K3, Purl to the last 3 stitches, K3.
You now have 19 stitches. Notice how the yarn overs create increases at the edges and at the center marker, forming the gentle curve of the shawl.
The Lace Pattern: An 8-Row Repeat
This is the heart of the Aurora Borealis Wrap. The pattern creates delicate leaf motifs with eyelets that catch the light beautifully. Work these 8 rows, repeating them as directed in the color change section below.
Row 5 (RS): K3, YO, *K1, YO, K2tog, K1, SSK, YO, K1, YO*; repeat from * to * until 3 stitches remain, K3.
Explanation: The yarn overs at the beginning and end of the repeat add stitches, while the K2tog and SSK in the middle create the leaf shape by decreasing. The center YOs form the eyelets.
Row 6 (WS): K3, Purl to the last 3 stitches, K3.
Row 7 (RS): K3, YO, *K2, YO, K2tog, K1, SSK, YO, K2, YO*; repeat from * to * until 3 stitches remain, K3.
Explanation: Notice how the knit stitches at the start and end of the repeat increase by one each time. This shifts the leaf motif outward and creates the expanding crescent shape.
Row 8 (WS): K3, Purl to the last 3 stitches, K3.
Row 9 (RS): K3, YO, *K3, YO, K2tog, K1, SSK, YO, K3, YO*; repeat from * to * until 3 stitches remain, K3.
Row 10 (WS): K3, Purl to the last 3 stitches, K3.
Row 11 (RS): K3, YO, *K4, YO, K2tog, K1, SSK, YO, K4, YO*; repeat from * to * until 3 stitches remain, K3.
Row 12 (WS): K3, Purl to the last 3 stitches, K3.
Rows 5-12 form one complete repeat of the lace pattern. As you work, you'll see the leaf motifs emerge and the shawl widen with each repeat.
Creating the Gradient: Color Changes
The magic of the aurora comes from the smooth transition between colors. Here's how to achieve that celestial gradient:
- Color A (Deep Teal): Work the lace pattern (Rows 5-12) for a total of 12 repeats, which equals 96 rows. Your shawl will be about 12 inches deep at the center.
- Color B (Emerald Green): Switch to Color B and work another 12 repeats of the lace pattern (96 rows). The shawl will now be approximately 24 inches deep.
- Color C (Soft Lavender): Switch to Color C and work the final 12 repeats (96 rows). The total depth will be about 36 inches at the center, with a wingspan of approximately 60 inches across the top.
Pro Tip: When changing colors, work the first row of the new color on a wrong-side row. This creates a cleaner transition and helps the gradient appear seamless.
Finishing Touches: Binding Off and Blocking
Step 1: On a right-side row, bind off all stitches loosely. To ensure a stretchy edge that won't pucker, use a larger needle or bind off with a yarn over between every few stitches (K2, YO, pass both over, repeat).
Step 2: Weave in all loose ends with your tapestry needle. Take care to weave them in along the color-change lines so they disappear into the fabric.
Step 3: This is the most important step for lace: blocking. Soak the shawl in lukewarm water with a gentle wool wash for 20-30 minutes. Gently squeeze out excess water (never wring!) and roll in a towel to remove moisture.
Step 4: Lay the shawl flat on blocking mats. Gently stretch it into a crescent shape, pulling the bottom edge outward to open up the lace pattern. Use blocking pins to secure the points along the bottom edge and the top corners. The garter stitch border will create a crisp, clean line.
Step 5: Allow the shawl to dry completely, which may take 24-48 hours depending on humidity. Once dry, remove the pins and marvel at your handiwork!
Wearing and Caring for Your Aurora Wrap
This shawl is incredibly versatile. Drape it over your shoulders for a romantic evening look, or wrap it snugly around your neck as a luxurious scarf. The gradient design means it pairs beautifully with neutral outfits, letting the colors take center stage.
To care for your creation, hand wash in cold water with a gentle detergent and lay flat to dry. Store it folded in a drawer or on a hanger with padded shoulders to maintain its shape.
The Aurora Borealis Wrap is more than a knitting project—it's a journey. As you work through each color change, you'll watch your own personal aurora come to life. The rhythmic lace pattern is perfect for mindful knitting sessions, and the stunning result will be a treasured heirloom for years to come.
Happy knitting, and may your stitches always dance like the northern lights!