The Celestial Shift Wrap: A Free Knitting Pattern for a Gradient, Textured Shawl
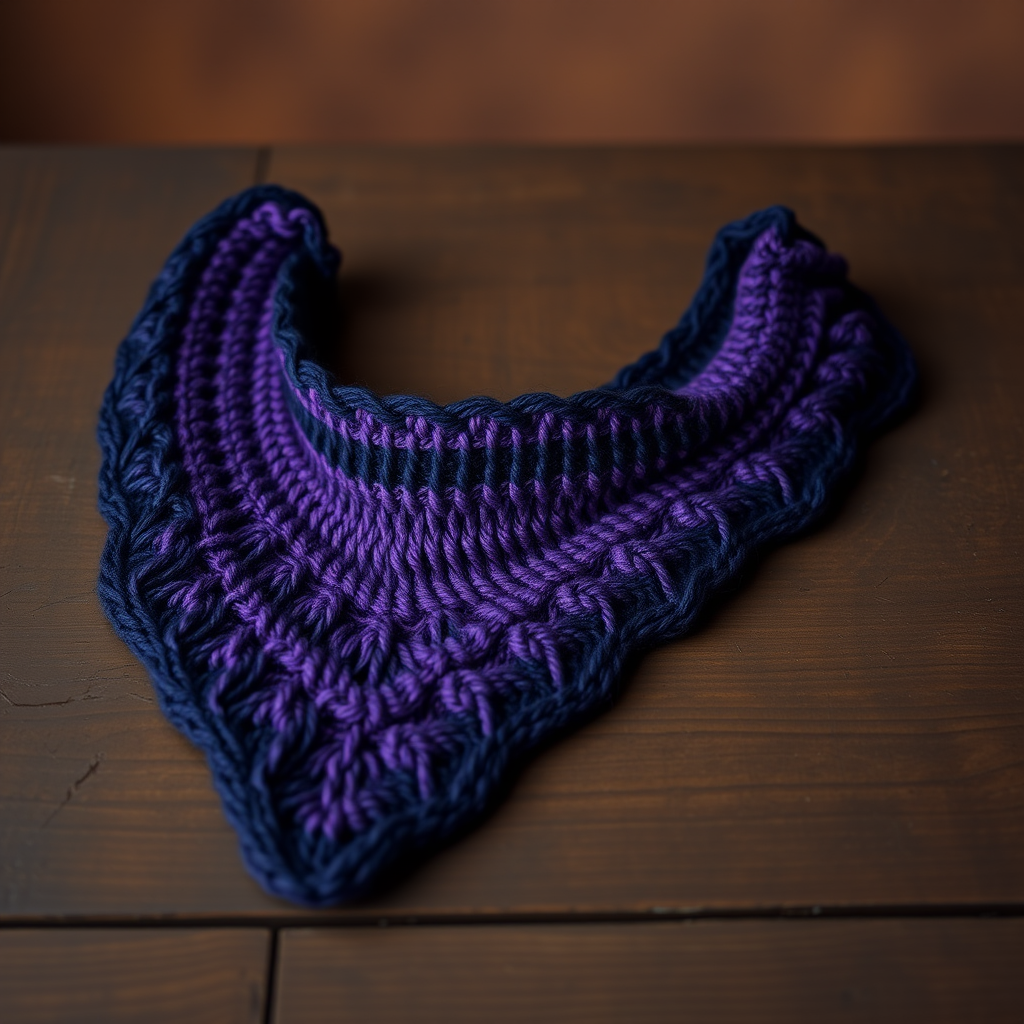
Wrap Yourself in the Night Sky: The Celestial Shift Wrap
There’s something magical about a shawl that feels like a piece of the night sky draped over your shoulders. The Celestial Shift Wrap is designed to capture that wonder—a crescent-shaped, textured shawl that transitions from deep indigo to twilight purple. The rhythmic stitch pattern creates delicate eyelets and subtle diagonal lines, mimicking the twinkle of distant stars. Whether you’re a seasoned knitter or a confident beginner looking for a rewarding project, this free pattern will guide you through creating an elegant, ethereal accessory perfect for cool evenings.
Materials Needed
To bring the Celestial Shift Wrap to life, you’ll need the following materials. The gradient effect is key, so choose yarns that blend beautifully from dark to light.
- Yarn: Fingering weight yarn in two colors:
- Color A (Deep Indigo): 400 yards
- Color B (Twilight Purple): 400 yards
- Needle: US Size 6 (4.0 mm) circular knitting needle, 32-inch or longer cable. The long cable is essential to accommodate the increasing number of stitches as the shawl grows.
- Notions: Stitch markers (optional, to mark pattern repeats), tapestry needle for weaving in ends, blocking pins and mats.
Gauge and Sizing
Gauge: 20 stitches and 28 rows = 4 inches in stockinette stitch, after blocking. Gauge is important for achieving the correct drape and size. Always knit a swatch and block it before measuring.
Finished Size: The shawl is worked from the top center point down, increasing on each side to create a crescent shape. You can customize the size by repeating the main pattern rows until you reach your desired dimensions. A typical finished shawl measures approximately 60 inches across the top edge and 20 inches deep at the center.
Step-by-Step Instructions
This pattern is knit from the top center point down, increasing on each side to create a crescent shape. The stitch pattern is a simple 4-row repeat that creates a beautiful, airy texture. Follow these detailed instructions carefully, and you’ll have a stunning shawl in no time.
Abbreviations
- k = knit
- p = purl
- yo = yarn over
- k2tog = knit two together (right-leaning decrease)
- ssk = slip, slip, knit (left-leaning decrease)
Getting Started: The Foundation Rows
You’ll begin by casting on just a few stitches and working increases to form the top center point. This creates the base for the crescent shape.
- Row 1 (Right Side): k1, yo, k1, yo, k1. (5 stitches)
- Row 2 (Wrong Side): k1, p3, k1.
- Row 3: k1, yo, k1, yo, k1, yo, k1, yo, k1. (9 stitches)
- Row 4: k1, p7, k1.
- Row 5: k1, yo, k2, yo, k1, yo, k2, yo, k1. (13 stitches)
- Row 6: k1, p11, k1.
- Row 7: k1, yo, k4, yo, k1, yo, k4, yo, k1. (17 stitches)
- Row 8: k1, p15, k1.
After Row 8, you should have 17 stitches on your needle. The first and last stitch of every row are knit (k1) to create a neat, non-curling edge.
Begin Main Pattern
Now you’ll work the 8-row repeat that creates the textured starry effect. Each repeat increases the stitch count by 4 stitches (2 on each side). The pattern is symmetrical, with decreases (ssk and k2tog) paired with yarn overs to maintain the stitch count within the body of the shawl, while the edge increases (yo after the first k1 and before the last k1) add width.
- Row 9 (Increase Row): k1, yo, *k2, yo, ssk, k1, k2tog, yo, k1; repeat from * to last 2 stitches, yo, k1, yo, k1. (21 stitches)
- Row 10: k1, purl to last stitch, k1.
- Row 11: k1, yo, *k1, yo, ssk, k1, k2tog, yo, k2; repeat from * to last 2 stitches, yo, k1, yo, k1. (25 stitches)
- Row 12: k1, purl to last stitch, k1.
- Row 13: k1, yo, *k2, yo, ssk, k1, k2tog, yo, k1; repeat from * to last 2 stitches, yo, k1, yo, k1. (29 stitches)
- Row 14: k1, purl to last stitch, k1.
- Row 15: k1, yo, *k1, yo, ssk, k1, k2tog, yo, k2; repeat from * to last 2 stitches, yo, k1, yo, k1. (33 stitches)
- Row 16: k1, purl to last stitch, k1.
Repeat Rows 9-16 until the shawl reaches your desired size, or until you have approximately 10 yards of yarn remaining. End after a Row 16 (a wrong-side row). As you work, the pattern will naturally form a beautiful, openwork texture. If you’re using two colors, you can switch from Color A to Color B at any point—perhaps halfway through, or gradually by alternating rows for a blended effect.
Edging
The simple scalloped edging adds a delicate finish. It’s worked directly onto the live stitches of the shawl body.
- Row 1: k1, yo, *k2tog, yo; repeat from * to last 2 stitches, k1, yo, k1.
- Row 2: k1, purl to last stitch, k1.
- Row 3: k1, yo, *k2tog, yo; repeat from * to last 2 stitches, k1, yo, k1.
- Row 4: Bind off loosely in knit. To bind off loosely, use a needle one size larger if needed, or work the bind-off stitches with a relaxed tension. This ensures the edge remains stretchy and doesn’t pucker.
Finishing
Once you’ve bound off, it’s time to finish your shawl.
- Weave in ends: Using a tapestry needle, carefully weave in all yarn tails on the wrong side of the work. Trim any excess.
- Blocking: Blocking is essential for this shawl. It opens up the stitch pattern, evens out the tension, and accentuates the crescent shape. Soak the shawl in lukewarm water with a gentle wool wash for 15-20 minutes. Gently squeeze out excess water (do not wring). Lay the shawl flat on a blocking mat, gently stretching it to the desired shape—a gentle crescent curve. Use blocking pins to hold the points and edges in place. Allow it to dry completely before removing the pins.
Your Celestial Shift Wrap is now ready to wear. The gradient colors and starry texture will catch the light beautifully, making it a stunning addition to any outfit. Enjoy the process and the beautiful result!



