The Ember & Ash Ripple Cowl: A Free Knitting Pattern for a Textured, Ombre Fall Accessory
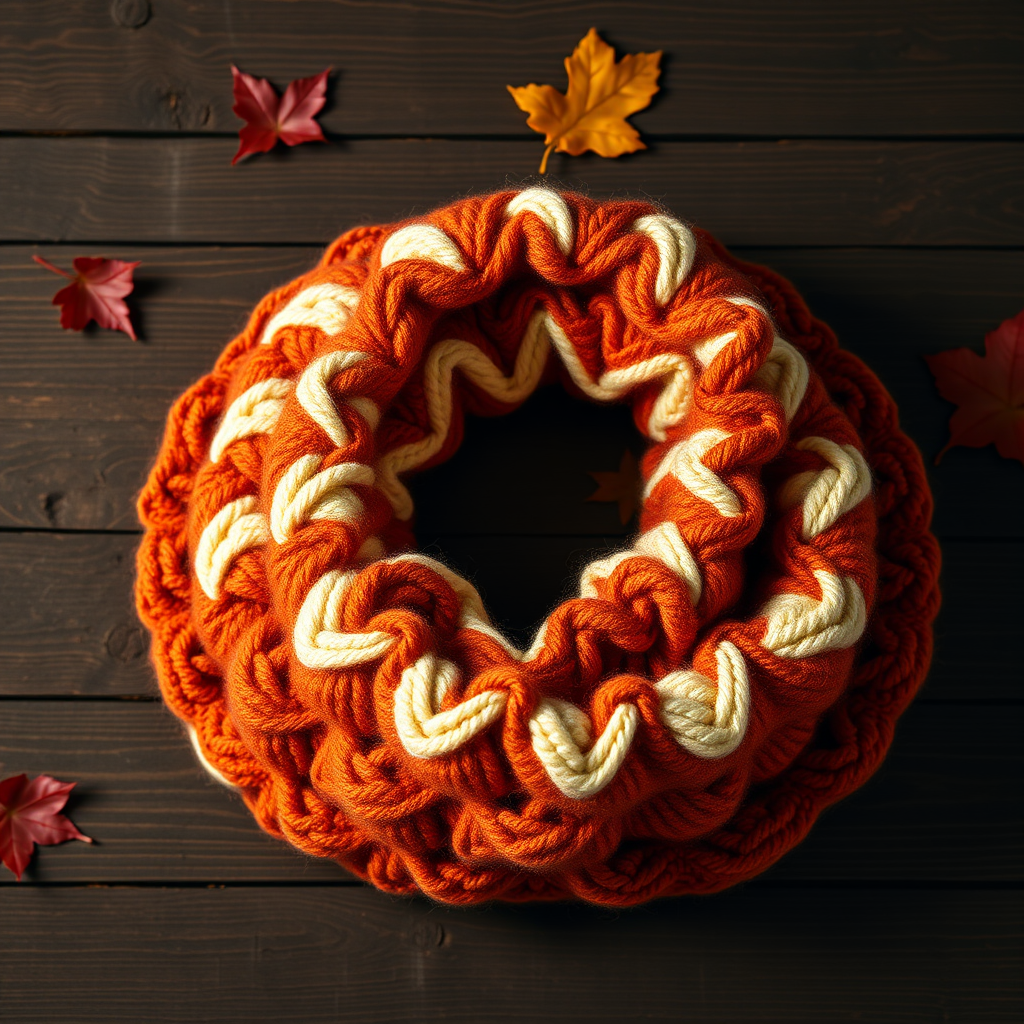
Wrap Yourself in Autumn: Introducing the Ember & Ash Ripple Cowl
There’s something magical about the way autumn colors shift—from deep, smoldering rusts to vibrant burnt oranges, finally fading into soft, creamy whites. The Ember & Ash Ripple Cowl captures that exact transition in a cozy, seamless accessory that’s as beautiful to knit as it is to wear. Worked in the round from the bottom up, this pattern features an all-over chevron ripple stitch that creates deep, textured valleys and peaks. The ombre effect is achieved by simply switching colors at the start of a round, carrying the yarn loosely up the inside. Whether you’re a confident beginner or an experienced knitter looking for a satisfying, rhythmic project, this cowl is the perfect layering piece for crisp fall days.
Materials Needed
Before you begin, gather the following supplies. Using the exact yarn or a similar worsted weight (#4) will ensure your cowl matches the gauge and drape shown.
- Yarn: Worsted weight (#4) yarn in 3 colors:
- Color A (Deep Rust): 120 yards
- Color B (Burnt Orange): 100 yards
- Color C (Cream): 80 yards
- Needle: US 8 (5.0 mm) 16-inch circular knitting needle, or size needed to obtain gauge.
- Notions: Stitch marker, tapestry needle for weaving ends, blocking pins/mat (optional but recommended).
Gauge
- 18 stitches x 24 rows = 4 inches in stockinette stitch (blocked).
- 1 ripple repeat (12 stitches) = 3.5 inches wide.
- Take time to check your gauge. If your gauge is off, adjust needle size accordingly.
Step-by-Step Instructions
Notes: The cowl is worked in the round from the bottom up. The ripple pattern is a 12-stitch repeat. To change colors, simply drop the old color and pick up the new one at the beginning of a round, carrying the yarn loosely up the inside. Do not cut the yarn until you are finished with that color section.
Abbreviations
- k = knit
- p = purl
- k2tog = knit two together (right-leaning decrease)
- ssk = slip slip knit (left-leaning decrease)
- m1 = make one (increase) – lift the bar between stitches and knit it through the back loop
Pattern
Section 1: Bottom Ribbing (Color A - Deep Rust)
With Color A, cast on 144 stitches. Place a marker and join in the round, being careful not to twist the stitches.
- Rounds 1-4 (Ribbing): *K2, p2; repeat from * around.
Section 2: Ripple Pattern (Color A - Deep Rust)
Round 5 (Setup Round): *K12; repeat from * around.
Round 6 (Ripple Increase Round): *K2, k2tog, k2, m1, k1, m1, k2, ssk, k1; repeat from * around. (You will have 156 stitches after this round.)
Round 7 (Ripple Decrease Round): *K1, ssk, k2, m1, k1, m1, k2, k2tog, k1; repeat from * around.
Rounds 8-9 (Ripple Even Rounds): *K12; repeat from * around.
Round 10 (Ripple Increase Round): *K2, k2tog, k2, m1, k1, m1, k2, ssk, k1; repeat from * around.
Round 11 (Ripple Decrease Round): *K1, ssk, k2, m1, k1, m1, k2, k2tog, k1; repeat from * around.
Rounds 12-13 (Ripple Even Rounds): *K12; repeat from * around.
Repeat Rounds 6-13 once more with Color A. (This means you will work Rounds 6-13 a total of two times with Color A.)
Section 3: Ripple Pattern (Color B - Burnt Orange)
Switch to Color B. Do not cut Color A; you will carry it up the inside.
Repeat Rounds 6-13 three times with Color B. (Work the 8-round ripple sequence three times.)
Section 4: Ripple Pattern (Color C - Cream)
Switch to Color C. Do not cut Color B; you will carry it up the inside.
Repeat Rounds 6-13 twice with Color C. (Work the 8-round ripple sequence two times.)
Section 5: Top Ribbing (Color C - Cream)
Rounds 1-4 (Ribbing): *K2, p2; repeat from * around.
Bind off loosely in pattern: Knit the knit stitches and purl the purl stitches as you bind off. This ensures the edge remains stretchy.
Finishing
- Weave in all ends using a tapestry needle. Be sure to secure the yarn tails from color changes neatly on the inside of the cowl.
- Block gently: Soak the cowl in lukewarm water for 15-20 minutes. Gently squeeze out excess water (do not wring). Lay flat on a blocking mat or towel, shaping the cowl into a circle. Gently stretch the ripple points to open up the chevron pattern and even out the stitches. Allow to dry completely.
Your Ember & Ash Ripple Cowl is now ready to wear! The deep texture and ombre gradient will make it a standout piece in your fall wardrobe. Enjoy the cozy warmth and the satisfying rhythm of the ripple stitch.


