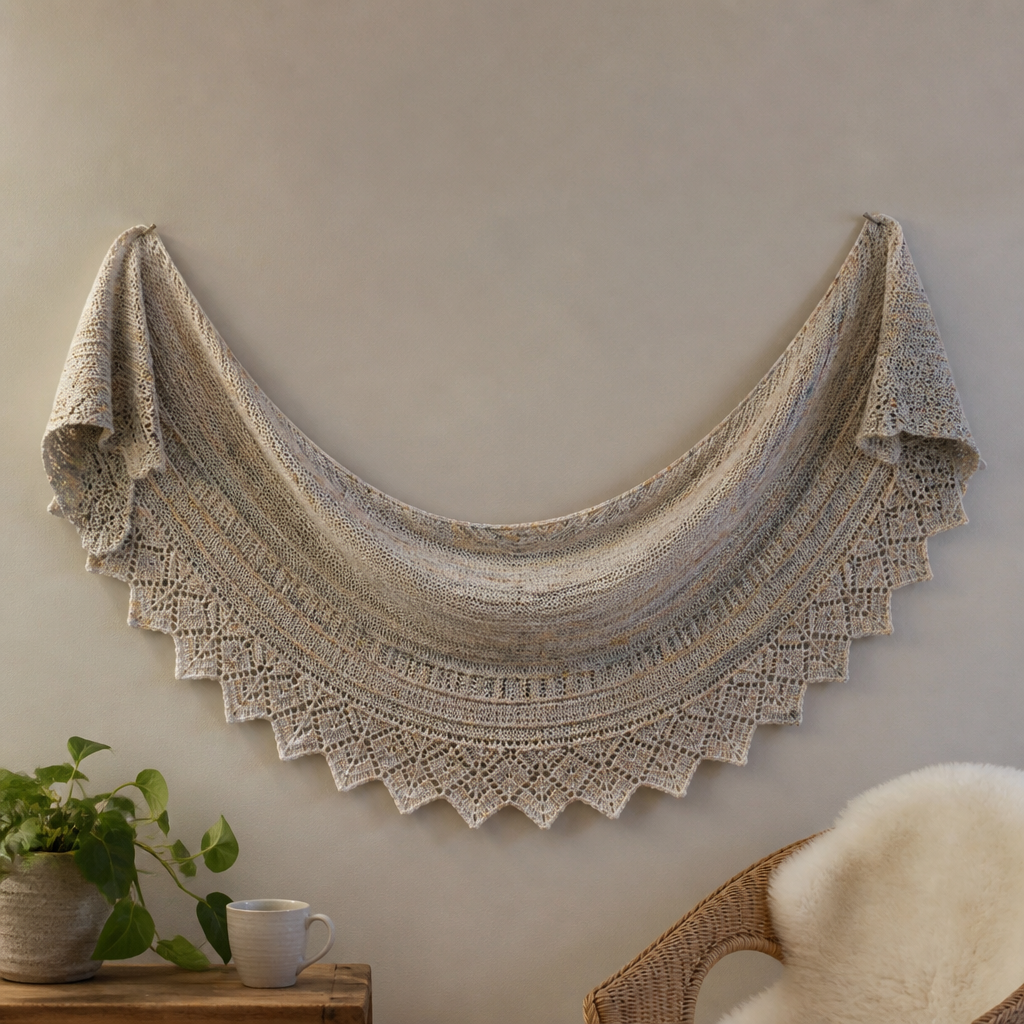
The Ember Dune Shawl Free Pattern – Knit a Desert Sunset Wrap

The Ember Dune Shawl Free Pattern – Knit a Desert Sunset Wrap
Wrap yourself in the warm hues of a desert sunset with this uniquely textured, crescent-shaped shawl. The Ember Dune Shawl combines a simple yet striking slipped-stitch pattern with a soft, gradient yarn to create a cozy, modern accessory. Whether you're curling up with a book or heading out for a crisp evening walk, this wrap adds a touch of earthy elegance to any outfit. Best of all, this free pattern is beginner-friendly, using only basic stitches and repeats to create a stunning woven texture that mimics the ripples of desert sand.
This pattern is worked from the top center down, increasing at the edges to form a graceful crescent shape. The slipped-stitch design creates a subtle, woven fabric that is both warm and breathable. With clear instructions and a rhythmic repeat, you'll find this project meditative and rewarding. Let's dive in and create your own piece of desert sunset!
Materials Needed
Before you begin, gather the following materials. The Ember Dune Shawl is designed to be versatile, so feel free to substitute yarns as long as you match the gauge.
Yarn
- Worsted weight yarn in 3 colors: Color A (deep terracotta), Color B (burnt orange), Color C (golden yellow) – approximately 400g total.
- Alternative: A gradient yarn cake of similar weight (400g) will also work beautifully, eliminating the need for color changes.
Needles & Notions
- US 8 (5mm) circular knitting needle, 32 inches or longer (to accommodate the growing number of stitches).
- Stitch markers (at least 2, but 3 is helpful).
- Yarn needle for weaving in ends.
- Scissors.
Gauge
18 stitches and 24 rows = 4 inches in stockinette stitch (blocked). Gauge is important for achieving the correct size and drape, so take a moment to knit a swatch before starting.
Step-by-Step Instructions
This shawl is worked from the top center down, increasing at the edges to form a crescent shape. The slipped-stitch pattern creates a subtle, woven texture that mimics the ripples of desert sand. Follow these instructions carefully, and you'll have a beautiful shawl in no time.
Abbreviations
- k = knit
- p = purl
- sl = slip stitch purlwise
- yo = yarn over
- k2tog = knit two together
- pm = place marker
- sm = slip marker
Setup
Let's begin by casting on and establishing the foundation of your shawl.
- Cast on 5 stitches loosely.
- Row 1 (WS): Knit all stitches.
- Row 2 (RS): K2, yo, k1, yo, k2. (You now have 7 stitches.)
- Row 3: Knit all stitches.
- Row 4: K2, yo, k1, pm, k1, pm, k1, yo, k2. (You now have 9 stitches. The center stitch is between the two markers.)
- Row 5: Knit all stitches.
Increase Section
In this section, you'll increase 4 stitches on every right-side row to shape the crescent. Repeat until you have 45 stitches on the needle.
- Row 6 (RS): K2, yo, knit to marker, yo, sm, k1, sm, yo, knit to last 2 stitches, yo, k2. (4 increases made)
- Row 7 (WS): Knit all stitches.
- Repeat Rows 6-7 until you have 45 stitches on the needle. You will have 22 stitches on each side of the center stitch. End with a WS row (a knit row).
Pro Tip: Place a locking stitch marker on the right side of your work so you can easily identify RS rows.
Body Pattern
Now we'll work the beautiful slipped-stitch pattern. This section is worked over the center 41 stitches, with 2-stitch edge borders on each side. The pattern is symmetrical around the center stitch, and the slipped stitches will align vertically to create the woven texture.
Row 1 (RS): K2, yo, *sl 1, k1, repeat from * to 2 stitches before marker, sl 1, yo, sm, k1, sm, yo, sl 1, *k1, sl 1, repeat from * to last 2 stitches, yo, k2.
Note: The slipped stitches should align vertically. The yarn overs at the edges and center create the increases.
Row 2 (WS): K2, yo, purl to marker, yo, sm, p1, sm, yo, purl to last 2 stitches, yo, k2. (Slipped stitches from the previous row are purled.)
Row 3 (RS): K2, yo, *k1, sl 1, repeat from * to 2 stitches before marker, k1, yo, sm, k1, sm, yo, k1, *sl 1, k1, repeat from * to last 2 stitches, yo, k2. (This staggers the slipped stitches, creating the woven effect.)
Row 4 (WS): Same as Row 2.
Repeat Rows 1-4 until the shawl measures approximately 20 inches from the cast-on edge, ending with a WS row. The shawl will grow wider as you repeat the pattern, so don't be alarmed if it seems large – that's the beauty of a crescent shawl!
Edge Finish
To give your shawl a delicate, elegant finish, we'll add a decorative eyelet border.
- Next Row (RS): K2, yo, *k2tog, yo, repeat from * to 2 stitches before marker, k2tog, yo, sm, k1, sm, yo, k2tog, *yo, k2tog, repeat from * to last 2 stitches, yo, k2.
- Next Row (WS): Knit all stitches.
- Bind off loosely knitwise. Be careful not to bind off too tightly, as this will prevent the shawl from draping beautifully.
Finishing
The final steps are crucial for showcasing the stitch texture and ensuring your shawl looks its best.
- Weave in all ends using a yarn needle. Be sure to weave them in securely but invisibly.
- Block the shawl gently to open up the lace and even out the edges. This step is essential for the slipped-stitch pattern to shine.
- Pin the top edge straight and the bottom edge into a gentle curve. This will define the crescent shape.
- Allow to dry completely before unpinning. This may take 24-48 hours depending on your climate.
Once dry, your Ember Dune Shawl is ready to wear! The warm gradient of terracotta, burnt orange, and golden yellow will remind you of a desert sunset every time you wrap it around your shoulders. The subtle woven texture adds depth and interest, making this shawl a true statement piece.
Happy knitting, and enjoy your handmade desert sunset!