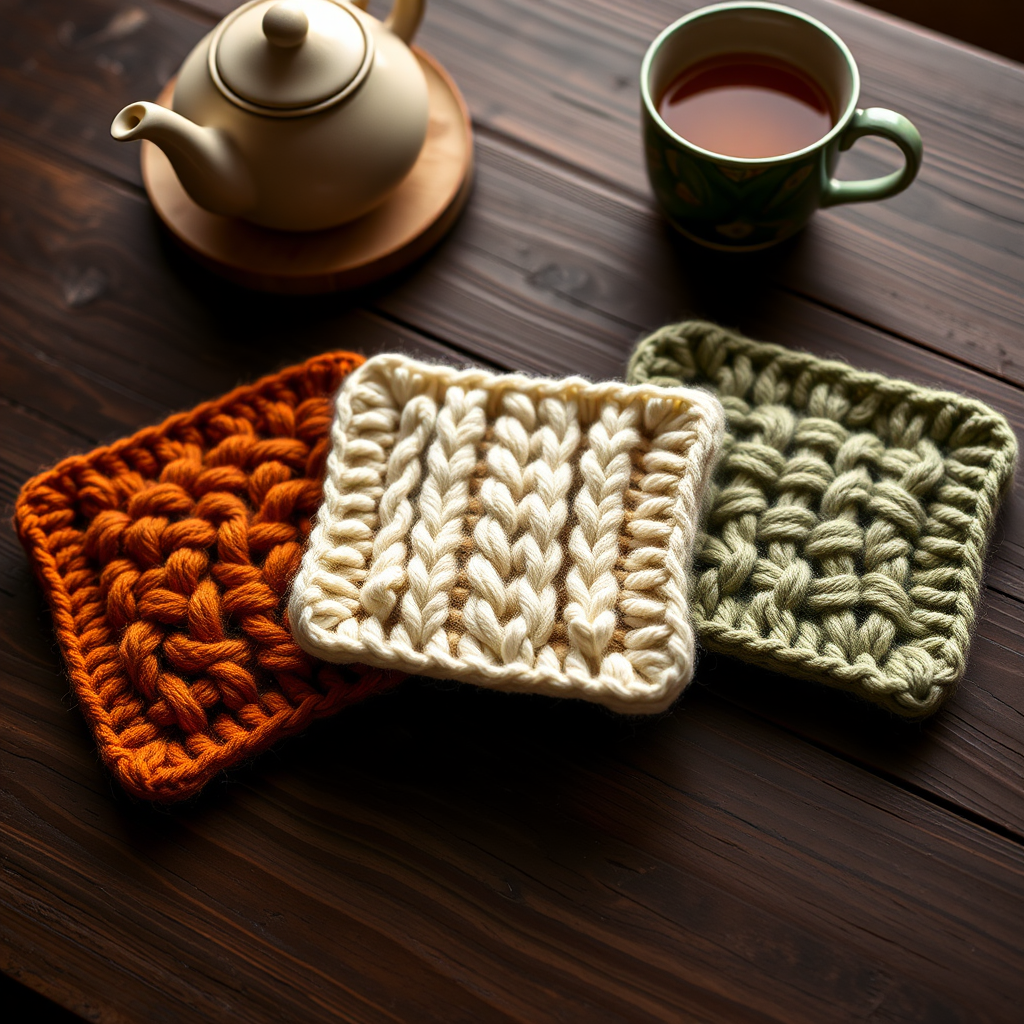
The Harvest Hearth Potholder Free Pattern – A Textured Waffle Knit

The Harvest Hearth Potholder: A Free Knitting Pattern for a Cozy, Textured Kitchen
Bring rustic charm and superior heat protection to your kitchen with the Harvest Hearth Potholder. This free knitting pattern creates a thick, waffle-textured square that’s as functional as it is beautiful. Knitted in warm autumnal hues of burnt orange, cream, and sage green, this potholder adds a cozy, handmade touch to any home. The waffle stitch not only looks stunning but also creates a dense, padded fabric that effectively shields your hands from hot pots and pans. Whether you're a seasoned knitter or a confident beginner looking for a rewarding project, this pattern is designed to be clear, detailed, and enjoyable to make.
Materials Needed
Before you begin, gather the following materials to ensure a smooth knitting experience:
- Yarn: 100% cotton worsted weight yarn (e.g., Lily Sugar'n Cream) in three colors:
- Burnt Orange (MC - Main Color): approximately 100 yards
- Cream (CC1 - Contrast Color 1): approximately 100 yards
- Sage Green (CC2 - Contrast Color 2): approximately 100 yards
- Needles: US 7 (4.5 mm) knitting needles
- Other: Tapestry needle for weaving in ends, scissors
Gauge
20 stitches and 28 rows = 4 inches in waffle stitch pattern (blocked). Gauge is important for achieving the correct size and density, so take a moment to knit a small swatch first if you're unsure.
Step-by-Step Instructions
This potholder is knitted flat in one piece using a waffle stitch pattern, then finished with a hanging loop. The waffle stitch creates a thick, padded fabric that is perfect for protecting your hands. Follow these detailed instructions carefully, and you'll have a beautiful, functional potholder in no time.
Abbreviations
- CO: Cast on
- K: Knit
- P: Purl
- K2tog: Knit two stitches together (decrease)
- sl1: Slip one stitch purlwise (as if to purl)
- wyib: With yarn in back (of the work)
- wyif: With yarn in front (of the work)
- BO: Bind off
- RS: Right side (the front of the work)
- WS: Wrong side (the back of the work)
Getting Started
With MC (Burnt Orange), CO 36 stitches. This will create a potholder that measures approximately 7 inches by 7 inches after blocking.
The Waffle Stitch Pattern
The waffle stitch is created by slipping stitches to form horizontal bars, which are then "puffed" by the knit rows. Here is the 8-row pattern repeat:
Row 1 (RS): K all stitches.
Row 2 (WS): P all stitches.
Row 3: K2, *sl1 wyib, K3; repeat from * to last 2 stitches, sl1 wyib, K1. (Note: sl1 wyib means slip 1 stitch with yarn in back, creating a horizontal bar over the slipped stitch on the RS.)
Row 4: P2, *sl1 wyif, P3; repeat from * to last 2 stitches, sl1 wyif, P1. (sl1 wyif: slip 1 stitch with yarn in front, creating a horizontal bar on the WS.)
Row 5: K all stitches.
Row 6: P all stitches.
Row 7: K4, *sl1 wyib, K3; repeat from * to last 4 stitches, sl1 wyib, K3.
Row 8: P4, *sl1 wyif, P3; repeat from * to last 4 stitches, sl1 wyif, P3.
Repeat Rows 1-8 for the waffle pattern throughout the project.
Main Body with Color Stripes
Now that you have the pattern, let's build the potholder with its beautiful color transitions.
Step 1: First MC Section
Work in MC for 16 rows total. This means you will complete 2 full repeats of the 8-row waffle pattern.
Step 2: Color Transition to CC1 (Cream)
To create a seamless stripe transition, you will split the pattern repeat across the color change:
- Work Rows 1-4 of the pattern with MC.
- Work Rows 5-8 with CC1 (Cream).
This completes one full 8-row pattern repeat, but with the color change happening in the middle. The slipped stitches from Rows 3-4 will be "puffed" by the knit rows in the new color, creating a clean transition.
Step 3: Continue with Stripes
Continue working 8-row stripes, alternating between CC1 and CC2 (Sage Green) for the next 32 rows. This means you will complete 4 full stripes total (2 in CC1 and 2 in CC2). Here's the sequence:
- Stripe 1: CC1 (8 rows)
- Stripe 2: CC2 (8 rows)
- Stripe 3: CC1 (8 rows)
- Stripe 4: CC2 (8 rows)
Step 4: Final MC Section
Now, work 16 rows with MC again to finish the main body of the potholder. This will mirror the beginning of the piece.
Final Rows and Hanging Loop
To finish the top edge and create the hanging loop, follow these steps carefully.
Step 1: Final Pattern Rows
Work Rows 1-6 of the waffle pattern with MC. This sets you up for the final two rows.
- Row 7 (RS): K4, *sl1 wyib, K3; repeat from * to last 4 stitches, sl1 wyib, K3.
- Row 8 (WS): P4, *sl1 wyif, P3; repeat from * to last 4 stitches, sl1 wyif, P3.
Step 2: Create the Hanging Loop
This is a clever technique that attaches the loop directly to the top edge of the potholder.
- With MC, CO 10 stitches onto a spare needle. This will be the loop.
- Now, with the working yarn still attached to the potholder, you will knit the loop stitches together with the potholder stitches. Hold the spare needle with the 10 loop stitches in your left hand (or however you hold your working needle) and the potholder stitches on your right needle.
- K2tog across the top edge of the potholder: knit one loop stitch together with one potholder stitch. To do this, insert your right needle into the first stitch on the spare needle AND the first stitch on the potholder needle as if to knit them together. Wrap the yarn and pull through both stitches, dropping them both off their respective needles. Repeat this until all 10 loop stitches are attached to the potholder.
- BO all stitches loosely. This will secure the loop and finish the top edge.
Finishing Touches
Your potholder is almost complete! Just a few final steps to make it perfect.
Weave in Ends: Using your tapestry needle, carefully weave in all loose yarn ends on the wrong side of the work. Make sure to secure them well so they don't come undone with use.
Blocking: Block gently to even out the stitches. To block, soak the potholder in lukewarm water with a mild soap, then gently squeeze out excess water (do not wring). Lay it flat on a towel and shape it to the correct dimensions (approximately 7x7 inches). Allow it to dry completely. The waffle texture will puff up nicely after blocking, giving it that beautiful, cushioned look.
Care Instructions
To keep your Harvest Hearth Potholder looking its best, hand wash it in cold water with a gentle detergent. Lay it flat to dry. Avoid using the dryer, as cotton can shrink and the waffle texture may distort.
Enjoy your beautiful, handmade potholder! It makes a wonderful gift and a lovely addition to your own kitchen. Happy knitting!