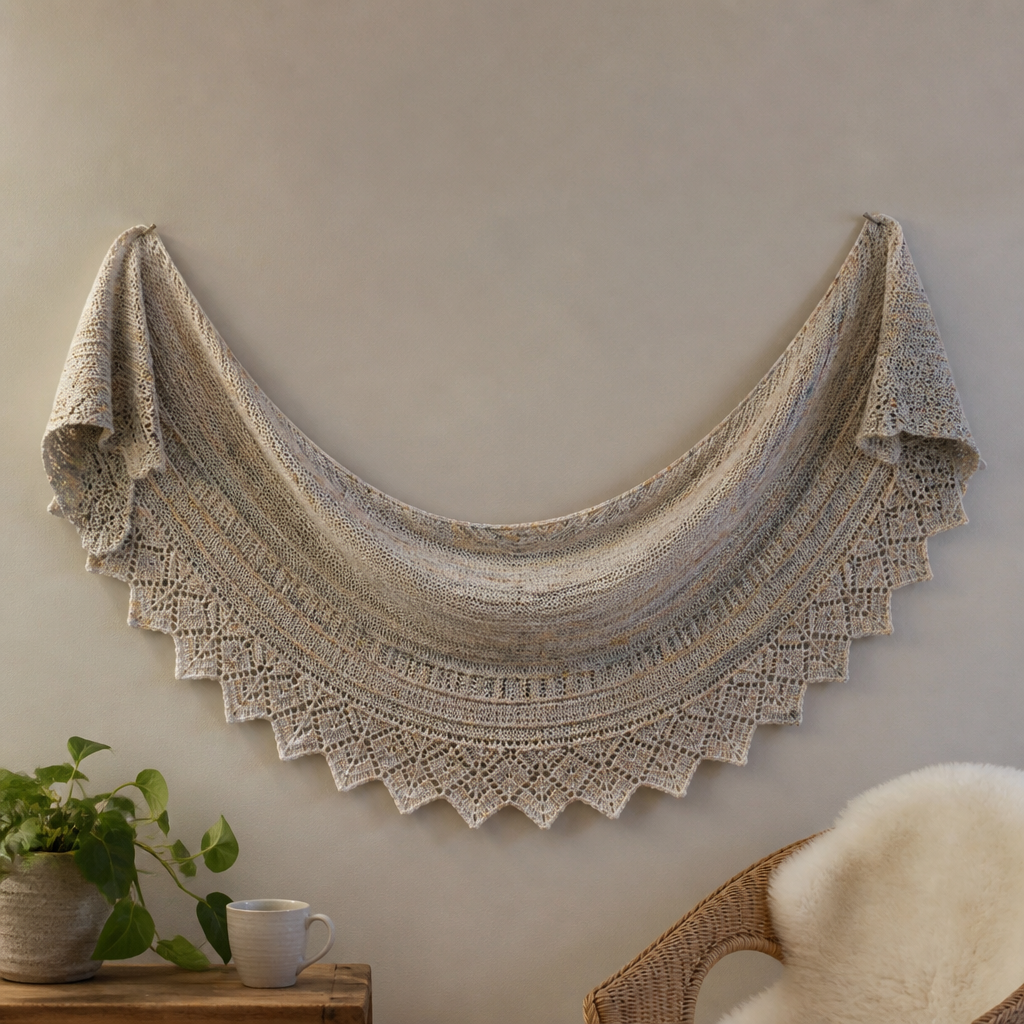
The Misty Meadow Bloom Shawl Free Pattern – A Knitted Gradient Wrap with Woven Flower Accents

The Misty Meadow Bloom Shawl: A Free Knitted Gradient Wrap with Woven Flower Accents
Wrap yourself in the soft hues of a spring meadow with this enchanting gradient shawl. The Misty Meadow Bloom Shawl features delicate woven blossoms scattered across a dreamy ombre knit, creating a romantic, airy accessory perfect for cool evenings. Whether you're a seasoned knitter or looking for your next rewarding project, this pattern offers a gentle rhythm of increases and a stunning color transition that feels like painting with yarn.
This free pattern guides you through creating a triangular shawl from the top down, with a smooth stockinette body and a delicate eyelet border. The real magic happens with the crocheted woven flowers, which add a three-dimensional, textured floral motif that elevates this piece from simple to stunning. Let's dive into this cozy, handmade project that captures the essence of a blooming meadow.
Materials Needed
Before you begin, gather the following materials to ensure a smooth knitting experience. The quality of your yarn will greatly affect the drape and feel of your finished shawl.
- Yarn: Fingering weight yarn in 3 pastel shades (e.g., blush pink, soft lavender, and cream) – approximately 400g total (100g each of two shades, 200g of the main shade). For this pattern, we'll use cream as the main shade, with blush pink and lavender as the gradient shades.
- Needle: US 6 (4.0 mm) circular knitting needle with a 32-inch cable. The long cable is essential for accommodating the growing number of stitches.
- Crochet Hook: Size G/4.0 mm for creating the woven flower accents.
- Notions: Tapestry needle for weaving in ends and sewing flowers, stitch markers (optional but helpful), and blocking pins for finishing.
- Contrast Yarn: Small amounts of soft yellow or deeper pink yarn for the flower centers and petals.
Gauge
20 stitches and 28 rows = 4 inches in stockinette stitch (blocked). Achieving the correct gauge is important for the final size and drape of your shawl. Always knit a swatch and block it before measuring to ensure accuracy.
Step-by-Step Instructions
This shawl is worked from the top center down, increasing at the edges to form a triangular shape. The woven flower accents are added after knitting using a crochet hook and contrasting yarn. Follow these detailed instructions carefully, and you'll create a beautiful heirloom piece.
Abbreviations
- k = knit
- p = purl
- yo = yarn over
- k2tog = knit two together
- ssk = slip, slip, knit (decrease)
- pm = place marker
- st(s) = stitch(es)
- RS = right side
- WS = wrong side
- ch = chain (crochet)
- dc = double crochet
- sc = single crochet
- hdc = half double crochet
- sl st = slip stitch
Getting Started: The Setup Rows
We'll begin by casting on a small number of stitches and working a few increase rows to establish the center spine of the shawl.
Setup: Cast on 3 stitches using the main shade (cream).
Row 1 (RS): k1, yo, k1, yo, k1 (5 sts). This row creates the first increases that will form the top edge.
Row 2 (WS): k2, p1, k2 (5 sts). The knit stitches at the edges create a neat garter border.
Row 3 (RS): k2, yo, k1, yo, k2 (7 sts). Notice how the increases are always placed two stitches in from each edge.
Row 4 (WS): k2, p3, k2 (7 sts). Continue to maintain the garter edge.
The Main Increase Section
Now we'll establish the pattern that will carry us through the body of the shawl. This simple two-row repeat is easy to memorize and creates a beautiful, even triangle.
Row 5 (RS): k2, yo, knit to last 2 sts, yo, k2 (increase 2 sts). This row adds one stitch at each edge, inside the garter border.
Row 6 (WS): k2, purl to last 2 sts, k2. The wrong side rows are simple: knit the first two and last two stitches, and purl everything in between.
Repeat Rows 5-6 for the entire body of the shawl. This will create a smooth stockinette fabric with a garter stitch edge.
Creating the Gradient Effect
The gradient is what makes this shawl truly special. We'll change colors gradually to create a soft, dreamy ombre effect. Follow this color sequence carefully:
- Rows 1-10: Work with blush pink. This will be the top of your shawl.
- Rows 11-20: Blend into lavender by alternating rows. Work Row 11 in blush pink, Row 12 in lavender, Row 13 in blush pink, and so on. This creates a subtle, blended transition.
- Rows 21-40: Continue with lavender only. This will be the middle section of your shawl.
- Rows 41-50: Blend into cream by alternating rows, just as you did before. Start with lavender, then cream, alternating until you're using only cream.
- Rows 51-70: Finish with cream only. This will be the bottom edge of your shawl.
Continue repeating Rows 5-6 until the shawl measures approximately 60 inches across the top edge (about 150 rows from cast-on), ending with a WS row. The number of rows may vary slightly depending on your gauge, so measure as you go.
Adding the Decorative Edging
Once your shawl reaches the desired size, we'll add a delicate eyelet border that gives the edge a beautiful, finished look.
Next RS row: k2, *yo, k2tog, repeat from * to last 2 sts, yo, k2. This creates a series of eyelets along the edge. The yarn overs add stitches, while the k2tog decreases keep the stitch count the same.
Next WS row: k2, purl to last 2 sts, k2. Work this row plain to stabilize the eyelet border.
Bind off loosely: k2, *slip both sts back to left needle, k2tog through back loop, k1, repeat from * until all sts are bound off. This stretchy bind-off ensures your shawl's edge remains flexible and doesn't pucker. Weave in all ends with your tapestry needle.
Creating the Woven Flower Accents
Now for the fun part – the flowers! These crocheted blossoms add a whimsical, three-dimensional touch. Make 5-7 flowers, depending on how densely you want them scattered.
Using a crochet hook (size G/4.0 mm) and contrasting yarn (e.g., soft yellow or deeper pink), make a magic ring.
Round 1: ch 3 (counts as first dc), 11 dc into ring, join with sl st to top of ch-3 (12 dc). Pull the magic ring tight to close the center.
Round 2: *ch 4, skip 1 dc, sl st into next dc, repeat from * around (6 loops). You'll have six chain loops radiating from the center.
Round 3: In each ch-4 loop, work (sc, hdc, 3 dc, hdc, sc) to form petals. This creates a lovely, rounded petal shape. Join with sl st to first sc. Fasten off, leaving a long tail for sewing.
Attaching the Flowers
Arrange the flowers randomly across the shawl, focusing on the edges and the gradient transition areas. This placement draws the eye to the color changes and creates a natural, organic look.
Using the long tail from each flower, sew it securely to the knitted fabric. Weave the thread through the back of the stitches, being careful not to pull too tightly. Ensure the flowers lie flat and are evenly spaced. Weave in all remaining ends.
Finishing and Blocking
Blocking is essential for this shawl. It opens up the stitches, evens out the fabric, and gives the shawl its beautiful drape.
Gently soak the shawl in lukewarm water with a mild wool wash. Squeeze out excess water (never wring). Lay the shawl on a blocking mat and pin the edges to shape, stretching it gently to the measurements you noted. Mist with water if needed, and allow to dry completely. Once dry, remove the pins and trim any loose ends.
Your Misty Meadow Bloom Shawl is now complete! This romantic, airy wrap is perfect for cool spring evenings, adding a touch of handmade elegance to any outfit. The gradient colors and delicate woven flowers make it a truly unique piece that you'll treasure for years to come. Happy knitting!