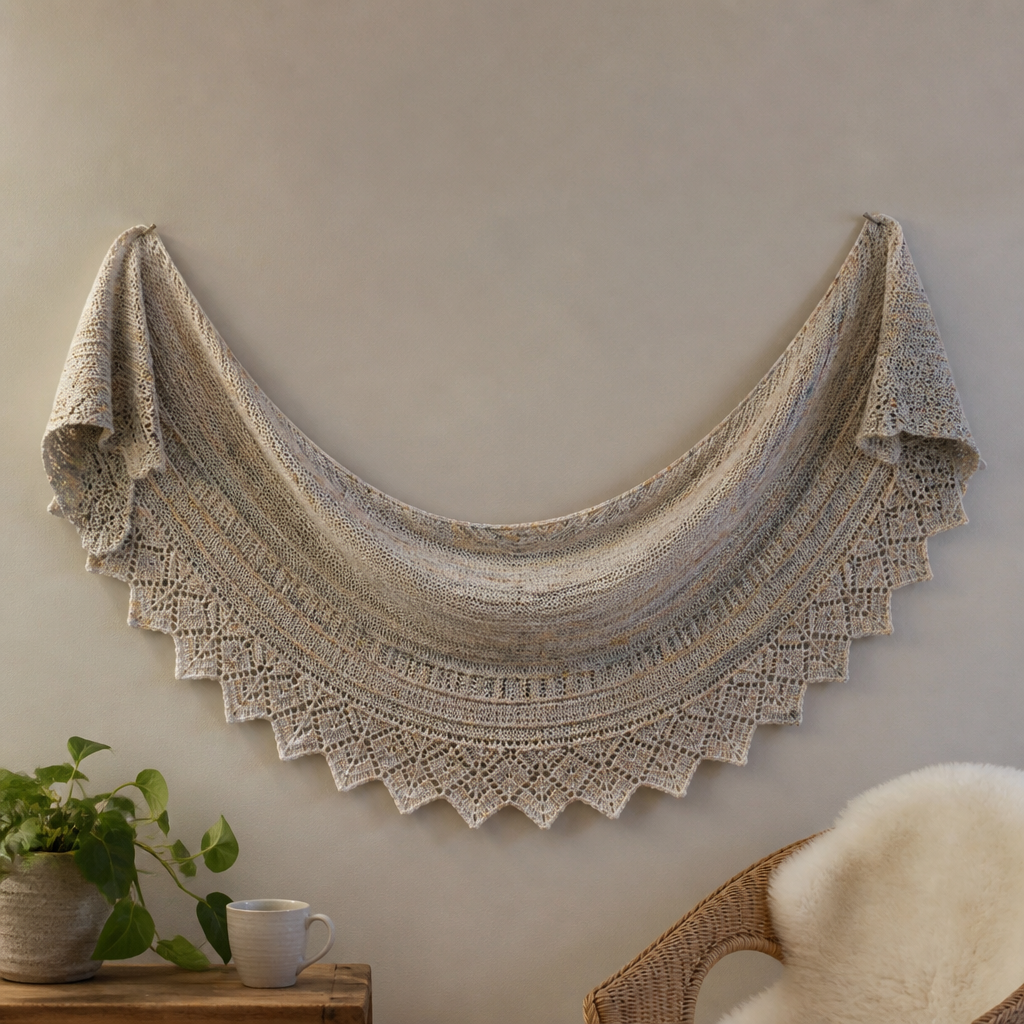
The Verdant Veil Shawl Free Pattern – Knit a Lush Leafy Wrap

The Verdant Veil Shawl: A Free Knitting Pattern for a Lush Leafy Wrap
Wrap yourself in the serene beauty of a forest floor with this textured leaf-inspired shawl. The gentle ripple pattern and earthy gradient evoke dappled sunlight through a canopy, creating a cozy, organic accessory that feels like a walk through the woods. Whether you're a seasoned knitter or a confident beginner looking for a rewarding project, this free pattern will guide you through every step to create a stunning, one-of-a-kind wrap.
This shawl is knitted from the top down, starting with a simple garter tab and increasing outward. The all-over leaf pattern is created with yarn overs and paired decreases, giving a textured, organic feel that is both elegant and approachable. The color palette transitions from a light sage green at the top to a deep forest green at the bottom, creating a beautiful gradient that mimics the natural world.
Materials Needed
Before you begin, gather the following materials to ensure a smooth knitting experience:
- Yarn: Worsted weight yarn in 3 shades of green (e.g., sage, moss, forest) – approximately 400g total. This will create the beautiful gradient effect.
- Needle: US 8 (5mm) circular knitting needle, 32 inches or longer. The circular needle is essential to accommodate the growing number of stitches.
- Gauge: 18 stitches and 24 rows = 4 inches in stockinette stitch. Achieving the correct gauge ensures your shawl will be the right size and drape.
- Notions: Stitch markers (at least 2), a tapestry needle for weaving in ends, and blocking pins for the finishing touches.
Step-by-Step Instructions
This shawl is knitted from the top down, starting with a simple garter tab and increasing outward. The leaf pattern is created with yarn overs and paired decreases. Follow these detailed instructions carefully, and you'll have a beautiful shawl in no time.
Abbreviations
- k = knit
- p = purl
- yo = yarn over
- k2tog = knit two together (right-leaning decrease)
- ssk = slip, slip, knit (left-leaning decrease)
- pm = place marker
- sm = slip marker
Setup: The Garter Tab
This is the foundation of your shawl. It creates a neat, seamless starting point.
- Cast on 3 stitches.
- Knit 6 rows of garter stitch (knit every row).
- Turn your work 90 degrees and pick up 3 stitches along the side edge of the garter tab.
- Then, pick up 3 stitches from the cast-on edge. You now have 9 stitches on your needle.
Increasing Rows (The Shawl Begins)
These rows establish the central spine of the shawl and create the initial increases. Note that all wrong side rows are worked the same way.
- Row 1 (Right Side): k3, yo, k1, yo, k3 (11 stitches)
- Row 2 and all wrong side rows: k3, purl to last 3 stitches, k3
- Row 3: k3, yo, k1, yo, k1, yo, k1, yo, k3 (15 stitches)
- Row 5: k3, yo, k3, yo, k1, yo, k3, yo, k3 (19 stitches)
- Row 7: k3, yo, k5, yo, k1, yo, k5, yo, k3 (23 stitches)
Now, begin the leaf pattern. Place a marker after the first 3 stitches and before the last 3 stitches to mark the garter border. This will help you keep track of the pattern section.
Leaf Pattern (Multiple of 8 + 1)
This is the heart of the shawl. The pattern repeat creates the stylized leaves. Repeat the 6 rows below, and as the shawl grows, you will add more pattern repeats across the row.
- Row 1 (RS): k3, sm, *k1, yo, k2, ssk, k2tog, k2, yo, k1* repeat from * to * until 3 stitches remain, sm, k3
- Row 2 (WS): k3, sm, purl to marker, sm, k3
- Row 3: k3, sm, *k2, yo, k1, ssk, k2tog, k1, yo, k2* repeat, sm, k3
- Row 4: as Row 2
- Row 5: k3, sm, *k3, yo, ssk, k2tog, yo, k3* repeat, sm, k3
- Row 6: as Row 2
Pro Tip: When you start a new repeat, you'll notice the pattern naturally expands. The yarn overs add stitches, and the decreases (ssk and k2tog) keep the stitch count balanced within each repeat. As you work, you'll see the leaf shapes emerge.
Creating the Gradient
To achieve the beautiful gradient effect, switch to the next darker shade of green every 12 rows. This will create a smooth, gradual transition from sage to moss to forest green. Continue this rhythm until you've used all your yarn or the shawl reaches the desired length.
Finishing the Shawl
Continue working the leaf pattern until the shawl measures approximately 60 inches from the cast-on edge, ending with a wrong side row. This will give you a generous, draping wrap.
- Edging: Knit 3 rows of garter stitch across all stitches. This creates a clean, sturdy border that complements the leaf pattern.
- Bind Off: Bind off loosely to prevent the edge from pulling. A loose bind-off is crucial for a shawl's drape.
- Weave in Ends: Using your tapestry needle, carefully weave in all loose ends on the wrong side of the work.
- Blocking: This is the most important step for lace patterns. Soak the shawl in lukewarm water with a gentle wool wash, then gently squeeze out excess water (do not wring). Lay it flat on a blocking mat and pin it out to shape, opening up the leaf lace pattern. Allow it to dry completely before unpinning.
Your Verdant Veil Shawl is now complete! The soft, cozy texture and the organic leaf pattern make it a perfect accessory for cool evenings or a thoughtful handmade gift. Enjoy the serene beauty of the forest, wrapped around your shoulders.