The Woven Ridge Cushion: A Free Crochet Pattern for a Textured, Modern Floor Pillow
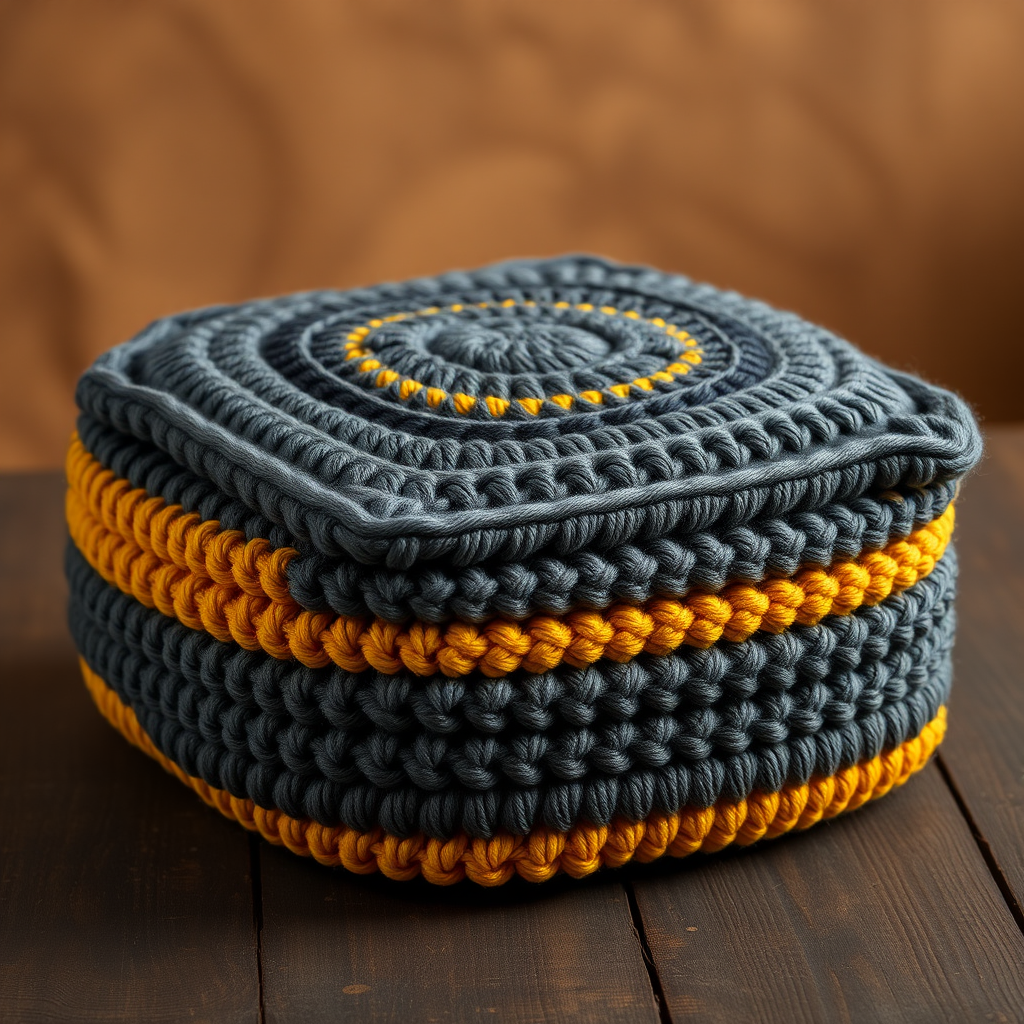
Transform Your Space with the Woven Ridge Cushion
Looking to add a cozy, modern touch to your living room? The Woven Ridge Cushion is the perfect DIY project. This free crochet pattern guides you through creating a plush, textured floor pillow that combines stunning color blocking with a unique woven stitch pattern. Using back post double crochet (BPdc), you'll craft a dense, ridged surface that's as beautiful as it is comfortable. Whether you're a seasoned crocheter or a confident beginner, this pattern is designed to be clear, detailed, and easy to follow. Let's get started on making a statement piece for your home!
Materials Needed
Before you begin, gather the following supplies. Using the exact materials will ensure your cushion matches the gauge and look described.
- Yarn: Super Bulky weight yarn (Size 6) in two contrasting colors:
- Color A (Main): 400 yards. Example: Lion Brand Wool-Ease Thick & Quick in Charcoal.
- Color B (Contrast): 200 yards. Example: Lion Brand Wool-Ease Thick & Quick in Mustard.
- Hook: US Size N/P (10 mm) crochet hook.
- Other: Tapestry needle for weaving ends and seaming, scissors, and a 20-inch (50 cm) round cushion form or polyfill stuffing.
Gauge: 8 back post double crochet stitches x 6 rows = 4 inches (10 cm) in pattern. Always check your gauge to ensure your cushion is the correct size.
Step-by-Step Instructions
This cushion is made from two identical panels that are seamed together and stuffed. The stitch pattern uses a crossed back post double crochet technique to create the woven texture. Follow these steps carefully.
Panel 1 (Make 2)
Foundation: With Color A, chain 36.
Row 1: Double crochet (dc) in the 4th chain from hook and across. (34 dc) Turn.
Row 2 (Pattern Row): Chain 3 (counts as first dc here and throughout). *Skip next stitch, back post double crochet (BPdc) around the post of the next stitch, BPdc around the post of the skipped stitch (this creates a crossed stitch).* Repeat from * across to last stitch. Dc in the top of the turning chain. Turn.
Row 3: Chain 3. *Skip next stitch, BPdc around the post of the next stitch, BPdc around the post of the skipped stitch.* Repeat from * across to last stitch. Dc in the top of the turning chain. Turn.
Rows 4-5: Repeat Row 3.
Row 6 (Plain Row): Chain 3. Dc in each stitch across. (34 dc) Turn.
Row 7 (Color Change): With Color B, repeat Row 3 (Pattern Row).
Rows 8-9: Repeat Row 3 with Color B.
Row 10: With Color B, repeat Row 6 (Plain Row).
Rows 11-15: Repeat Rows 2-6 with Color A.
Rows 16-20: Repeat Rows 7-10 with Color B.
Rows 21-25: Repeat Rows 2-6 with Color A.
Rows 26-30: Repeat Rows 7-10 with Color B.
Rows 31-35: Repeat Rows 2-6 with Color A.
Fasten off and weave in ends.
Assembly
- Place the two panels together with right sides facing out (for a visible, decorative seam) or right sides facing in (for a cleaner, hidden seam).
- Using Color A and a tapestry needle, whip stitch around three sides of the cushion, leaving one side open.
- Insert a 20-inch (50 cm) round cushion form or polyfill stuffing through the opening. Ensure the cushion is firmly stuffed to maintain its shape.
- Whip stitch the remaining side closed. Weave in all ends securely.
Your Woven Ridge Cushion is complete! Enjoy your new cozy, textured accent piece that adds warmth and modern style to any room.


