Aurora Borealis Ombre Scarf Free Pattern – Knit a Shifting Sky Wrap
Aurora Borealis Ombre Scarf Free Pattern – Knit a Shifting Sky Wrap
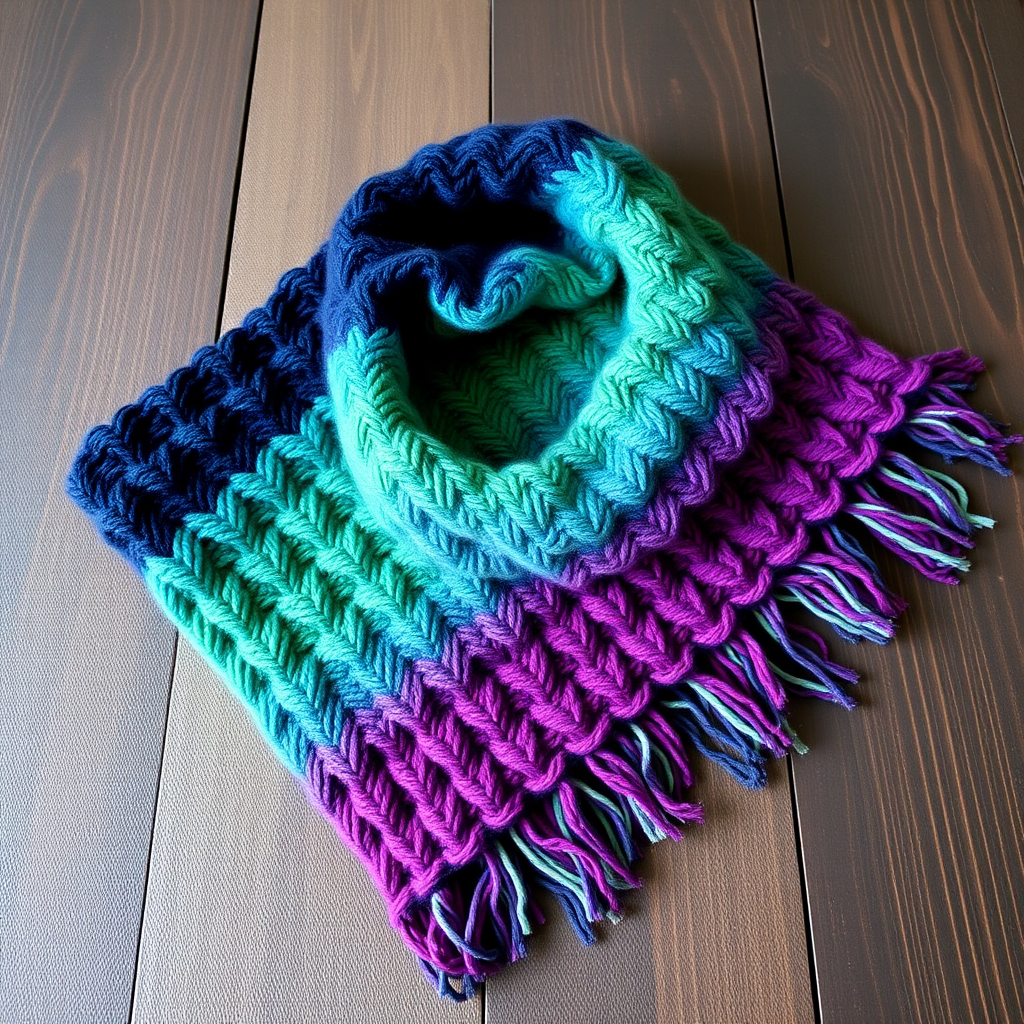
Wrap yourself in the ethereal dance of the northern lights with this mesmerizing ombre scarf, knitted in a cloud-soft blend that shifts from deep twilight blue to vibrant emerald and violet. The gentle wave stitch mimics the fluid movement of auroras, creating a cozy, artistic accessory that feels like a piece of the night sky. This free knitting pattern is perfect for intermediate beginners who want to explore color changes and textured stitches while creating a stunning, wearable piece of art.
Whether you're looking for a unique gift idea or a special treat for yourself, this scarf delivers both beauty and warmth. The symmetrical color gradient—navy to emerald to violet and back—creates a balanced, professional look that will draw compliments everywhere you go. Let's dive into this magical project!
Materials Needed
Before you begin, gather the following supplies. All items are readily available at craft stores or online.
Yarn
- Worsted weight yarn in 3 colors:
- Color A: Deep navy blue (approximately 150g)
- Color B: Emerald green (approximately 100g)
- Color C: Violet (approximately 100g)
- Total yarn needed: Approximately 350g
- Suggested yarn: Lion Brand Wool-Ease in Navy, Forest Green, and Purple (or any worsted weight yarn of your choice)
Needles & Notions
- Knitting needles: US 8 (5mm) straight or circular needles (circular recommended for comfort with long projects)
- Scissors
- Tapestry needle for weaving in ends
- Measuring tape (optional, for checking gauge)
Gauge
- Gauge: 18 stitches and 24 rows = 4 inches in stockinette stitch (after blocking)
- Finished dimensions: Approximately 70 inches long and 10 inches wide (before fringe)
Step-by-Step Instructions
This pattern is worked flat in one piece, using a simple wave stitch that creates beautiful undulating ridges. The color changes are made at the end of rows to create smooth, diagonal ombre stripes. Follow along carefully, and you'll have a stunning scarf in no time!
Abbreviations
- CO: Cast on
- K: Knit
- P: Purl
- K2tog: Knit two stitches together
- YO: Yarn over
- Sl: Slip stitch purlwise
- Rep: Repeat
- St(s): Stitch(es)
- RS: Right side
- WS: Wrong side
Pattern Notes
- The scarf is worked flat in one piece, using a simple wave stitch pattern.
- Color changes are made at the end of rows to create smooth, diagonal ombre stripes.
- The fringe is added after the main body is complete.
- Always change colors at the beginning of a right-side row for the cleanest color transition.
Main Body Instructions
Step 1: Cast On
With Color A (deep navy blue), CO 45 stitches. Leave a tail of about 6 inches for weaving in later.
Step 2: Foundation Rows
Row 1 (RS): K all stitches.
Row 2 (WS): P all stitches.
Step 3: Begin Wave Stitch Pattern
Row 3: K2, *K2tog, K2tog, YO, K1, YO, K1, YO, K1, YO, K2tog, K2tog, K1*; rep from * to * across, ending with K2. (You will still have 45 stitches after this row—the decreases are balanced by the yarn overs.)
Row 4: P all stitches.
Row 5: K all stitches.
Row 6: P all stitches.
Step 4: Repeat Wave Pattern
Row 7: K2, *K2tog, K2tog, YO, K1, YO, K1, YO, K1, YO, K2tog, K2tog, K1*; rep from * to * across, ending with K2.
Row 8: P all stitches.
Row 9: K all stitches.
Row 10: P all stitches.
Step 5: Color Change Sequence
Now you'll work the full color sequence to create the ombre effect. Follow this order carefully:
- Color A (Navy): Work Rows 1-10 for a total of 30 rows (3 full repeats of the wave pattern).
- Switch to Color B (Emerald): Work Rows 1-10 for 30 rows.
- Switch to Color C (Violet): Work Rows 1-10 for 30 rows.
- Switch back to Color B (Emerald): Work Rows 1-10 for 30 rows.
- Switch back to Color A (Navy): Work Rows 1-10 for 30 rows.
Pro tip: When changing colors, do so at the beginning of a right-side row. Leave a 6-inch tail for weaving in later. Don't cut the old color until you're sure you won't need it again—this saves yarn and reduces ends to weave in.
Step 6: Bind Off
After completing the final 30 rows with Color A, bind off loosely on a right-side row (knitwise). To bind off: K2, then pass the first stitch over the second, *K1, pass the previous stitch over*, repeat from * to * until one stitch remains. Cut yarn, leaving a 6-inch tail, and pull through the last loop.
Step 7: Weave in Ends
Using your tapestry needle, weave in all loose ends along the edges of the scarf. Weave them in on the wrong side, following the path of the yarn to hide them completely. Trim any excess.
Finishing: Adding the Fringe
The fringe adds the perfect finishing touch, echoing the multi-colored aurora theme.
Step 1: Cut Fringe Strands
Cut strands of yarn in each color, about 12 inches long. You'll need enough to place fringe every 2-3 stitches along both short ends of the scarf. For a 45-stitch width, you'll need approximately 15-18 fringe groups per end.
Step 2: Create Fringe Groups
For each fringe, take 3 strands—one of each color (navy, emerald, violet). Fold them in half together to create a loop at the folded end.
Step 3: Attach Fringe
Insert a crochet hook (or your fingers) through the edge of the scarf from front to back. Pull the folded loop through the edge. Then, pull the loose ends through the loop and pull tight. This creates a secure knot.
Step 4: Repeat Across Both Ends
Continue attaching fringe groups every 2-3 stitches across both short ends of the scarf. Space them evenly for a polished look.
Step 5: Trim Fringe
Once all fringe is attached, trim the ends evenly to about 5 inches. Use sharp scissors and a straight edge (like a ruler) as a guide for a clean, professional finish.
Blocking (Optional but Recommended)
Blocking helps even out the wave stitch and gives your scarf a beautiful drape. To block:
- Fill a basin with lukewarm water and a drop of mild wool wash.
- Submerge the scarf gently, pressing (don't wring) to saturate.
- Let soak for 15-20 minutes.
- Drain water, gently press out excess (roll in a towel to remove moisture).
- Lay flat on a blocking mat, gently stretching to the finished dimensions (70" x 10").
- Pin edges if needed and let dry completely.
Wear Your Aurora
Once dry, your Aurora Borealis Ombre Scarf is ready to wear! The soft waves and stunning color transitions make it a statement piece for any winter outfit. It also makes a thoughtful, handmade gift that shows how much you care.
We'd love to see your finished scarf! Share your photos on social media with the hashtag #AuroraScarfPattern and tag us. Happy knitting!