Celestial Dreamcatcher Amigurumi Free Pattern – A Starry-Eyed Cloud Guardian
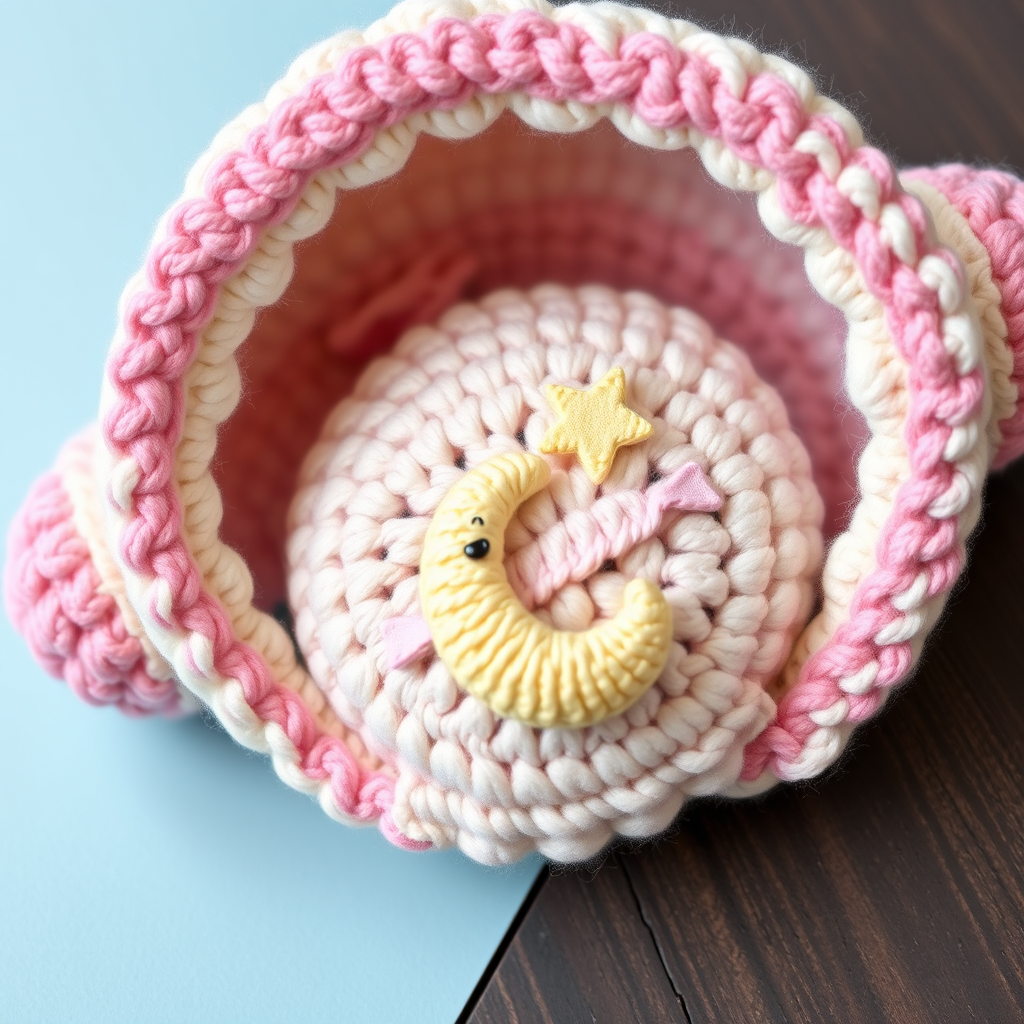
Celestial Dreamcatcher Amigurumi Free Pattern – A Starry-Eyed Cloud Guardian
Welcome to a world where the night sky meets the softest yarn! This whimsical crochet pattern creates a dreamy cloud amigurumi with a tiny star charm and a crescent moon pocket—the perfect guardian for sweet dreams. Whether you're decorating a nursery, crafting a heartfelt gift, or simply adding a touch of celestial magic to your home, this pattern is your ticket to a unique and comforting creation.
What makes this project truly special is its textured bobble stitches and serene pastel palette. The combination of white, lavender, pink, and light yellow evokes a tranquil night sky, while the cloud's gentle smiling face adds a dose of pure charm. Designed with beginners in mind, this pattern walks you through every step with clarity, ensuring you can recreate this dreamcatcher-inspired amigurumi with confidence. Let's dive in and bring this starry-eyed guardian to life!
Materials Needed
Before we begin our celestial journey, let's gather all the essentials. Here's what you'll need to create your very own Cloud Guardian:
Yarn & Hook
- Yarn: Worsted weight cotton or acrylic yarn in the following colors:
- White (approx. 100g)
- Soft lavender (approx. 100g)
- Pale pink (approx. 100g)
- Light yellow (approx. 100g)
- Hook: 3.5mm (E) crochet hook
Additional Supplies
- Polyester fiberfill stuffing
- Yarn needle for sewing and weaving in ends
- Stitch marker to keep track of your rounds
- Small amount of embroidery floss for the star charm (optional, but recommended for extra detail)
Gauge & Tension
Gauge: 4 sc x 4 rows = 1 inch. While gauge isn't critical for this project, maintaining consistent tension will ensure your cloud is evenly puffy and your stitches are neat. If you tend to crochet loosely, consider using a slightly smaller hook to keep the stuffing from showing through.
Step-by-Step Instructions
Now, let's get to the fun part! This pattern is broken down into manageable sections. We'll start with the cloud body, then create the moon pocket and star charm, and finally assemble everything into your dreamy guardian. Follow along carefully, and you'll have a beautiful amigurumi in no time.
Abbreviations & Special Stitches
Before we start, let's review the abbreviations used in this pattern:
- MR: Magic ring
- sc: Single crochet
- inc: Increase (2 sc in same stitch)
- dec: Decrease (sc two stitches together)
- bobble: 4 dc cluster (see special stitch instructions below)
- sl st: Slip stitch
- ch: Chain
Special Stitch – Bobble
To create the textured bobble stitch: Work 4 double crochet into the same stitch, but leave the last loop of each on the hook. After completing all 4 double crochets, yarn over and pull through all 5 loops on your hook. This creates a lovely, puffy bump that adds wonderful texture to your cloud.
Cloud Body (Make 2 Pieces, Then Join)
We'll create two identical cloud pieces and then join them together to form a puffy, three-dimensional shape. Let's start with the first piece.
First Cloud Piece
Round 1: Start with a magic ring, work 6 sc into the ring. Pull tight to close. (6 stitches)
Round 2: Work 2 sc into each stitch around. (12 stitches)
Round 3: *Sc in the next stitch, inc in the next stitch*; repeat from * to * around. (18 stitches)
Round 4: *Sc in the next 2 stitches, inc in the next stitch*; repeat from * to * around. (24 stitches)
Round 5: *Sc in the next 3 stitches, inc in the next stitch*; repeat from * to * around. (30 stitches)
Round 6: *Sc in the next 4 stitches, inc in the next stitch*; repeat from * to * around. (36 stitches)
Round 7: *Sc in the next 5 stitches, inc in the next stitch*; repeat from * to * around. (42 stitches)
Round 8: *Sc in the next 6 stitches, inc in the next stitch*; repeat from * to * around. (48 stitches)
Rounds 9-12: Sc in each stitch around. (48 stitches)
Round 13: *Sc in the next 6 stitches, dec*; repeat from * to * around. (42 stitches)
Round 14: *Sc in the next 5 stitches, dec*; repeat from * to * around. (36 stitches)
Round 15: *Sc in the next 4 stitches, dec*; repeat from * to * around. (30 stitches)
Round 16: *Sc in the next 3 stitches, dec*; repeat from * to * around. (24 stitches)
Round 17: *Sc in the next 2 stitches, dec*; repeat from * to * around. (18 stitches)
Round 18: *Sc in the next stitch, dec*; repeat from * to * around. (12 stitches)
Round 19: Dec around. (6 stitches)
Fasten off, leaving a long tail for sewing. Important: Stuff the piece firmly with fiberfill before closing the final hole. You want it to be nice and plush!
Second Cloud Piece
Repeat Rounds 1-19 exactly as above, but do not fasten off. Instead, leave a long tail (about 18-20 inches) for sewing the two pieces together. This tail will be used to join the cloud halves.
Joining the Cloud Pieces
Now for the magical part—bringing your cloud to life! Place the two cloud pieces together with their wrong sides facing each other. The right sides (the ones you want visible) should be on the outside.
Using the long tail from the second piece, thread it onto your yarn needle. Whip stitch around the edge of the cloud, going through both layers. Important: Leave a 2-inch opening along one side. Through this opening, add a bit more stuffing to ensure the cloud is perfectly puffy and rounded. Then, continue whip stitching to close the opening completely. Weave in the end securely.
Your cloud base is now complete! Admire your work—it should be a soft, rounded, puffy shape ready for its celestial details.
Crescent Moon Pocket (Make 1)
This adorable pocket will hold tiny treasures or simply add to the dreamy aesthetic. We'll use light yellow yarn for a gentle, moonlit glow.
Round 1: MR, 6 sc in ring. (6 stitches)
Round 2: Inc in each stitch around. (12 stitches)
Round 3: *Sc in the next stitch, inc*; repeat from * to * around. (18 stitches)
Round 4: *Sc in the next 2 stitches, inc*; repeat from * to * around. (24 stitches)
Rounds 5-6: Sc in each stitch around. (24 stitches)
Round 7: *Sc in the next 2 stitches, dec*; repeat from * to * around. (18 stitches)
Round 8: *Sc in the next stitch, dec*; repeat from * to * around. (12 stitches)
Round 9: Dec around. (6 stitches)
Fasten off, leaving a long tail for sewing. Stuff the moon pocket lightly—you want it to hold its shape but remain soft. Sew it to the front of the cloud, positioning it as a pocket with the opening facing upward. This creates a lovely, functional detail.
Star Charm (Make 1)
Every cloud needs its guiding star! We'll use pale pink yarn for a soft, rosy glow.
Round 1: MR, 5 sc in ring. (5 stitches)
Round 2: Inc in each stitch around. (10 stitches)
Round 3: *Sc in the next stitch, inc*; repeat from * to * around. (15 stitches)
Round 4: *Sc in the next 2 stitches, inc*; repeat from * to * around. (20 stitches)
Rounds 5-6: Sc in each stitch around. (20 stitches)
Round 7: *Sc in the next 2 stitches, dec*; repeat from * to * around. (15 stitches)
Round 8: *Sc in the next stitch, dec*; repeat from * to * around. (10 stitches)
Round 9: Dec around. (5 stitches)
Fasten off, leaving a long tail. Stuff the star lightly and sew it to the top of the cloud, near the moon pocket. This placement creates a beautiful visual balance.
Adding Bobble Texture (Optional but Recommended)
To give your cloud that extra-special, dreamy texture, add a few bobble stitches randomly across the cloud's surface. You can do this before joining the two pieces, or even after—just be careful not to pull too tightly. Simply insert your hook into a stitch on the cloud's surface, work a bobble stitch, and continue. This creates lovely, subtle bumps that mimic the fluffiness of a real cloud.
Finishing Touches
Now for the final details that bring your Cloud Guardian to life:
- Weave in all ends carefully to ensure a clean, professional finish.
- Embroider a gentle smile on the cloud's face using pink yarn and a yarn needle. A simple curved line or a small "v" shape works perfectly. Place it below the moon pocket for a charming, friendly expression.
- Create a hanging loop by chaining 10-15 stitches and attaching it to the top of the cloud. This allows you to display your creation as a dreamcatcher or ornament.
And there you have it—your very own Celestial Dreamcatcher Amigurumi! This starry-eyed cloud guardian is ready to watch over sweet dreams and add a touch of whimsy to any space. Whether you keep it for yourself or gift it to someone special, this handmade treasure is sure to bring comfort and joy.
Happy crocheting, and may your nights be filled with gentle, starry dreams!



