Dockside Stripe Mosaic Scarf Free Pattern: A Modern Navy & White Overlay Crochet Scarf
Dockside Stripe Mosaic Scarf Free Pattern: A Modern Navy & White Overlay Crochet Scarf
Introduction
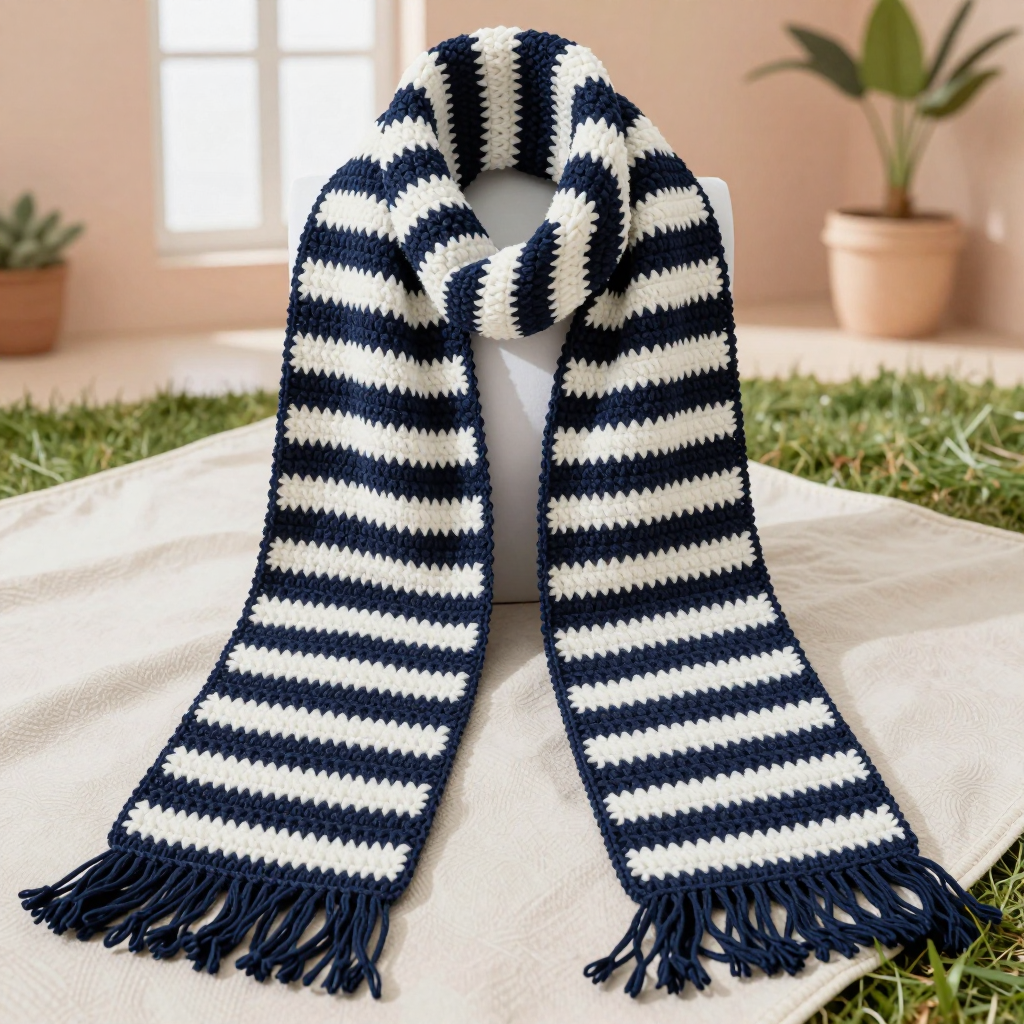
If you have never picked up a crochet hook before, this scarf is the perfect place to begin. The Dockside Stripe Scarf is a long, narrow accessory worked flat in overlay mosaic crochet — a clever technique that looks impressively intricate but is made from just two simple stitches you will learn in minutes. The finished piece is about 7 inches wide and 60 inches long, with a crisp navy base crossed by clean white lines and blocks, giving it a modern, tailored look that feels dense, warm, and wonderfully squishy in the hand. Tidy navy fringe at both ends adds the perfect finishing touch. Because every row uses the same stitch count and only two colors, you can relax into the rhythm and watch the geometric pattern appear row by row — no experience required, just curiosity and a little patience.
Materials Needed
- Yarn: Worsted weight (#4) acrylic or wool-blend yarn, approximately 350–400 yards total — 200 yards navy (Color A) and 150–200 yards white (Color B).
- Crochet hook: 5.0 mm (US H-8), or the size needed to obtain gauge.
- Stitch markers: At least 2, to mark your first stitch and the right side of your work.
- Tapestry needle: A blunt-tipped needle with a large eye for weaving in ends.
- Scissors: Sharp craft scissors for cutting yarn and fringe.
- Measuring tape and rustproof pins (for blocking).
- Finished size: Approximately 7 inches (18 cm) wide and 60 inches (152 cm) long, excluding fringe. Fringe adds approximately 3 inches (7.5 cm) at each end.
Abbreviations and Beginner Glossary
Every term below is explained as if you have never crocheted before. All terms are US crochet terms.
- ch — chain: Make a slip knot on your hook, wrap the yarn over the hook, and pull it through the loop on your hook. That is one chain. Chains form your starting foundation.
- sc — single crochet: Insert your hook into the stitch, wrap the yarn over the hook, pull up a loop (you now have 2 loops on the hook), wrap the yarn over again, and pull through both loops. One single crochet made.
- scBLO — single crochet in back loop only: Every stitch has two loops at its top (a front loop facing you and a back loop behind it). For scBLO, insert your hook only under the back loop, then work a normal single crochet. This creates a ridge that makes the mosaic texture.
- dc — double crochet: Wrap the yarn over the hook, insert the hook into the stitch, wrap and pull up a loop (3 loops on hook), wrap and pull through 2 loops (2 loops remain), wrap and pull through the last 2 loops. One double crochet made — it is taller than a single crochet.
- dcBLO — double crochet in back loop only: Work a double crochet inserting your hook only under the back loop of the stitch. These taller stitches create the raised overlay lines of the pattern.
- st(s) — stitch(es): A single completed stitch, or several of them.
- sk — skip: Do not work into that stitch; move past it to the next one.
- rep — repeat: Do the instruction again the number of times stated.
- RS — right side: The front, public-facing side of your scarf.
- WS — wrong side: The back side of your scarf, facing you on alternating rows.
- turn: Flip your work over so you can crochet back in the other direction.
- fasten off: Cut the yarn a few inches from your work and pull the tail through the last loop to secure it.
Gauge
Gauge: 16 stitches and 16 rows = 4 inches (10 cm) in overlay mosaic crochet pattern, measured after blocking.
Why gauge matters: Gauge is how many stitches and rows fit into a set measurement. If your stitches are larger than the pattern's, your scarf will come out wider and shorter; if smaller, it will be narrower and longer. Checking gauge first means your finished scarf matches the measurements.
How to make a gauge swatch: With Color A, ch 22. Work Rows 1–2 of the Setup section, then repeat Rows 3–6 of the pattern until your swatch is about 5 inches tall. Fasten off, mist it lightly with water, and let it dry flat. Lay a ruler across the middle and count how many stitches fit in 4 inches, then how many rows fit in 4 inches. If you have more than 16 stitches, switch to a larger hook; if fewer, switch to a smaller hook. Try again until you match.
Beginner Tips Before You Start
- Use stitch markers. Place one in the very first stitch of each row and one on the right side of your work so you always know which side is facing you.
- Do not pull your yarn too tight. Keep an even, relaxed tension — tight stitches make it hard to insert your hook into the back loops, which is the heart of this pattern.
- Count every row. Each row must have 29 stitches. Count before you turn; it takes ten seconds and saves hours of fixing.
- Carry, don't cut. When you change colors, leave the unused color hanging along the side edge and pick it up again two rows later. Do not cut the yarn between color bands.
- Work the back loop only, every time. The pattern depends on it. If a stitch looks like it has two loops, choose the one farther from you.
- Practice the first four rows twice on a scrap before starting the scarf — the mosaic rhythm clicks quickly once you see it.
Step-by-Step Instructions
Setup (Foundation)
Row 1 (RS, Color A): With navy, ch 30. Sc in the 2nd ch from hook and in each ch across. Turn. (29 sc)
Row 2 (WS, Color A): Ch 1, scBLO in each st across. Turn. (29 sc)
Body (Mosaic Pattern)
Row 3 (RS, Color B): Ch 1, scBLO in first 2 sts, *dcBLO in next st, scBLO in next 3 sts; rep from * to last 3 sts, dcBLO in next st, scBLO in last 2 sts. Turn. (29 sts)
Row 4 (WS, Color B): Ch 1, scBLO in each st across. Turn. (29 sts)
Row 5 (RS, Color A): Ch 1, scBLO in first 4 sts, *dcBLO in next st, scBLO in next 3 sts; rep from * to last st, scBLO in last st. Turn. (29 sts)
Row 6 (WS, Color A): Ch 1, scBLO in each st across. Turn. (29 sts)
Repeat Rows 3–6 fifty-eight more times (that is 59 repeats in total, ending on a Row 6 in Color A), until the scarf measures approximately 60 inches (152 cm) from the beginning. Your total row count will be 238 rows (2 setup rows + 236 pattern rows), which at 16 rows per 4 inches gives roughly 59 inches — block gently to reach the full 60 inches. Do not fasten off.
Final Edging
Row 1 (RS, Color A): Ch 1, sc evenly along the top edge, working 1 sc in each st across. Turn. (29 sc)
Row 2 (WS, Color A): Ch 1, scBLO in each st across. Fasten off. (29 sc)
Fringe
Cut 58 strands of navy yarn, each approximately 8 inches (20 cm) long. Holding 2 strands together, fold them in half to make a loop. Insert your hook from back to front through the edge of the scarf, pull the loop through, then pull the two yarn tails through the loop and tighten gently. Attach fringe along both short ends, spacing evenly — approximately 14 fringe bundles per end. Trim the fringe ends evenly to approximately 3 inches (7.5 cm).
Assembly and Finishing
Weaving in ends: Thread each yarn tail onto your tapestry needle and weave it back and forth through the back of several stitches (about 2 inches), then trim close to the work. Never knot your ends — weaving hides them securely and keeps the fabric smooth.
Blocking: Lightly mist the scarf with cool water until damp but not soaking. Lay it flat on a towel or blocking mat and pin the edges straight to the finished measurements (7 inches wide, 60 inches long). Use rustproof pins every few inches along both long edges. Leave it to dry completely — usually overnight. Blocking opens the stitches, evens the mosaic texture, and helps the scarf hang beautifully.
Final check: Once dry, remove the pins, give the fringe a final trim so both ends match, and gently steam the fringe if it looks crimped.
Pro Tips and Variations
- Change the colors: Try charcoal and cream, forest green and oatmeal, or dusty rose and ivory. Keep one color dark and one light so the mosaic lines stand out.
- Adjust the length: For a shorter cowl-style scarf, stop after 40 inches (about 160 rows total). For a longer wrap, add repeats in groups of 4 rows so you always end on a Color A row.
- Substitute yarn: A DK weight (#3) yarn with a 4.0 mm (G-6) hook makes a lighter scarf — swatch first, as you will need more stitches to reach 7 inches wide.
- Skip the fringe: For a cleaner, more minimalist look, leave the ends plain or add a simple single crochet border around the entire scarf in navy.