Driftwood Dune Cocoon Sweater Free Pattern
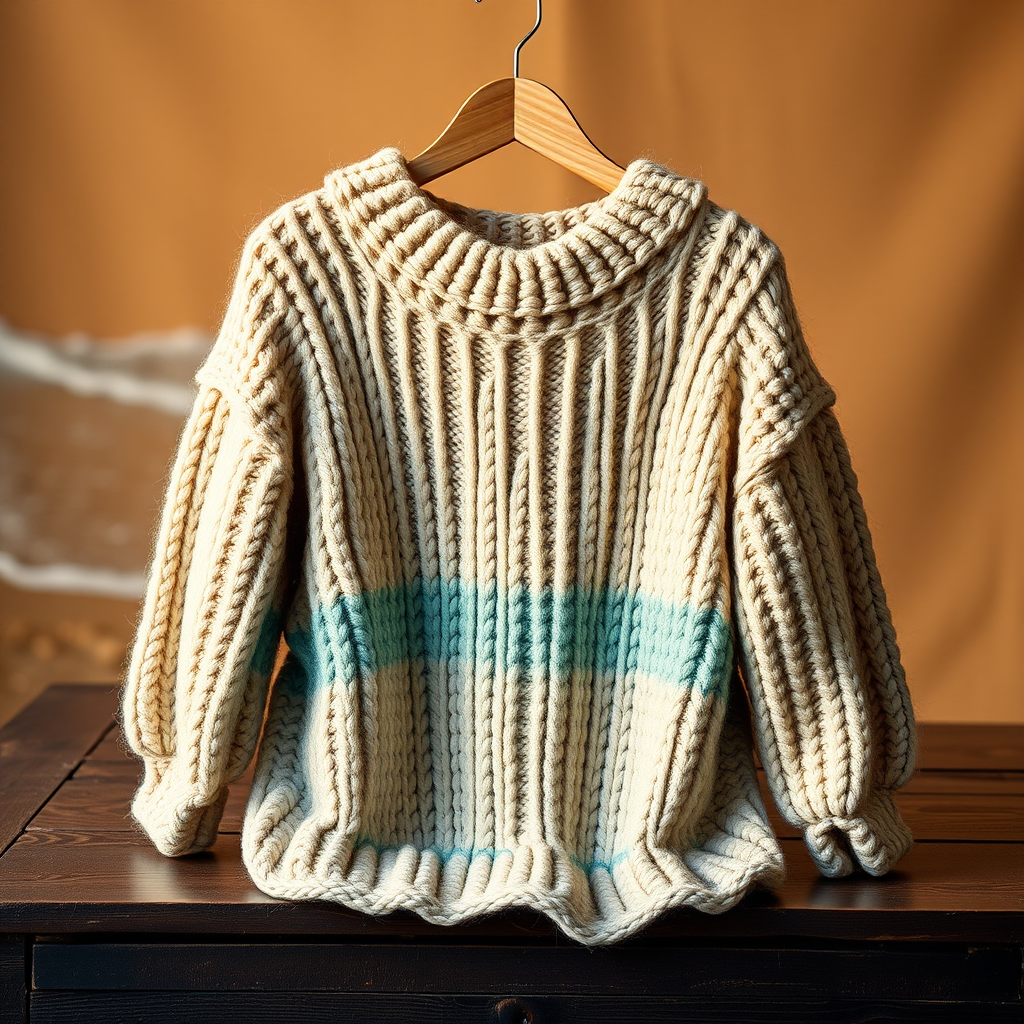
Driftwood Dune Cocoon Sweater: A Beginner-Friendly Knitting Pattern
Embrace the serene beauty of coastal textures with this oversized, cloud-soft cocoon sweater. Knitted in a unique blend of chunky yarns, it drapes like a warm, sandy breeze. This pattern is designed with beginners in mind, using simple stitches and a relaxed, boxy silhouette that flatters every body type. The subtle texture comes from a slipped-stitch pattern that mimics the ripples of sand dunes, while the soft teal accents evoke the gentle sea. Whether you're curled up by the fire or strolling along the shore, this sweater is your new go-to for cozy, effortless style.
Why You'll Love This Pattern
This is the perfect weekend project. Because it's worked in two identical rectangles, there's no complicated shaping or set-in sleeves to wrestle with. You'll knit two panels, seam them together, and you're done! The chunky yarn means it works up fast, and the forgiving, oversized fit means gauge isn't critical—just knit and enjoy the process.
Materials Needed
Before you begin, gather these supplies. All items are readily available at your local yarn shop or online.
- Yarn: Super Bulky Weight Yarn (Size 6). You will need:
- 3 (3, 4, 4) skeins in 'Sea Glass' (soft teal)
- 2 (2, 2, 3) skeins in 'Sand Dune' (warm oatmeal)
- Needles: US 13 (9 mm) 32-inch circular knitting needle (used for both flat and circular work—the long cord holds your stitches comfortably).
- Notions: Stitch markers, tapestry needle for weaving in ends, and scissors.
Gauge
8 stitches and 12 rows = 4 inches in stockinette stitch (knit on US 13 needles, after blocking). While gauge isn't crucial for this oversized style, matching it ensures your sweater falls within the listed measurements. Always knit a swatch first!
Step-by-Step Instructions
This pattern is broken down into simple, manageable steps. Read through the entire pattern once before starting, and you'll be a pro in no time.
Sizes & Measurements
This pattern is written for sizes S/M (M/L, L/XL, XXL). The finished chest measurements are 40 (46, 52, 58) inches, and the length is 22 (24, 26, 28) inches. The oversized fit means you can choose a size based on how much ease you prefer. For a relaxed, true-to-size fit, pick the size closest to your bust measurement. For a more dramatic cocoon look, size up.
Pattern Notes
The sweater is worked flat in two identical rectangles (front and back) and seamed at the shoulders and sides, leaving openings for arms. The unique texture comes from alternating sections of garter stitch and a simple slipped-stitch pattern. Don't be intimidated by the slipped stitches—they're incredibly easy and create a beautiful, woven effect.
Stitch Pattern (Multiple of 4 + 2)
This is the core texture of the sweater. Practice on a small swatch until you feel comfortable.
- Row 1 (RS): Knit all.
- Row 2 (WS): Purl all.
- Row 3: *Slip 1 purlwise with yarn in back, k3; repeat from * to last 2 sts, slip 1 purlwise with yarn in back, k1.
- Row 4: *Slip 1 purlwise with yarn in front, p3; repeat from * to last 2 sts, slip 1 purlwise with yarn in front, p1.
Repeat Rows 1-4 for pattern.
FRONT PANEL
Let's start knitting! Follow these steps carefully.
- Cast On: With 'Sea Glass' yarn, cast on 80 (92, 104, 116) stitches using a long-tail cast on. This will be the bottom edge of your sweater.
- Garter Stitch Border: Work in garter stitch (knit every row) for 6 rows. This creates a neat, rolled edge that anchors the sweater.
- Switch Yarn: Cut the 'Sea Glass' yarn, leaving a 6-inch tail. Join the 'Sand Dune' yarn.
- Main Body: Work in the Stitch Pattern (Rows 1-4) until the piece measures 18 (20, 22, 24) inches from the cast-on edge, ending with a WS row (Row 2 or 4 of the pattern). This is the main body of the sweater.
- Shape Shoulders: This is where we create the shoulder slope and neck opening.
- Next Row (RS): Bind off 10 (12, 14, 16) stitches, knit to end.
- Next Row (WS): Bind off 10 (12, 14, 16) stitches, purl to end.
- Collar: Continue working in the Stitch Pattern on these remaining stitches for 4 (4, 5, 5) inches. This creates the deep, fold-over collar.
- Bind Off: Bind off all stitches loosely. A loose bind-off is crucial for a stretchy, comfortable neckline. Use a larger needle or a stretchy bind-off method if needed.
BACK PANEL
Repeat the exact same steps as the Front Panel. This is the beauty of this pattern—no shaping differences between front and back!
- Cast on 80 (92, 104, 116) stitches with 'Sea Glass'.
- Work 6 rows of garter stitch.
- Switch to 'Sand Dune' and work in the Stitch Pattern until the piece measures 18 (20, 22, 24) inches, ending with a WS row.
- Bind off 10 (12, 14, 16) stitches at the beginning of the next two rows.
- Continue in pattern on the remaining 60 (68, 76, 84) stitches for 4 (4, 5, 5) inches.
- Bind off all stitches loosely.
FINISHING
Now for the magic—turning your two rectangles into a sweater!
- Lay Flat: Lay both panels flat on a large surface, with the right sides (the side you want facing out) facing up. Make sure they are aligned.
- Seam Shoulders: With right sides together (the inside of the sweater facing out), use a tapestry needle and a length of 'Sand Dune' yarn to sew the shoulder seams. Sew for 10 (12, 14, 16) inches from each outer edge. This leaves the center 20 (22, 24, 26) inches open for the neck. Use a mattress stitch or a simple whip stitch for a secure seam.
- Seam Sides: Still with right sides together, sew the side seams from the bottom edge up for 12 (14, 16, 18) inches. This leaves a 6 (8, 10, 12) inch opening at the top for your armholes. The armhole opening should align with the shoulder seams.
- Weave in Ends: Use your tapestry needle to weave in all loose yarn ends securely on the inside of the sweater. This prevents unraveling.
- Block to Measurements: This is a crucial step for a professional finish. Soak the sweater in lukewarm water with a drop of wool wash for 15 minutes. Gently squeeze out excess water (do not wring). Lay the sweater flat on a towel, roll it up to remove more water, then reshape it to the finished measurements listed above. Allow it to dry completely. Blocking evens out the stitches and gives the sweater its beautiful drape.
And that's it! You've created a stunning, cozy, and stylish cocoon sweater. The Driftwood Dune pattern is a joy to knit and an even greater joy to wear. The combination of the soft oatmeal color and the subtle teal trim is timeless, and the texture is simply irresistible. Happy knitting!


