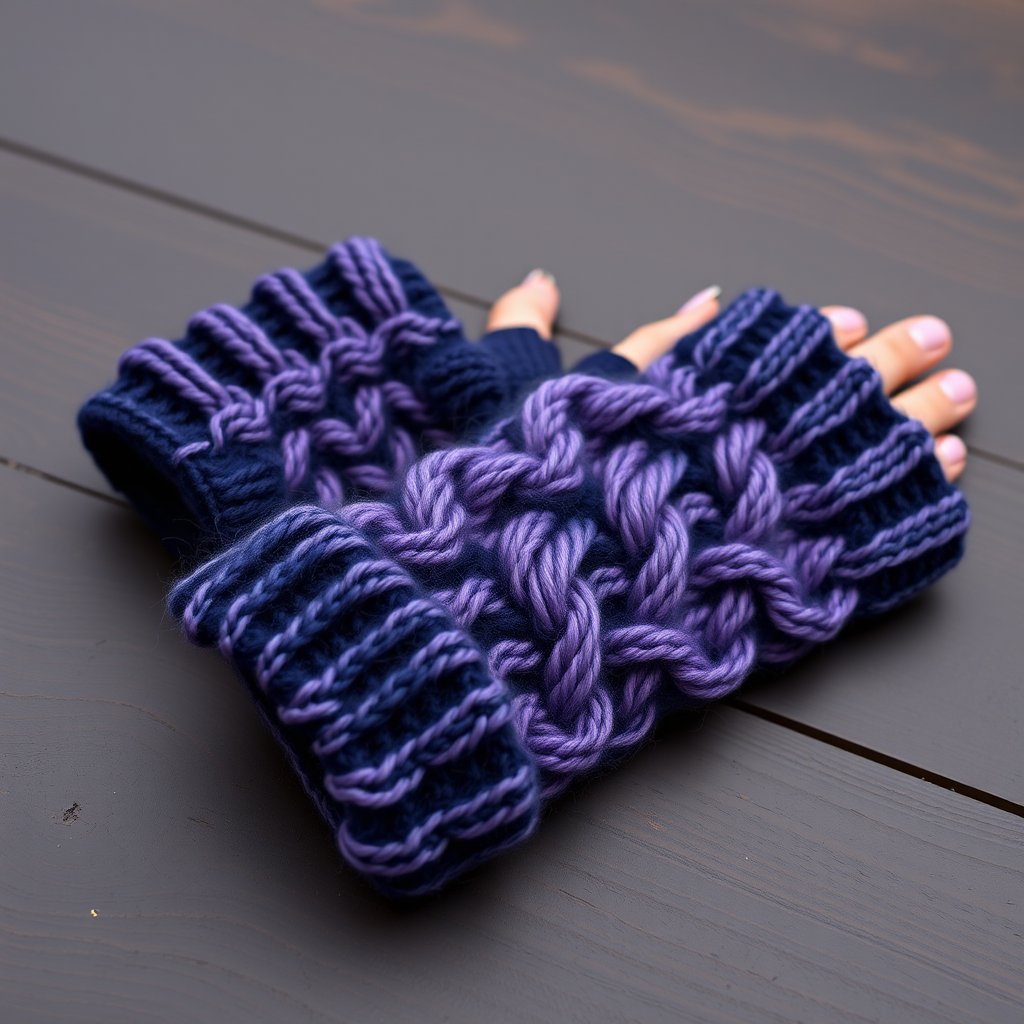
Emberwood Fingerless Flower Mitts Free Pattern – Knit a Botanical Garden for Your Hands

Emberwood Fingerless Flower Mitts Free Pattern – Knit a Botanical Garden for Your Hands
Wrap your hands in a blooming garden with these textured fingerless mitts, featuring an all-over floral cable motif that feels like a warm hug. Knit in a rich, earthy palette of deep forest green and burnt orange, these mitts are the perfect cozy accessory for crisp autumn days. Whether you're sipping cider at a pumpkin patch or curling up with a good book, these mitts keep your fingers free while your palms stay toasty. The raised flower cables add a dimensional, handcrafted touch that elevates them from simple accessories to wearable art. Best of all, this free pattern is beginner-friendly, with clear instructions and a repeating 12-row motif that's easier than it looks. Let's dive in and knit a little botanical magic!
Materials Needed
Before you begin, gather your supplies. Here's everything you'll need to bring your Emberwood Mitts to life:
- Yarn: Worsted weight yarn (e.g., Lion Brand Wool-Ease) in two colors:
- Main Color (MC) – Deep Forest Green (approx. 150g/300yds)
- Contrast Color (CC) – Burnt Orange (approx. 50g/100yds)
- Needles: US 7 (4.5mm) knitting needles (straight or circular for magic loop)
- Notions: Stitch markers, tapestry needle for weaving in ends and seaming
- Gauge: 20 stitches and 26 rows = 4 inches in stockinette stitch (after blocking). Be sure to check your gauge to ensure a proper fit!
Tip: If you're between sizes, adjust your needle size to match the gauge. A swatch is your best friend!
Step-by-Step Instructions
This pattern is worked flat in two pieces (left and right mitt) and seamed, with a thumb hole created by binding off and casting on stitches. The flower cable pattern is a 12-row repeat that creates a beautiful raised floral motif. Follow along carefully, and you'll have a pair of mitts in no time.
Abbreviations
- CO: cast on
- K: knit
- P: purl
- K2tog: knit two together (decrease)
- SSK: slip, slip, knit (decrease)
- Yo: yarn over
- C4F: cable 4 front (slip 2 stitches to cable needle, hold in front, knit next 2 stitches, then knit the 2 from cable needle)
- C4B: cable 4 back (slip 2 stitches to cable needle, hold in back, knit next 2 stitches, then knit the 2 from cable needle)
- PM: place marker
- SM: slip marker
- BO: bind off
Special Stitch Pattern – Flower Cable (worked over 12 stitches)
This is the heart of the mitts. The 12-stitch repeat creates a raised floral motif with twisted cables and purl bumps. Work these rows as written, repeating them throughout the body of the mitt.
- Row 1 (RS): P2, C4F, K4, C4B, P2
- Row 2 (WS): K2, P12, K2
- Row 3: P2, K12, P2
- Row 4: K2, P12, K2
- Row 5: P2, C4B, K4, C4F, P2
- Row 6: K2, P12, K2
- Row 7: P2, K12, P2
- Row 8: K2, P12, K2
- Row 9: P2, K2, C4F, C4B, K2, P2
- Row 10: K2, P12, K2
- Row 11: P2, K12, P2
- Row 12: K2, P12, K2
Note: The RS (right side) rows are where the magic happens—cables twist and flowers form. WS (wrong side) rows are mostly purling, which is a nice breather!
Left Mitt
Cast On and Ribbing:
CO 40 stitches with MC.
Ribbing:
Row 1 (RS): K2, P2, repeat to end.
Row 2 (WS): P2, K2, repeat to end.
Repeat these 2 rows for 2 inches (about 12 rows). This creates a snug, stretchy cuff.
Body:
Next Row (RS): K2, PM, work Flower Cable over next 12 stitches, PM, K to end (you will have 26 stitches after the second marker).
Continue in pattern: On RS rows, work the Flower Cable as written, and knit all other stitches. On WS rows, purl all stitches except the 2 edge stitches on each side which are knit (for a neat selvedge).
Work even until piece measures 4 inches from cast-on edge, ending with a WS row.
Thumb Hole:
Next Row (RS): Work in pattern across first 16 stitches, BO next 8 stitches, continue in pattern to end (you will have 32 stitches on needle).
Next Row (WS): Work in pattern across, CO 8 stitches over the bound-off gap (using the backward loop method), continue to end. You now have 40 stitches again.
Pro tip: The backward loop method is simple: just loop the yarn around your thumb and slip it onto the needle. It's quick and perfect for this gap.
Continue in pattern (with the flower cable centered) until piece measures 7 inches from cast-on edge, ending with a WS row.
Top Ribbing:
Switch to CC (Burnt Orange).
Row 1 (RS): K2, P2, repeat to end.
Row 2 (WS): P2, K2, repeat to end.
Repeat these 2 rows for 1 inch (about 6 rows).
BO loosely in pattern. Tip: Use a larger needle or a stretchy bind-off to keep the edge flexible.
Right Mitt
Work same as left mitt, but when creating the thumb hole, place it on the opposite side. To do this, work in pattern across 24 stitches, BO next 8 stitches, continue to end. On the next row, CO 8 stitches over the gap. Continue as for left mitt. This ensures the thumb hole is mirrored for your right hand.
Finishing
Weave in all ends using a tapestry needle. Fold each mitt in half with right sides together, and sew the side seam from the cast-on edge up to the thumb hole, then from the thumb hole to the top edge. Use a mattress stitch for an invisible seam. Turn right side out. Block gently to shape—this helps the cables pop and evens out the stitches.
Optional Embellishment: Embroider small French knots in CC at the center of each flower cable to add a pop of color. This tiny detail makes the flowers truly bloom!
Final Thoughts
And there you have it—a pair of Emberwood Fingerless Flower Mitts that are as beautiful as they are functional. The combination of rich colors and intricate cables makes them a standout accessory, while the fingerless design keeps your hands free for whatever autumn brings. Whether you're a seasoned knitter or a brave beginner, this pattern is a rewarding project that you'll be proud to wear or gift. So grab your needles, pour a cup of tea, and let the knitting begin. Happy crafting!