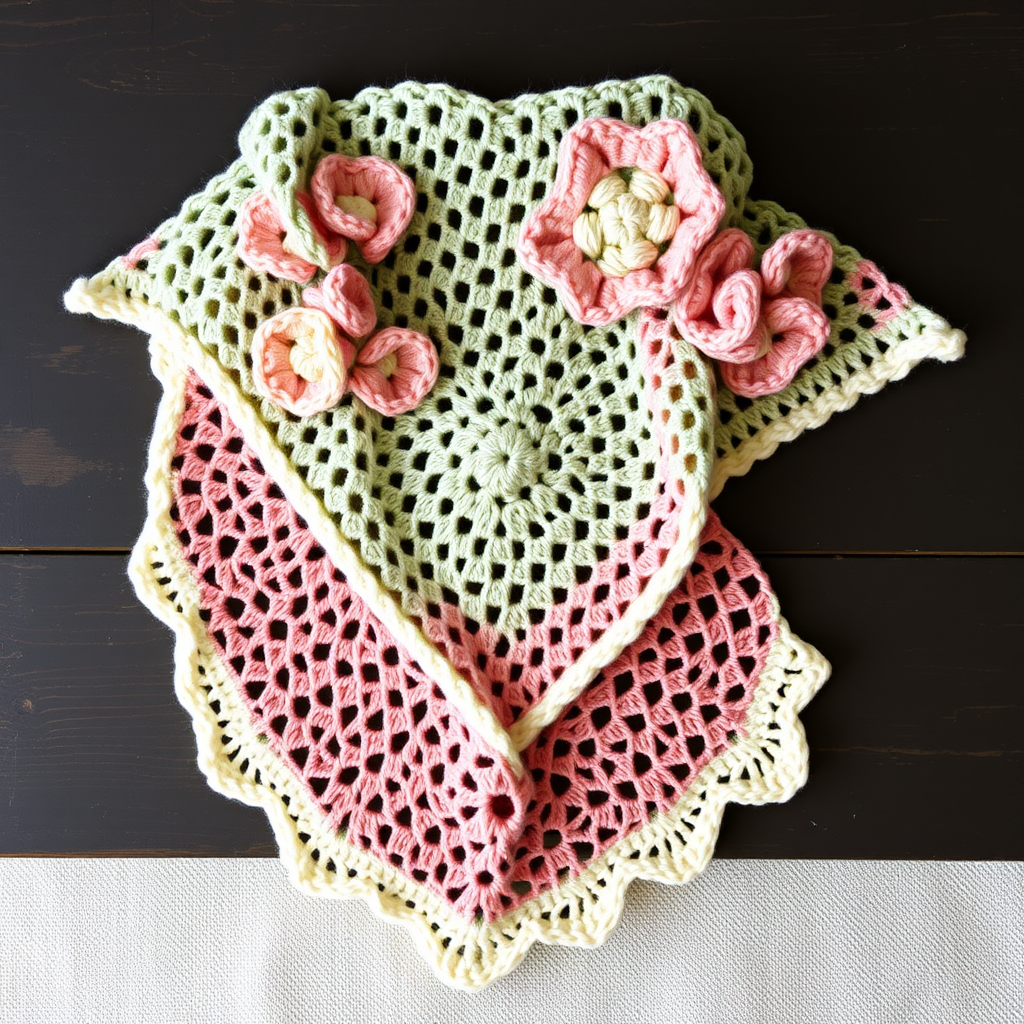
Free Pattern: The Driftwood Harbor Wrap

Free Pattern: The Driftwood Harbor Wrap
Introduction
Welcome to the Driftwood Harbor Wrap, a project I designed with absolute beginners in mind. If you have never held a crochet hook before, this is the perfect first "big" project for you, because it uses only two simple stitches and grows a little more with every single row. The finished wrap is a soft, breezy, asymmetrical triangle that drapes beautifully over your shoulders on a cool evening, with a gentle openwork texture that looks far more complicated than it actually is. Worked in a heathered seafoam green worsted-weight yarn, the fabric feels cozy but light, with a slight halo and a matte, handmade finish. By the time you finish, you will have a wearable, gift-worthy piece and a whole new skill.
Materials Needed
- Yarn: Worsted weight yarn (Category 4), approximately 600–700 yards. The sample is shown in a heathered seafoam green (for example, Lion Brand Heartland in "Acadia" or any similar worsted-weight yarn).
- Crochet hook: Size I/9 (5.5 mm). (The "I/9" is the US size and "5.5 mm" is the metric size — they are the same hook.)
- Stitch markers: At least 4, to help you keep track of your increases and your place in the row.
- Tapestry needle: A large-eyed, blunt-tipped needle for weaving in your yarn ends at the end.
- Scissors: Any sharp pair for cutting yarn.
- Measuring tape: For checking your gauge and the length of your wrap.
- Blocking supplies (optional but recommended): A spray bottle of water, rust-proof pins, and a towel or blocking mat.
Finished size: Approximately 60 inches along the longest edge, forming an asymmetrical triangle with two shorter edges. The exact size depends on how many rows you work — you can stop whenever it feels right to you.
Abbreviations and Beginner Glossary
Every abbreviation used in this pattern is listed below and explained in plain English. You do not need to know anything before you start.
- ch — chain: Make a loop with the yarn on your hook (a "slip knot"), then wrap the yarn over the hook and pull it through the loop already on the hook. That is one chain. Chains look like a little braid or a row of tiny "V"s.
- sc — single crochet: Insert your hook into the next stitch, wrap the yarn over the hook, pull up a loop (you now have 2 loops on the hook), wrap the yarn over again, and pull it through both loops. You are left with 1 loop on the hook. This is the shortest, tightest basic stitch.
- dc — double crochet: Wrap the yarn over the hook first, insert the hook into the next stitch, wrap the yarn over and pull up a loop (3 loops on the hook), wrap the yarn over and pull through the first 2 loops (2 loops left), wrap the yarn over and pull through the last 2 loops (1 loop left). This stitch is taller than a single crochet and creates the open, airy texture of this wrap.
- sk — skip: Do not work into that stitch or space at all. Simply move past it to the next one. Skipping is what creates the little holes (the "chain-1 spaces") in the fabric.
- sp — space: The small gap or hole created by a chain. A "ch-1 sp" means the little gap made by one chain stitch.
- st — stitch: One completed unit of crochet (one sc, one dc, and so on). "Sts" means more than one stitch.
- sl st — slip stitch: Insert your hook into the stitch, wrap the yarn over, and pull it through both the stitch and the loop on your hook in one motion. It creates almost no height — it is used to join rounds together.
- turning chain: The chains you make at the very start of a row (here, "ch 3"). They lift your yarn up to the height of the new row. In this pattern, the ch 3 at the start of a row counts as your first double crochet.
- turn: Flip your work over (like turning a page) so you can work back across the row you just made.
- fasten off: Cut the yarn a few inches from your work, then pull the tail all the way through the last loop on your hook to lock it. This finishes the piece.
- join: Connect the end of a round to its beginning, here with a slip stitch.
- perimeter: The entire outer edge of the wrap — all the way around.
- evenly: Spread the stitches out at a comfortable, consistent spacing, without bunching or stretching.
Gauge
Gauge: 12 stitches and 8 rows = 4 inches in the pattern stitch (the alternating double crochet and chain-1 spaces).
Why gauge matters: Gauge is simply how big your stitches come out. If your stitches are larger than mine, your wrap will end up bigger than 60 inches; if they are smaller, it will end up smaller. Checking gauge means you will know your finished wrap is the size you expect, and it also tells you whether to go up or down a hook size.
How to make a gauge swatch: With your 5.5 mm hook and your yarn, chain 20. Work in the pattern stitch (double crochet with chain-1 spaces between them) for about 10 rows. Lay the swatch flat, and measure a 4-inch section across the middle with your measuring tape. Count how many stitches fall inside those 4 inches, then count how many rows fall inside 4 inches vertically. If you have more than 12 stitches in 4 inches, your stitches are too small — try a larger hook. If you have fewer than 12, your stitches are too big — try a smaller hook. Do not worry about being perfect; being close is plenty for a wrap.
Beginner Tips Before You Start
- Use stitch markers to track your increases. Place a marker in the very first stitch of each row and another in the very last stitch. Those two end stitches are where the "2 dc" increases happen, and the markers stop you from accidentally losing or adding stitches.
- Count your stitches at the end of every row. It is much easier to fix a mistake in the row you just made than five rows later. The stitch counts are given for you in the instructions.
- Do not pull your yarn too tight. Beginners often grip the yarn hard, which makes the fabric stiff and the stitches hard to get into. Keep your tension relaxed and even — the wrap should feel soft and drapey.
- Remember that the ch 3 at the start of a row counts as a double crochet. So when the pattern says "dc in same st as ch-3," you are working a second double crochet into the same spot, which is what makes the increase at the edge.
- Work the chain-1 spaces, not the chains themselves. When the pattern says "sk next ch-1 sp," you are skipping over the little gap, not hunting for individual chain stitches. This keeps the fabric open and even.
- Take breaks and stretch your hands. This is a long, relaxing project — there is no rush, and it is meant to be enjoyable.
Step-by-Step Instructions
Notes: The wrap is worked sideways in one piece, starting from one narrow end and increasing to create an asymmetrical triangle shape. The pattern uses a simple two-row repeat of double crochet and chain-1 spaces. Every row is written out below — nothing is skipped.
Foundation and First Rows
Foundation: Ch 4.
Row 1: 2 dc in the 4th ch from hook (the 3 skipped chains count as your first dc). Turn. (3 dc)
Body (Two-Row Repeat)
Row 2 (Increase Row): Ch 3 (counts as first dc here and throughout), dc in the same st as the ch-3. *Ch 1, sk next st, dc in next st; repeat from * to the end of the row, ending with 2 dc in the last st. Turn. (You will have 2 dc at each end, with dc stitches separated by ch-1 spaces in between.)
Row 3 (Even Row): Ch 3, dc in the same st as the ch-3. *Ch 1, sk next ch-1 sp, dc in next dc; repeat from * across, ending with 2 dc in the last st (the turning ch-3 of the previous row). Turn. (Same stitch count as the previous row — this row does not increase.)
Row 4 (Increase Row): Ch 3, dc in the same st as the ch-3. *Ch 1, sk next ch-1 sp, dc in next dc; repeat from * across, ending with 2 dc in the last st. Turn. (One more dc than the previous row, because of the extra dc at the beginning and end.)
Row 5 (Even Row): Ch 3, dc in the same st as the ch-3. *Ch 1, sk next ch-1 sp, dc in next dc; repeat from * across, ending with 2 dc in the last st. Turn. (Same stitch count as Row 4.)
Row 6 (Increase Row): Ch 3, dc in the same st as the ch-3. *Ch 1, sk next ch-1 sp, dc in next dc; repeat from * across, ending with 2 dc in the last st. Turn. (One more dc than Row 5.)
Row 7 (Even Row): Ch 3, dc in the same st as the ch-3. *Ch 1, sk next ch-1 sp, dc in next dc; repeat from * across, ending with 2 dc in the last st. Turn. (Same stitch count as Row 6.)
Row 8 (Increase Row): Ch 3, dc in the same st as the ch-3. *Ch 1, sk next ch-1 sp, dc in next dc; repeat from * across, ending with 2 dc in the last st. Turn. (One more dc than Row 7.)
Row 9 (Even Row): Ch 3, dc in the same st as the ch-3. *Ch 1, sk next ch-1 sp, dc in next dc; repeat from * across, ending with 2 dc in the last st. Turn. (Same stitch count as Row 8.)
Row 10 (Increase Row): Ch 3, dc in the same st as the ch-3. *Ch 1, sk next ch-1 sp, dc in next dc; repeat from * across, ending with 2 dc in the last st. Turn. (One more dc than Row 9.)
Continuing the body: From here, you simply keep alternating the two rows you already know. Work an Even Row (exactly like Rows 3, 5, 7, and 9 above: ch 3, dc in same st, then *ch 1, sk next ch-1 sp, dc in next dc across, ending with 2 dc in the last st, turn), then an Increase Row (exactly like Rows 4, 6, 8, and 10 above: the same instructions, which add one dc at each end). Repeat these two rows over and over, always ending with an Even Row, until the wrap measures approximately 60 inches along the longest edge, or until it is the size you want. Do not fasten off.
Border
Round 1: Ch 1, then work sc evenly around the entire perimeter of the wrap: work 1 sc in each dc and 1 sc in each ch-1 sp along the top and bottom edges, and 2 sc in each dc along the side edges (the extra stitches on the sides keep the border flat and stop it from pulling in). Join with a sl st to the first sc. (The exact stitch count will depend on your number of rows — just keep the stitches evenly spaced and the edge flat.)
Round 2: Ch 1, sc in each sc around. Join with a sl st to the first sc. Fasten off. (Same number of sc as Round 1.)
Assembly and Finishing
Weaving in ends: Thread each loose yarn tail onto your tapestry needle. Turn the wrap to the wrong side (the back) and weave the needle in and out through the backs of several stitches, changing direction once or twice so the tail is secure. Trim the yarn close to the fabric. Do this for every tail — the starting tail, the ending tail, and any others.
Blocking: Lightly mist the wrap with water until it is damp but not soaking. Lay it flat on a towel or blocking mat and gently pat it into shape, opening up the chain-1 spaces so the openwork pattern shows. If you like, pin the edges in place with rust-proof pins. Leave it to dry completely — usually overnight. Blocking evens out the fabric and makes the stitches look neat and professional.
Wearing it: The wrap can be worn with the point at the front or the back, draped loosely over one shoulder. There is no wrong way — experiment and see what feels best.
Pro Tips and Variations
- Change colors for a striped look: Work a few rows in one color, then switch to a second color by simply joining the new yarn at the start of a row and carrying on. A soft cream stripe against the seafoam would look lovely, and it is a great way to use up leftover yarn.
- Adjust the size: Because the wrap grows with every increase row, you can make it as small or as large as you like. Stop earlier for a petite shawl, or keep going for a generous, blanket-like wrap. Just remember to end on an Even Row before starting the border.
- Substitute yarn: Any worsted-weight (Category 4) yarn will work beautifully. A cotton blend will give a crisper, more summery drape, while an acrylic or wool blend will feel warmer and cozier. Always check your gauge with the new yarn first.
- Add a fringe or tassels: For a boho touch, cut equal-length strands of yarn, fold them in half, and use your hook to pull the fold through a stitch along the bottom edge, then pull the loose ends through the loop to secure. Space them evenly along the edge.