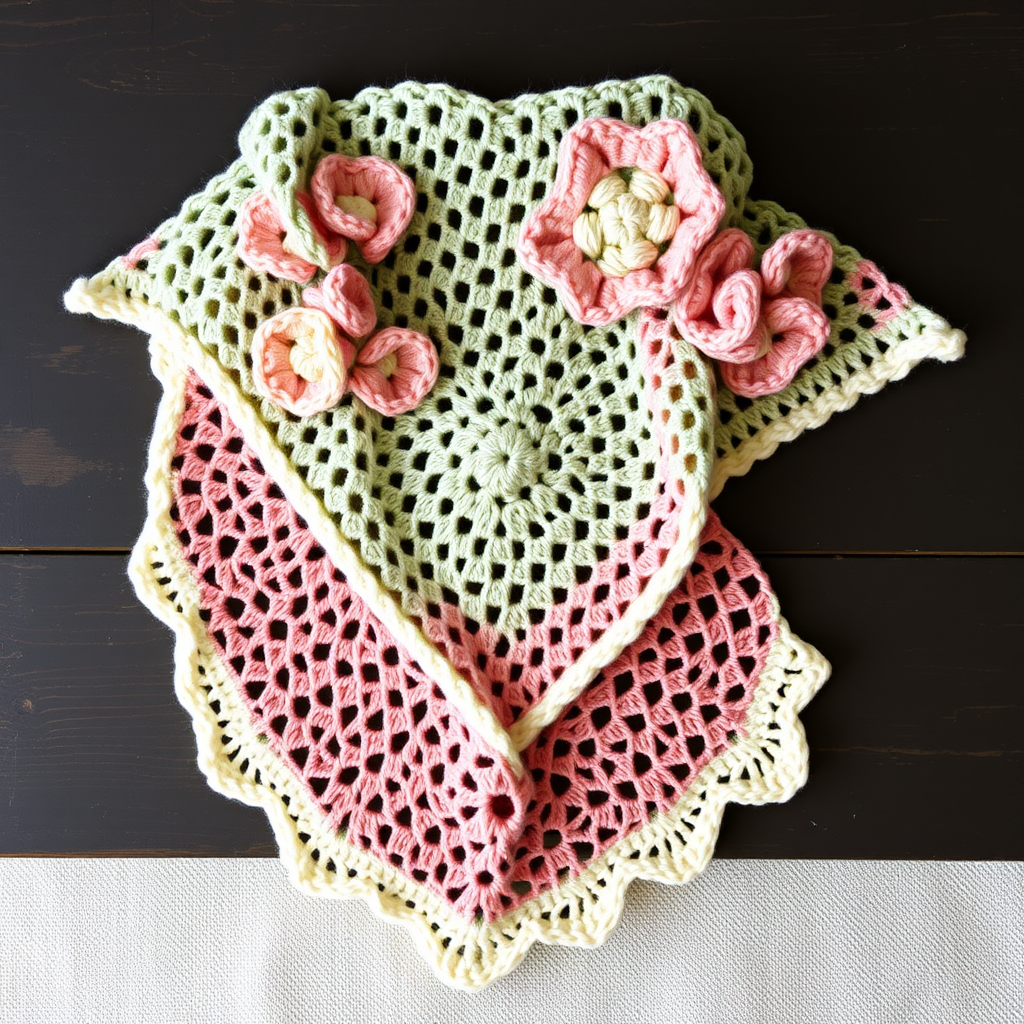
Free Pattern: The Meadowlark Crescent Shawl

Free Pattern: The Meadowlark Crescent Shawl
Introduction
Welcome to the Meadowlark Crescent Shawl — a project I designed with absolute beginners in mind, and one I hope will become your first "I can't believe I made this" piece. This shawl is perfect for anyone who has just learned a few basic crochet stitches and wants to make something genuinely beautiful, wearable, and gift-worthy. It is worked from the top center downward in gentle, meditative rows of half-double-crochet, so you only ever need to master one main stitch to complete the entire body. The finished shawl is a soft, lightweight crescent that drapes gracefully over your shoulders, wide across the top and gently curved along the bottom, finished with a delicate picot edging that looks far more complicated than it actually is. Made in a pale sage green merino-silk blend, it feels smooth, slightly cool, and whisper-light — like a hug you can fold up and carry in your bag.
Materials Needed
- Yarn: Fine (2) weight yarn, approximately 650–700 yards (595–640 m). A soft merino-silk or alpaca-silk blend is recommended. The sample was made in pale sage green; dusty lavender is equally lovely.
- Crochet hook: E/4 (3.5 mm) crochet hook. (The "E/4" is the US size; 3.5 mm is the metric size. They are the same hook.)
- Stitch markers: At least 3 removable stitch markers (or safety pins, or even small scraps of contrasting yarn).
- Tapestry needle: A blunt-tipped needle with a large eye, used for weaving in yarn ends.
- Scissors: Any sharp pair for cutting yarn.
- Blocking supplies (optional but recommended): Pins and a blocking mat or a clean towel.
- Finished size: Width 57 inches (145 cm) across the top edge, height 23 inches (58 cm) at center back.
Abbreviations and Beginner Glossary
Every abbreviation used in this pattern is listed below and explained in plain English. If you have never crocheted before, read this section twice before you begin — it is your dictionary.
- ch – chain. Make a loop of yarn on your hook, then pull the yarn through the loop on your hook. Each pull-through creates one chain stitch. Chains look like tiny braided "V"s.
- sl st – slip stitch. Insert your hook into the stitch, wrap the yarn over the hook (yarn over), and pull that loop straight through both the stitch and the loop already on your hook in one motion. It creates an almost invisible joining stitch.
- sc – single crochet. Insert your hook into the stitch, yarn over, pull up a loop (you now have 2 loops on your hook), yarn over again, and pull through both loops. One single crochet made.
- hdc – half double crochet. Yarn over first (wrap the yarn around your hook), insert your hook into the stitch, yarn over, pull up a loop (you now have 3 loops on your hook), yarn over again, and pull through all 3 loops at once. One half double crochet made.
- st / sts – stitch / stitches. A "stitch" is one completed unit of crochet in your fabric.
- sp – space. An opening in the fabric, usually created by a chain (for example, a "ch-2 sp" is the little gap made by two chain stitches).
- yo – yarn over. Wrap the working yarn around your hook from back to front. This is the motion you use to create loops.
- picot – a tiny decorative bump. Made by chaining 3, then working a slip stitch into the third chain from your hook. It creates a small looped point along an edge.
- turn – flip your work over (like turning a page) so you can work back across the row you just made.
- fasten off – cut the yarn a few inches from your work, then pull the tail all the way through the last loop on your hook to lock it.
- weave in ends – thread a yarn tail onto a tapestry needle and sew it back and forth through the fabric so it disappears and cannot unravel.
- block – dampen the finished piece and pin it out to its final measurements so the stitches settle evenly and the edges lie flat.
- ring – a small circle made by joining a short chain with a slip stitch. You will work your very first stitches into the middle of this ring.
Gauge
Gauge: 14 hdc x 20 rows = 4 inches (10 cm) in half double crochet.
Why gauge matters: Gauge is simply how big your stitches turn out. If your stitches are larger than the pattern's, your shawl will come out bigger than 57 inches wide; if smaller, it will come out narrower and use less yarn. Checking gauge means your finished shawl will match the measurements and drape shown.
How to make a gauge swatch: With your 3.5 mm hook and your yarn, chain 22. Work 1 hdc into the third chain from your hook and 1 hdc into every remaining chain (20 hdc). Work 20 rows of hdc (ch 2 to begin each row, then 1 hdc in each stitch across). Lay the swatch flat and measure a 4-inch (10 cm) section in the middle: count how many stitches fit across 4 inches and how many rows fit in 4 inches. If you have more than 14 stitches in 4 inches, your stitches are too small — try a larger hook. If you have fewer than 14, your stitches are too big — try a smaller hook. Do not skip this step — it takes 15 minutes and saves hours of disappointment.
Beginner Tips Before You Start
- Use stitch markers to track your increase points. Place a marker in the center ch-2 space and one at each end of the row. Every row you will increase at these three points, and the markers mean you never have to count 200 stitches to find them.
- Do not pull your yarn too tight. Beginners often crochet tightly out of nerves. Keep your loops relaxed and even — tight stitches make a stiff, small shawl and make it hard to insert your hook.
- Count your stitches at the end of every row. The stitch counts in parentheses tell you exactly how many stitches you should have. If the number is off, fix it right away rather than discovering it 20 rows later.
- Remember the turning chain counts as your first stitch. The "ch 2" at the start of each row stands in for the first hdc. Do not work an hdc into the very first stitch underneath it — that would add an extra stitch.
- Work in good light and take breaks. This is a long, repetitive project. Ten minutes of crochet, a stretch, and back to it keeps your hands happy and your tension even.
- Keep your work-in-progress in a bag. Fine yarn picks up lint and pet hair easily; a simple cloth bag keeps it clean between sessions.
Step-by-Step Instructions
Notes: The shawl is worked from the top center downward in rows, increasing at both ends and at the center to create a gentle crescent shape. The turning chain counts as the first stitch unless otherwise noted. The picot edging is worked directly onto the final row.
Set-Up
Set-up: Ch 4. Join with a sl st to form a ring. (This is a small circle of 4 chains; you will work your first stitches into the hole in the middle of it.)
Body
Row 1: Ch 2 (counts as first hdc), work 3 hdc into the ring, ch 2, work 4 hdc into the same ring. Turn. (8 hdc, 1 ch-2 sp)
Row 2: Ch 2, hdc in each of the next 3 sts, (2 hdc, ch 2, 2 hdc) in the ch-2 sp, hdc in each of the last 4 sts. Turn. (16 hdc, 1 ch-2 sp)
Row 3: Ch 2, hdc in each st across to the ch-2 sp, (2 hdc, ch 2, 2 hdc) in the ch-2 sp, hdc in each st to the end. Turn. (24 hdc, 1 ch-2 sp)
Rows 4–60: Repeat Row 3 exactly — that is, ch 2, hdc in each stitch across until you reach the center ch-2 space, work (2 hdc, ch 2, 2 hdc) into that center space, then hdc in each stitch to the end of the row, and turn. Each row adds 8 stitches: 4 at the center (2 on each side of the ch-2 space) and 4 at the two ends (2 at each end). After Row 60 you will have 480 hdc and 1 ch-2 sp. Do not fasten off.
Stitch count check for Rows 4–60: Row 4 = 32 hdc, Row 5 = 40 hdc, Row 6 = 48 hdc, and so on, adding 8 stitches per row. Row 60 = 8 + (59 rows × 8) = 480 hdc. If your count matches this formula at any row, you are on track.
Picot Edging
Edging Row 1: Ch 1, sc evenly along the entire outer edge of the shawl, working 1 sc in each hdc and (sc, ch 2, sc) in the center ch-2 sp. Join with a sl st to the first sc. Do not turn. (1 sc in every hdc along the edge, plus 2 sc and 1 ch-2 sp at the center point)
Edging Row 2: Ch 1, sc in each sc around, working (sc, picot, sc) in each corner and at the center point. A picot is made as follows: ch 3, sl st in the third ch from hook. Join with a sl st to the first sc. Fasten off. (1 sc in every sc from the previous row, with a picot worked at each corner and at the center point)
Assembly and Finishing
Weaving in ends: Thread each yarn tail onto your tapestry needle. Turn the shawl to the wrong side (the back of the fabric) and sew the tail back and forth through the backs of several stitches, changing direction once or twice so it cannot pull loose. Trim the yarn close to the fabric. Do this for the starting tail and the final tail.
Blocking: Fill a sink with cool water and submerge the shawl for about 10 minutes. Gently squeeze out the water — do not wring or twist. Roll the shawl in a clean towel and press to remove excess moisture. Lay it flat on a blocking mat or towel and pin it out to the finished measurements: 57 inches (145 cm) across the top edge and 23 inches (58 cm) at center back. Pin out each picot point so the edging opens up. Allow to dry completely, away from direct heat or sunlight, then remove the pins.
Final check: Give the shawl a gentle shake, fold it, and admire your work — you have just finished a real, wearable piece of handmade clothing.
Pro Tips and Variations
- Color changes: Work the body in one color and the picot edging in a contrasting shade (for example, a soft cream edging on sage green) for a boutique look. Simply fasten off the body color before Edging Row 1 and join the new color with a slip stitch.
- Size adjustments: To make the shawl larger, continue repeating Row 3 beyond Row 60, adding 8 stitches per row until you reach your desired width, then work the edging. To make it smaller, stop earlier — just remember to work the edging onto whatever final row you choose.
- Yarn substitutions: Any Fine (2) weight yarn will work, but check your gauge first. A cotton-blend yarn gives a crisper, more summery shawl; an alpaca-silk blend gives extra warmth and a soft halo. Avoid fuzzy novelty yarns for your first attempt, as they make it hard to see your stitches.
- Edging variation: For a simpler finish, skip the picot and work Edging Row 2 as plain single crochet all the way around — it still looks neat and is even quicker.