Frosted Pinecone Gnome Ornament Free Pattern – Knit a Cozy Woodland Holiday Decoration
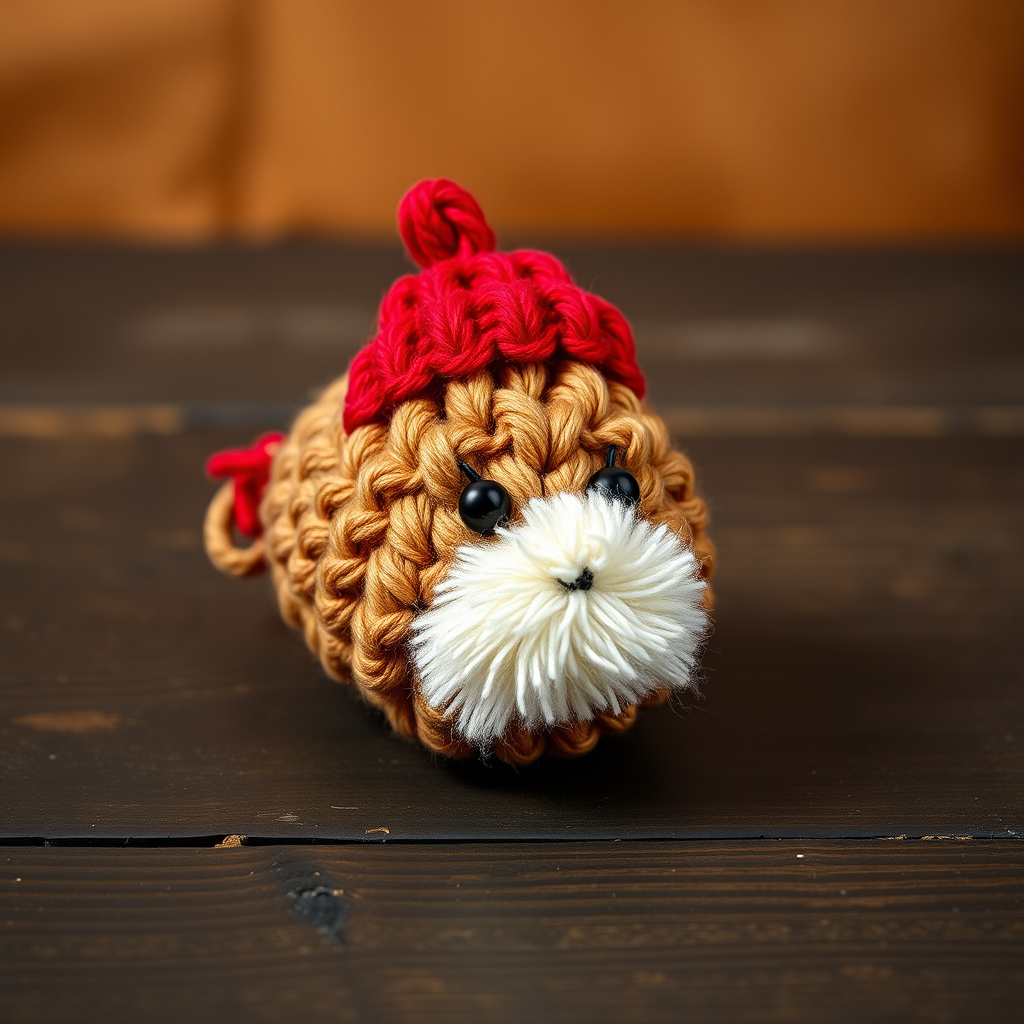
Frosted Pinecone Gnome Ornament Free Pattern – Knit a Cozy Woodland Holiday Decoration
Bring a touch of woodland whimsy to your holiday tree with this charming knitted gnome ornament. Featuring a textured pinecone body, a snowy white beard, and a bright red pointed hat, this quick-to-knit project is perfect for beginners and experienced crafters alike. Whether you're decorating your own home or gifting a heartfelt handmade treasure, this little gnome is sure to become a seasonal favorite.
Materials Needed
Before you begin, gather the following supplies to ensure a smooth knitting experience:
- Yarn: Worsted weight yarn in three colors:
- Brown (e.g., Lion Brand Vanna's Choice in Chestnut) – for the pinecone body
- Cream (e.g., Vanna's Choice in White) – for the beard
- Red (e.g., Vanna's Choice in Scarlet) – for the hat
- Needles: US Size 5 (3.75 mm) knitting needles (or size needed to obtain gauge)
- Notions: Tapestry needle, stitch marker, fiberfill stuffing
- Gauge: 20 stitches and 28 rows = 4 inches in stockinette stitch (gauge is not critical for this project, but matching it ensures the ornament is the intended size)
Step-by-Step Instructions
This pattern is worked flat in rows and then seamed. The pinecone body is created using a simple knit/purl texture, while the beard and hat are added separately. Follow each section carefully, and you'll have a delightful gnome in no time.
Pinecone Body (Make 2 Pieces)
Using brown yarn, cast on 12 stitches.
- Row 1 (WS): Purl all stitches.
- Row 2 (RS): *K1, p1; repeat from * to end.
- Row 3: Purl all stitches.
- Row 4: *P1, k1; repeat from * to end.
- Rows 5-20: Repeat Rows 1-4 four more times (total 20 rows).
- Row 21 (WS): Purl all stitches.
- Row 22 (RS): K2tog across row (6 stitches).
- Row 23: Purl all stitches.
Cut yarn, leaving a long tail. Thread tail through remaining stitches, pull tight, and secure. This will be the top of the pinecone. Repeat to make a second identical piece.
Beard
Using cream yarn, cast on 8 stitches.
- Row 1 (RS): Knit all stitches.
- Row 2: Purl all stitches.
- Rows 3-6: Repeat Rows 1-2 twice more.
- Row 7: K1, k2tog, k2, k2tog, k1 (6 stitches).
- Row 8: Purl all stitches.
- Row 9: K1, k2tog, k2tog, k1 (4 stitches).
- Row 10: Purl all stitches.
Bind off all stitches. This forms a triangular beard shape. Set aside.
Hat
Using red yarn, cast on 10 stitches.
- Row 1 (RS): Knit all stitches.
- Row 2: Purl all stitches.
- Row 3: K1, k2tog, k4, k2tog, k1 (8 stitches).
- Row 4: Purl all stitches.
- Row 5: K1, k2tog, k2, k2tog, k1 (6 stitches).
- Row 6: Purl all stitches.
- Row 7: K1, k2tog, k2tog, k1 (4 stitches).
- Row 8: Purl all stitches.
- Row 9: K2tog twice (2 stitches).
- Row 10: K2tog (1 stitch).
Cut yarn, pull through last stitch, and secure. This creates a tapered hat.
Assembly
Now it's time to bring your gnome to life! Follow these steps carefully:
- Sew the body: With right sides together, sew the two pinecone body pieces together along the side seams, leaving the bottom open. Turn right side out. Stuff lightly with fiberfill to give it a plump, rounded shape. Do not overstuff—you want it soft and squishy.
- Attach the beard: Sew the beard to the front of the pinecone, just below the top opening, with the point facing down. The beard should sit centered on the front of the body, covering the lower portion.
- Attach the hat: Place the hat over the top opening, covering the gathered top. Sew the hat in place around the base of the hat, securing it firmly to the pinecone body. Make sure the hat sits at a jaunty angle for extra charm.
- Create a hanging loop: Thread a piece of yarn through the top of the hat and tie a knot to form a loop. This will allow you to hang your gnome on the tree.
- Weave in all ends: Use your tapestry needle to weave in any loose yarn ends, ensuring a clean, professional finish.
Tips for a Perfect Gnome
- Gauge matters: While this pattern is forgiving, matching the gauge ensures your gnome is the intended size. If your stitches are looser, use a smaller needle; if tighter, go up a size.
- Customize colors: Feel free to swap the red hat for green, blue, or any festive color that matches your holiday decor.
- Add a nose: For extra character, sew a small wooden bead or a knitted sphere to the center of the beard as a gnome nose.
- Make a set: Knit several gnomes in different colors to create a whimsical woodland collection for your tree.
This Frosted Pinecone Gnome Ornament is a delightful project that combines simple knitting techniques with a touch of holiday magic. Whether you're a beginner looking for your first amigurumi or an experienced knitter seeking a quick gift, this pattern delivers charm and coziness in every stitch. Happy knitting, and may your holidays be filled with handmade warmth!



