Heirloom Honeycomb Baby Cardigan Free Pattern – Knit a Cozy Textured Sweater

Heirloom Honeycomb Baby Cardigan Free Pattern – Knit a Cozy Textured Sweater
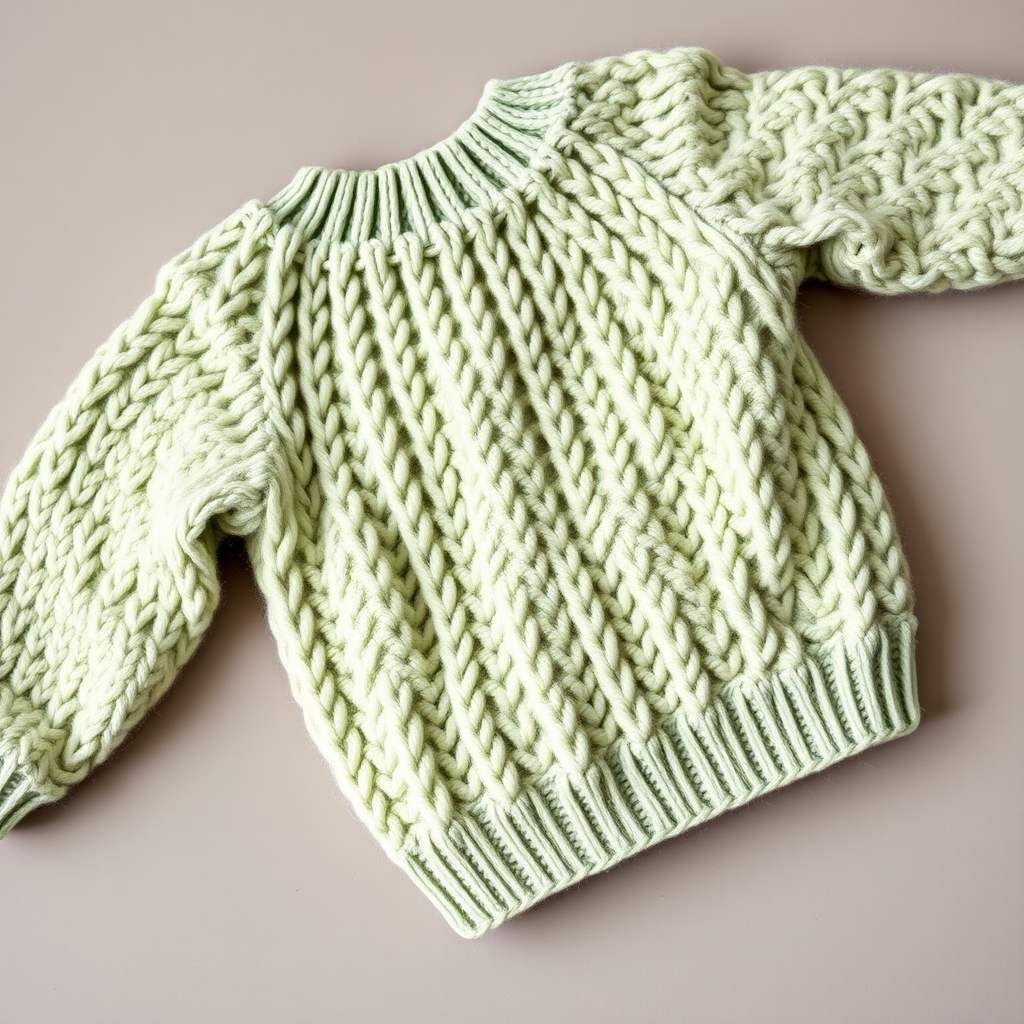
There is something truly magical about creating a handmade garment for a little one. This Heirloom Honeycomb Baby Cardigan is designed to become one of those cherished pieces—the kind that gets passed down, photographed, and remembered. The delicate, cable-like honeycomb stitch creates a beautiful textured surface that looks intricate but is surprisingly simple to knit. Made with soft, breathable cotton yarn, this cardigan offers everyday comfort while maintaining that timeless, heirloom quality. Whether you're a seasoned knitter or a confident beginner ready for a rewarding project, this free pattern will guide you through creating a cozy, textured sweater that will be treasured for years to come.
Materials Needed
Before you begin, gather the following materials to ensure a smooth and enjoyable knitting experience:
- Yarn: Worsted weight cotton yarn (e.g., Lion Brand 24/7 Cotton) in a soft pastel yellow (approx. 300-350 yards for 6-12 months size). The cotton fiber provides excellent stitch definition, making the honeycomb pattern truly pop.
- Needles: US 6 (4.0 mm) knitting needles. You'll need straight or circular needles for the body and double-pointed needles (DPNs) for the sleeves.
- Gauge: 20 stitches and 28 rows = 4 inches in honeycomb stitch pattern (blocked). Always knit a gauge swatch first to ensure your finished cardigan matches the intended measurements.
- Notions: Stitch markers, tapestry needle for weaving in ends, and 4 small round wooden buttons.
Sizes and Measurements
This pattern is written for three baby sizes:
- 0-3 months: Finished chest 16 inches
- 3-6 months: Finished chest 17 inches
- 6-12 months: Finished chest 18 inches
Instructions are given for the smallest size, with larger sizes in parentheses: 0-3 (3-6, 6-12) months.
Abbreviations
Familiarize yourself with these standard knitting abbreviations before starting:
- CO: Cast on
- K: Knit
- P: Purl
- K2tog: Knit two stitches together (decrease)
- P2tog: Purl two stitches together (decrease)
- SSK: Slip, slip, knit (left-leaning decrease)
- YO: Yarn over (increase creating a hole)
- RS: Right side (public side of work)
- WS: Wrong side (inside of work)
- st(s): Stitch(es)
- pm: Place marker
The Honeycomb Stitch Pattern
This is the heart of the cardigan. The pattern is a multiple of 6 + 2 stitches. Follow these 12 rows carefully, repeating them throughout the project:
- Row 1 (RS): K2, *P2, K4; repeat from * to last 4 sts, P2, K2.
- Row 2 (WS): P2, *K2, P4; repeat from * to last 4 sts, K2, P2.
- Row 3: K2, *P2, K4; repeat from * to last 4 sts, P2, K2.
- Row 4: P2, *K2, P4; repeat from * to last 4 sts, K2, P2.
- Row 5: K2, *P2, K4; repeat from * to last 4 sts, P2, K2.
- Row 6: P2, *K2, P4; repeat from * to last 4 sts, K2, P2.
- Row 7: K2, *P2, K4; repeat from * to last 4 sts, P2, K2.
- Row 8: P2, *K2, P4; repeat from * to last 4 sts, K2, P2.
- Row 9: K2, *P2, K4; repeat from * to last 4 sts, P2, K2.
- Row 10: P2, *K2, P4; repeat from * to last 4 sts, K2, P2.
- Row 11: K2, *P2, K4; repeat from * to last 4 sts, P2, K2.
- Row 12: P2, *K2, P4; repeat from * to last 4 sts, K2, P2.
Repeat rows 1-12 for the entire pattern. The combination of knits and purls creates that beautiful, dimensional honeycomb texture.
Step-by-Step Instructions
Back Panel
CO 62 (68, 74) sts. Work in the honeycomb stitch pattern until the piece measures 7 (8, 9) inches from the cast-on edge, ending with a WS row.
Shape armholes: Bind off 4 (5, 6) sts at the beginning of the next 2 rows. Continue in pattern on the remaining 54 (58, 62) sts until the armhole measures 4 (4.5, 5) inches.
Shape shoulders: Bind off 8 (9, 10) sts at the beginning of the next 4 rows. Bind off the remaining 22 (22, 22) sts for the back neck.
Left Front Panel
CO 32 (35, 38) sts. Work in the honeycomb stitch pattern, but keep a 4-stitch garter stitch border at the front edge (knit all rows on those 4 sts). This creates a neat, non-curling edge for the button band. Work until the piece measures the same as the back to the armhole.
Shape armhole: Bind off 4 (5, 6) sts at the beginning of the next RS row. Continue in pattern on the remaining 28 (30, 32) sts until the armhole measures 2 (2.5, 3) inches, ending with a WS row.
Shape neck: At the beginning of the next RS row, bind off 6 sts, then decrease 1 st at the neck edge every RS row 4 times. Work even on the remaining 18 (20, 22) sts until the armhole measures the same as the back.
Shape shoulder: Bind off 8 (9, 10) sts at the beginning of the next RS row, then work 1 WS row, bind off the remaining 10 (11, 12) sts.
Right Front Panel
Work as for the left front, but mirror the shaping. This means you'll bind off for the armhole at the beginning of a WS row, and the neck shaping will happen at the beginning of WS rows. Keep the 4-stitch garter border on the opposite edge.
Sleeves (Make 2)
CO 30 (34, 38) sts. Work in the honeycomb stitch pattern, increasing 1 st each side every 6th row until you have 42 (46, 50) sts. The increases should be worked 1 stitch in from the edge to keep the pattern clean. Work even until the sleeve measures 6 (7, 8) inches from the cast-on edge. Bind off all sts loosely.
Finishing and Assembly
Sew seams: Sew the shoulder seams. Set in the sleeves, sewing the sleeve caps to the armholes. Sew the side and sleeve seams using a mattress stitch for invisible seams.
Button band: With RS facing, pick up and knit 1 st for every row along the left front edge (for girls) or right front edge (for boys). Work in garter stitch for 4 rows. Bind off.
Buttonhole band: Pick up and knit along the opposite front edge. Work 2 rows in garter stitch. On the next row (RS): K2, *YO, K2tog, K6; repeat from * to the last 4 sts, YO, K2tog, K2. Adjust the spacing as needed to make 4 evenly spaced buttonholes. Work 2 more rows in garter stitch. Bind off.
Neckband: With RS facing, pick up and knit sts around the neck edge (including the bands). Work in garter stitch for 3 rows. Bind off.
Final touches: Weave in all ends carefully. Block the cardigan gently to the specified measurements, which will help the honeycomb pattern open up and lay flat. Sew the buttons opposite the buttonholes.
Your Heirloom Honeycomb Baby Cardigan is now complete! This beautiful, textured sweater is sure to become a family favorite—a cozy, handmade treasure that wraps your little one in warmth and love. Happy knitting!