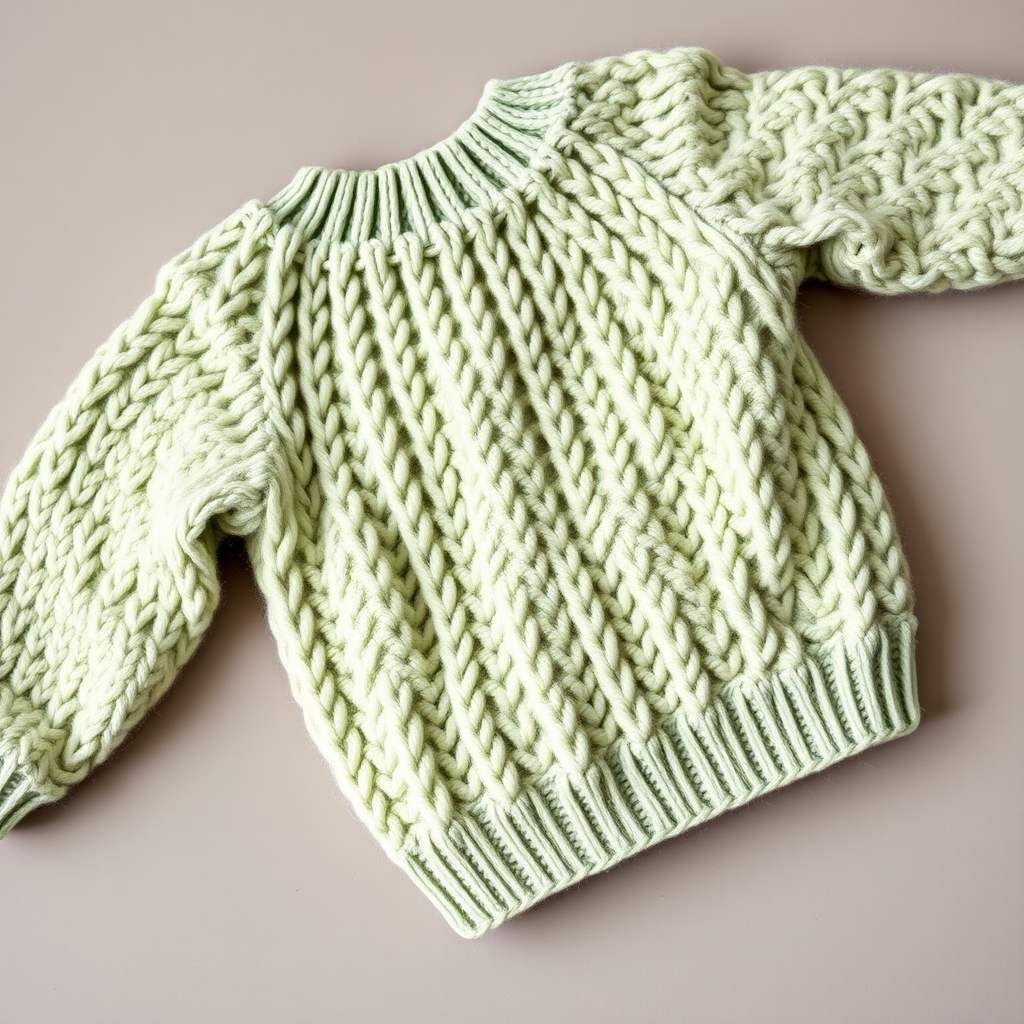
Honeyed Hearth Button Neck Sweater Free Pattern – A Knitted Baby Cocoon

Wrap Your Little One in the Honeyed Hearth Button Neck Sweater
There is something truly magical about creating a handmade garment for a baby. The Honeyed Hearth Button Neck Sweater is more than just a knitting pattern—it's a warm embrace you can craft with your own two hands. Featuring a gorgeous, textured honeycomb stitch and a charming button neck closure, this cozy cocoon-style sweater is perfect for newborns and infants up to 12 months. Whether you're a seasoned knitter or a brave beginner ready for a rewarding project, this free pattern will guide you through every step to create a heirloom-quality piece.
The honeycomb stitch creates a dimensional, honey-like texture that is as delightful to knit as it is to see. The warm golden color and rustic wooden buttons give it a handmade charm that will make every photo session and cuddle time extra special. Let's dive into this pattern and create something beautiful!
Materials Needed
Before you begin, gather these supplies to ensure a smooth knitting experience:
- Yarn: Worsted weight (Category 4) yarn in a soft golden honey color, approximately 250-300 yards. A soft acrylic or wool blend works beautifully for baby items.
- Needles: US Size 7 (4.5 mm) knitting needles (straight or circular, whichever you prefer).
- Notions: Stitch markers, tapestry needle for weaving ends, and 4 buttons (1/2 inch in diameter). Wooden buttons add a lovely rustic touch.
- Gauge: 18 stitches and 24 rows = 4 inches in honeycomb stitch (blocked). Always check your gauge to ensure the correct size!
Sizes and Measurements
This pattern includes three sizes so you can knit the perfect fit:
- Sizes: 0-3 months (3-6 months, 6-12 months)
- Finished Chest Circumference: 16 (18, 20) inches
Stitch Abbreviations
Familiarize yourself with these standard knitting abbreviations:
- k = knit
- p = purl
- k2tog = knit two together (decrease)
- yo = yarn over (increase)
- sl1 = slip one stitch purlwise
- psso = pass slipped stitch over (decrease)
- pm = place marker
- sm = slip marker
Special Stitch – Honeycomb Pattern
This beautiful textured stitch is the heart of the sweater. It's worked over a multiple of 4 stitches plus 2. Here's how to create it:
- Row 1 (RS): k2, *sl1 wyif, k3; repeat from * to last 2 sts, sl1 wyif, k1
- Row 2 (WS): p2, *k1, p3; repeat from * to last 2 sts, k1, p1
- Row 3 (RS): k2, *k1, sl1 wyif, k2; repeat from * to last 2 sts, sl1 wyif, k1
- Row 4 (WS): p2, *p2, k1, p1; repeat from * to last 2 sts, p2
Note: "sl1 wyif" means to slip one stitch as if to purl, with the yarn held in front of the work. This creates the honeycomb texture.
Step-by-Step Instructions
Body (Worked in One Piece from Bottom Up)
This clever construction means you knit the entire body as one piece before dividing for the armholes—no seaming needed for the body!
- Cast on 72 (80, 88) stitches.
- Garter stitch border: Work in garter stitch (knit every row) for 4 rows. This creates a neat, non-curling edge.
- Begin honeycomb pattern: Start with Row 1 of the honeycomb pattern. Work even in pattern until the piece measures 6 (7, 8) inches from the cast-on edge, ending with a wrong-side row.
Divide for Fronts and Back
Now we'll separate the body into three sections for the armholes:
- Next row (RS): Work 18 (20, 22) stitches in pattern for the left front, bind off 4 stitches for the underarm, work 28 (32, 36) stitches for the back, bind off 4 stitches for the underarm, work 18 (20, 22) stitches for the right front.
- Place the left front and back stitches on stitch holders or waste yarn. You'll work on the right front first.
Right Front
- Armhole shaping: Continue on the right front stitches. At the armhole edge, decrease 1 stitch every right-side row 2 (3, 4) times. This shapes the armhole.
- Work even until the armhole measures 3 (3.5, 4) inches, ending at the neck edge (the front edge of the sweater).
- Shape neck: At the neck edge (front edge), bind off 4 (5, 5) stitches once, then bind off 2 stitches once, then decrease 1 stitch every right-side row 2 times. This creates a gentle curve for the neckline.
- Work even until the armhole measures 4 (4.5, 5) inches.
- Bind off the remaining 8 (9, 10) shoulder stitches.
Back
- Return the back stitches to your needle.
- Armhole shaping: At each armhole edge, decrease 1 stitch every right-side row 2 (3, 4) times.
- Work even until the armhole measures the same as the front (4 (4.5, 5) inches).
- Bind off all stitches.
Left Front
- Return the left front stitches to your needle.
- Work the same as the right front, but reverse the shaping. This means the neck shaping will happen at the opposite edge. Follow the same decrease and bind-off counts, just mirrored.
Sleeves (Make 2)
These slightly puffed sleeves add to the cozy cocoon look:
- Cast on 28 (32, 36) stitches.
- Garter stitch border: Work in garter stitch for 4 rows.
- Begin honeycomb pattern: Start with Row 1 of the honeycomb pattern.
- Increase for sleeve shape: Increase 1 stitch at each edge every 4th row until you have 40 (44, 48) stitches. To increase, simply knit into the front and back of the first and last stitch of the row.
- Work even until the sleeve measures 5 (6, 7) inches from the cast-on edge.
- Shape sleeve cap: Bind off 2 stitches at the beginning of the next 2 rows. Then decrease 1 stitch at each edge every right-side row until 10 (12, 14) stitches remain.
- Bind off the remaining stitches.
Button Neck Band
This wide band creates the signature button neck closure:
- Pick up stitches: With the right side facing, pick up and knit 20 (22, 24) stitches along the right front neck edge, then 24 (26, 28) stitches along the back neck, then 20 (22, 24) stitches along the left front neck edge. Total: 64 (70, 76) stitches.
- Garter stitch: Work in garter stitch for 3 rows.
- Buttonhole row (RS): k2, yo, k2tog, *k5 (6, 7), yo, k2tog; repeat from * to last 2 sts, k2. This creates 4 evenly spaced buttonholes.
- Finish band: Work 3 more rows in garter stitch.
- Bind off loosely to keep the edge stretchy.
Finishing Touches
- Sew shoulder seams using a tapestry needle and yarn.
- Set in sleeves: Sew the sleeves into the armholes, then sew the underarm and sleeve seams.
- Attach buttons: Sew the 4 buttons opposite the buttonholes.
- Weave in all ends carefully to ensure durability for baby wear and washing.
- Block gently: Soak the sweater in lukewarm water with a gentle wool wash, then lay flat to dry, shaping to the measurements. This will even out the honeycomb stitches and give the sweater a professional finish.
Tips for Success
- Check your gauge: Take the time to knit a swatch and measure it. This ensures your sweater will be the correct size.
- Use stitch markers: Place markers at the division points for fronts and back to keep track of your sections.
- Count your rows: Keep a row counter or use a notebook to track your honeycomb pattern rows, especially when shaping.
- Choose baby-safe buttons: Ensure buttons are securely sewn and appropriate for a baby garment.
This Honeyed Hearth Button Neck Sweater is a labor of love that will be treasured for years. The honeycomb stitch creates a beautiful, tactile texture that's perfect for keeping little ones warm and cozy. Whether you're knitting this for your own baby, a grandchild, or as a thoughtful gift, the recipient will feel the warmth of your care in every stitch.
Happy knitting, and enjoy watching this sweet little sweater come to life!