Heirloom Lace Edge Dishcloth Free Pattern – Textured Knit Kitchen Cloth
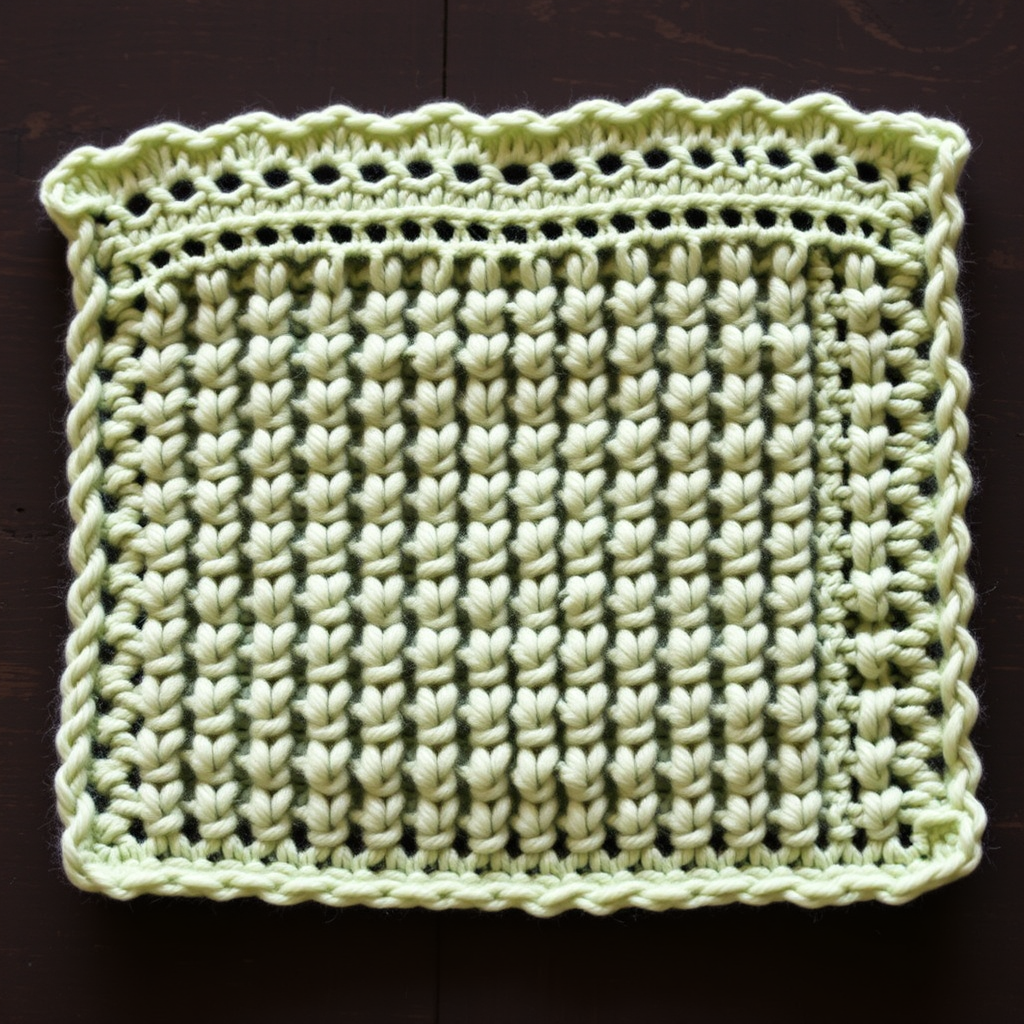
Heirloom Lace Edge Dishcloth: A Timeless Kitchen Treasure
There's something deeply satisfying about creating a beautiful, functional item for your home with your own two hands. This Heirloom Lace Edge Dishcloth pattern is the perfect blend of rustic charm and refined elegance. Featuring a dense, absorbent seed stitch body and a delicate, scalloped lace border, this dishcloth will elevate your daily kitchen routine while adding a touch of vintage farmhouse style to your space. Whether you're a seasoned knitter looking for a quick weekend project or a beginner ready to learn new techniques, this pattern is designed to guide you every step of the way.
The combination of textures is what makes this dishcloth truly special. The sturdy, bumpy seed stitch provides excellent scrubbing power and absorbency, while the airy lace edge adds a delicate, heirloom-quality finish. Knitted in soft sage green 100% cotton yarn, this cloth is as practical as it is beautiful—and it makes a wonderful handmade gift for housewarmings, weddings, or just because.
Materials Needed
Before you begin, gather the following supplies. All items are readily available at your local craft store or online.
- Yarn: Worsted weight 100% cotton yarn (e.g., Lily Sugar'n Cream) in a soft sage green – 1 ball (approx. 120 yards). Cotton is essential for absorbency and durability in the kitchen.
- Needles: US Size 7 (4.5 mm) knitting needles. Straight or circular needles both work fine for this flat project.
- Notions: Tapestry needle for weaving in ends, scissors, and a ruler or measuring tape.
- Optional: Blocking mats and pins for finishing (recommended for best results).
Gauge: 20 stitches and 28 rows = 4 inches in seed stitch (blocked). Gauge is important for achieving the correct finished size, but since this is a dishcloth, slight variations are perfectly acceptable.
Finished Size: Approximately 9 inches wide by 9 inches long (blocked).
Step-by-Step Instructions
This pattern is worked flat from the bottom up. The main body uses a simple seed stitch, and the lace border is added at the top edge. Follow along carefully, and you'll have a beautiful dishcloth in no time.
Abbreviations
- CO: Cast on
- K: Knit
- P: Purl
- K2tog: Knit two stitches together (decrease)
- YO: Yarn over (increase, creates an eyelet hole)
- SSK: Slip, slip, knit (slip two stitches knitwise one at a time, then knit them together through back loops – a left-leaning decrease)
- BO: Bind off
Pattern Notes
- The dishcloth is worked flat from the bottom up.
- The lace border is created at the top edge after the main body is complete.
- Seed Stitch Pattern: Row 1: *K1, P1* repeat to end. Row 2: *P1, K1* repeat to end. Repeat these two rows.
Main Body (Seed Stitch)
- Cast On: CO 45 stitches using your preferred method (long-tail cast on works well).
- Row 1: *K1, P1* repeat to last stitch, K1. (This ensures a neat edge.)
- Row 2: *P1, K1* repeat to last stitch, P1.
- Repeat Rows 1 and 2 until the piece measures 7 inches from the cast-on edge, ending with a Row 2. (You will have an even number of rows worked.)
Tip: Keep your tension even and relaxed. Cotton yarn can be a bit stiff, so try not to pull your stitches too tightly.
Lace Border
Now we'll add the delicate lace edge. This section creates a series of eyelet holes that form a beautiful, airy border.
- Row 1 (Right Side): K1, *YO, K2tog* repeat to last 2 stitches, K2. (You will still have 45 stitches on your needle; the YOs create extra loops that will be resolved in the next row.)
- Row 2 (Wrong Side): Purl all stitches, including the yarn overs. (This will create small eyelet holes.)
- Row 3: K1, *SSK, YO* repeat to last 2 stitches, K2. (This alternates the direction of the lace pattern.)
- Row 4: Purl all stitches.
- Row 5: K1, *YO, K2tog* repeat to last 2 stitches, K2.
- Row 6: Purl all stitches.
- Row 7: K1, *SSK, YO* repeat to last 2 stitches, K2.
- Row 8: Purl all stitches.
- Row 9: K1, *YO, K2tog* repeat to last 2 stitches, K2.
- Row 10: Purl all stitches.
- Row 11: K1, *SSK, YO* repeat to last 2 stitches, K2.
- Row 12: Purl all stitches.
Note: The YO, K2tog and SSK, YO combinations create the lace pattern. Don't worry if it looks a bit messy at first—blocking will work wonders!
Bind Off (Lace Edge)
For a truly heirloom finish, we'll create a decorative picot edge. This adds small loops along the edge that give the dishcloth its signature scalloped look.
- Picot Bind Off: K2, *slip the stitch just made back to left needle, YO, K2tog (through back loops), K1, then bind off 2 stitches* repeat to end. This creates small loops along the edge.
- Alternative: If you prefer a simpler edge, simply BO all stitches loosely knitwise.
Tip: When binding off, keep your tension loose so the edge remains stretchy and doesn't pucker.
Finishing
- Weave in Ends: Use a tapestry needle to weave in all loose ends securely on the wrong side of the work.
- Block the Dishcloth: Soak the dishcloth in lukewarm water with a drop of mild soap for about 15 minutes. Gently squeeze out excess water (do not wring). Rinse thoroughly and squeeze again.
- Shape and Dry: Lay the dishcloth flat on a blocking mat or clean towel. Gently stretch it to the correct dimensions (approximately 9x9 inches), paying special attention to opening up the lace pattern and evening out the seed stitch. Pin if necessary and allow to dry completely.
- Your Heirloom Lace Edge Dishcloth is now ready to use or gift!
This dishcloth is not just a practical kitchen accessory—it's a small piece of art that brings warmth and beauty to your home. The combination of the sturdy seed stitch and the delicate lace edge makes it a joy to knit and a pleasure to use. Enjoy the process, and don't forget to admire your handiwork with every dish you dry!


