Midnight Lace Bat Amigurumi Free Pattern
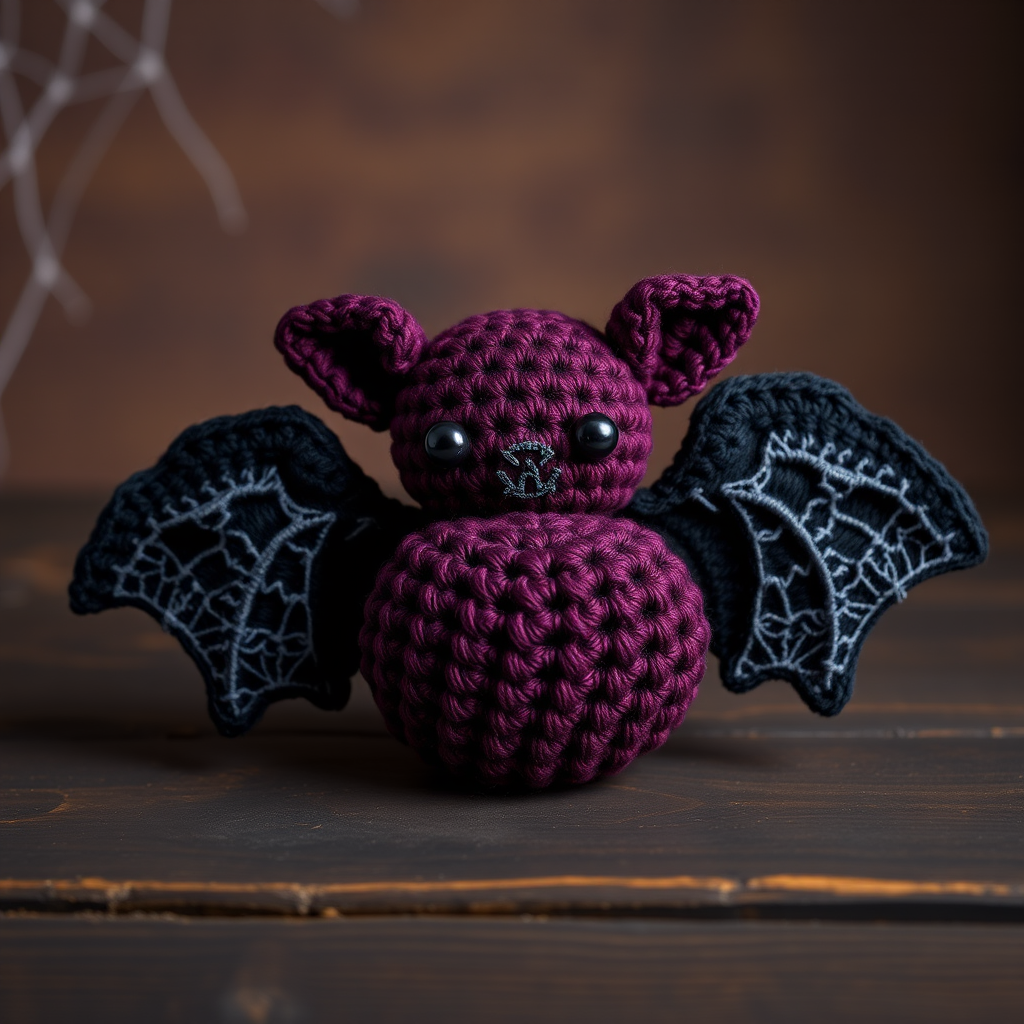
Midnight Lace Bat Amigurumi: A Free Crochet Pattern for Gothic Charm
Embrace the darker side of crochet with this bewitching Midnight Lace Bat Amigurumi! This pattern combines a plush, velvety body with delicate, lace-edged wings to create a spooky-cute companion that's perfect for Halloween decor, gothic displays, or as a year-round cuddly friend. Whether you're a seasoned amigurumi enthusiast or a brave beginner looking for a fun challenge, this detailed free pattern will guide you through every step to create your very own gothic treasure.
Materials Needed
Before you begin your crafting adventure, gather the following materials. The quality of your yarn will greatly affect the final look and feel of your bat, so choose wisely!
- Yarn: Worsted weight (#4) in three colors:
- Deep Plum (main body & head) – about 100 yards
- Black (wings) – about 50 yards
- Silver (lace edging & facial features) – about 20 yards
- Crochet Hook: 3.5mm (E) hook, or size needed to obtain gauge
- Fiberfill: Polyester stuffing for a plush finish
- Yarn Needle: For sewing pieces together and weaving in ends
- Stitch Markers: To keep track of your rounds
- Scissors: For cutting yarn
- Optional: Small silver bell or charm for the neck
Gauge: 4 inches = 18 sc and 20 rows in continuous spiral. Gauge is not critical for this project, but maintaining consistent tension will ensure your bat is well-proportioned.
Step-by-Step Instructions
This pattern is worked in continuous spirals unless otherwise noted. Do not join rounds unless specified. Use a stitch marker to mark the beginning of each round.
Body (Make 1)
The body is worked from the bottom up, creating a round, cuddly shape.
- R1: Create a magic ring, work 6 single crochet (sc) into the ring. (6 stitches)
- R2: Increase (inc) in each stitch around. (12 stitches)
- R3: (Sc in next stitch, inc) repeat around. (18 stitches)
- R4: (Sc in next 2 stitches, inc) repeat around. (24 stitches)
- R5: (Sc in next 3 stitches, inc) repeat around. (30 stitches)
- R6-10: Sc in each stitch around for 5 rounds. (30 stitches)
- R11: (Sc in next 3 stitches, decrease (dec)) repeat around. (24 stitches)
- R12: (Sc in next 2 stitches, dec) repeat around. (18 stitches)
- R13: (Sc in next stitch, dec) repeat around. (12 stitches)
- Stuff firmly with fiberfill, shaping the body as you go.
- R14: Decrease (dec) around. (6 stitches)
- Fasten off, leaving a tail. Weave the tail through the front loops of the remaining 6 stitches and pull tight to close. Weave in the end securely.
Head (Make 1)
The head is slightly larger than the body opening to create a cute, proportionate look.
- R1: Magic ring, 6 sc in ring. (6 stitches)
- R2: Inc in each stitch around. (12 stitches)
- R3: (Sc in next stitch, inc) repeat around. (18 stitches)
- R4: (Sc in next 2 stitches, inc) repeat around. (24 stitches)
- R5-7: Sc in each stitch around for 3 rounds. (24 stitches)
- R8: (Sc in next 2 stitches, dec) repeat around. (18 stitches)
- R9: (Sc in next stitch, dec) repeat around. (12 stitches)
- Stuff firmly with fiberfill.
- R10: Dec around. (6 stitches)
- Fasten off, leaving a long tail (about 12 inches) for sewing to the body. Do not close the hole completely; you will use this opening to attach the head.
Ears (Make 2)
These small, pointed ears add the perfect bat silhouette.
- R1: Magic ring, 4 sc in ring. (4 stitches)
- R2: (Sc in next stitch, inc) twice. (6 stitches)
- R3: Sc in each stitch around. (6 stitches)
- Fasten off, leaving a long tail (about 8 inches) for sewing. Flatten the ear slightly.
Wings (Make 2)
The wings are worked in rows, not rounds. They feature a beautiful gradient of stitches to create the pointed, bat-like shape.
- R1: Chain (ch) 11. Sc in the 2nd chain from the hook and in each chain across. (10 stitches)
- R2: Ch 1, turn. Sc in next 2 stitches, half double crochet (hdc) in next 2 stitches, double crochet (dc) in next 2 stitches, treble crochet (tr) in next 2 stitches, double treble crochet (dtr) in last 2 stitches. (10 stitches)
- R3: Ch 1, turn. Repeat Row 2 exactly: Sc in next 2 stitches, hdc in next 2 stitches, dc in next 2 stitches, tr in next 2 stitches, dtr in last 2 stitches. (10 stitches)
- R4: Ch 1, turn. Repeat Row 2 exactly. (10 stitches)
- R5: Ch 1, turn. Repeat Row 2 exactly. (10 stitches)
- Fasten off, leaving a long tail (about 12 inches) for sewing. The wing will naturally curve and taper to a point.
Lace Edging on Wings
This delicate silver edging transforms simple wings into gothic lace masterpieces.
- With the silver yarn, join with a slip stitch (sl st) at the base of the wing (the straight edge).
- Ch 3. (Dc, ch 2, dc) in the same stitch. Skip the next stitch. (Dc, ch 2, dc) in the next stitch. Repeat this pattern along the outer curved edge of the wing.
- When you reach the end, fasten off and weave in the ends. Repeat for the second wing.
Assembly
Now for the magical moment—bringing your bat to life!
- Attach the Head: Position the head on top of the body, slightly offset to the front for a charming, inquisitive look. Using the long tail from the head, sew it securely to the body with a whip stitch or invisible seam. Weave in the end.
- Attach the Ears: Fold each ear slightly at the base to give them a natural, perky look. Sew them to the top of the head, spacing them evenly apart. Weave in the ends.
- Attach the Wings: Position the wings on the sides of the body, angling them outward and slightly upward. Using the long tails, sew them securely to the body. Make sure they are symmetrical. Weave in the ends.
- Embroider the Face: Using the silver yarn and a yarn needle, embroider two small, shiny eyes. Make a small vertical stitch for each eye, or create a tiny cross-stitch for a sparkly effect. Add a small, stitched mouth just below the eyes using a simple backstitch.
- Final Touch: If desired, sew a small silver bell or charm to the front of the neck for an extra touch of gothic elegance.
Congratulations! You've just created your very own Midnight Lace Bat Amigurumi. Display it proudly on a shelf, hang it from a doorknob, or gift it to a fellow lover of all things spooky. This pattern is perfect for using up scrap yarn and makes a wonderful handmade addition to any Halloween collection. Happy crocheting!



